Makerspace at the Fulton School
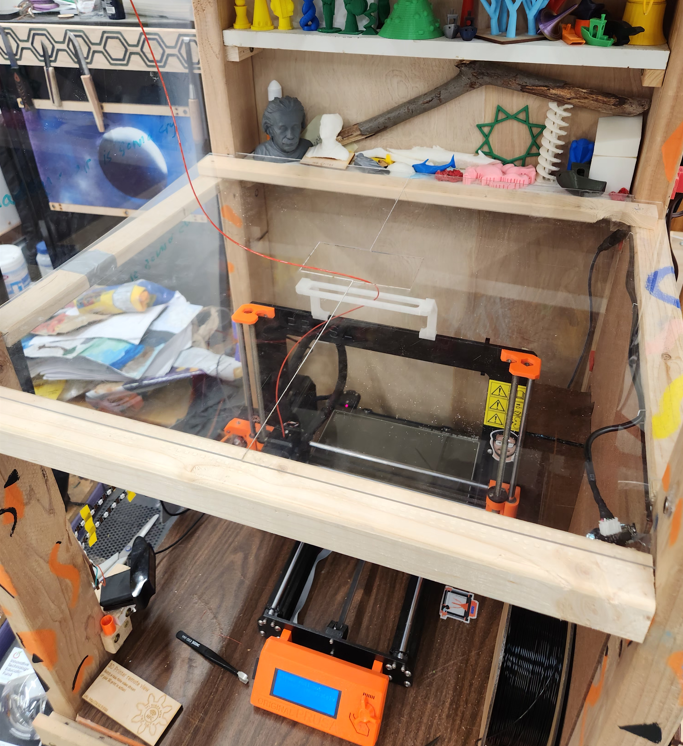
Enclosure for Clementine
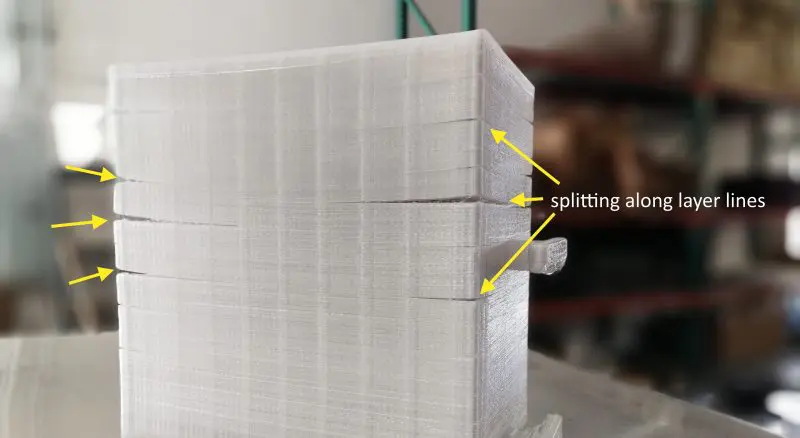
Enclosures create a controlled environment around a 3D printer, stabilizing the ambient temperature and protecting prints from drafts of cold air. This is very useful when printing with high-temperature filaments like Nylon (PA), ABS, ASA, and Polycarbonates, which are extremely finicky. These filaments tend to contract significantly as they cool, leading to warping and layer separation/delamination.
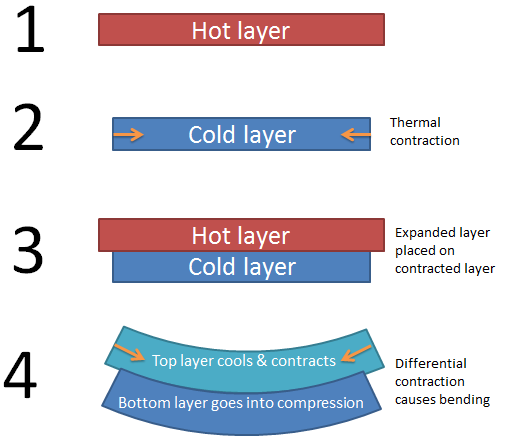
An enclosure maintains higher ambient temperatures around 3D printed objects, reducing the temperature difference between freshly extruded layers and the print bed. This dramatically reduces warping and improves layer adhesion, making complex prints with these materials possible. Enclosures also help keep the build area and printer clean and dust-free, which is a pretty big problem in the Makerspace.
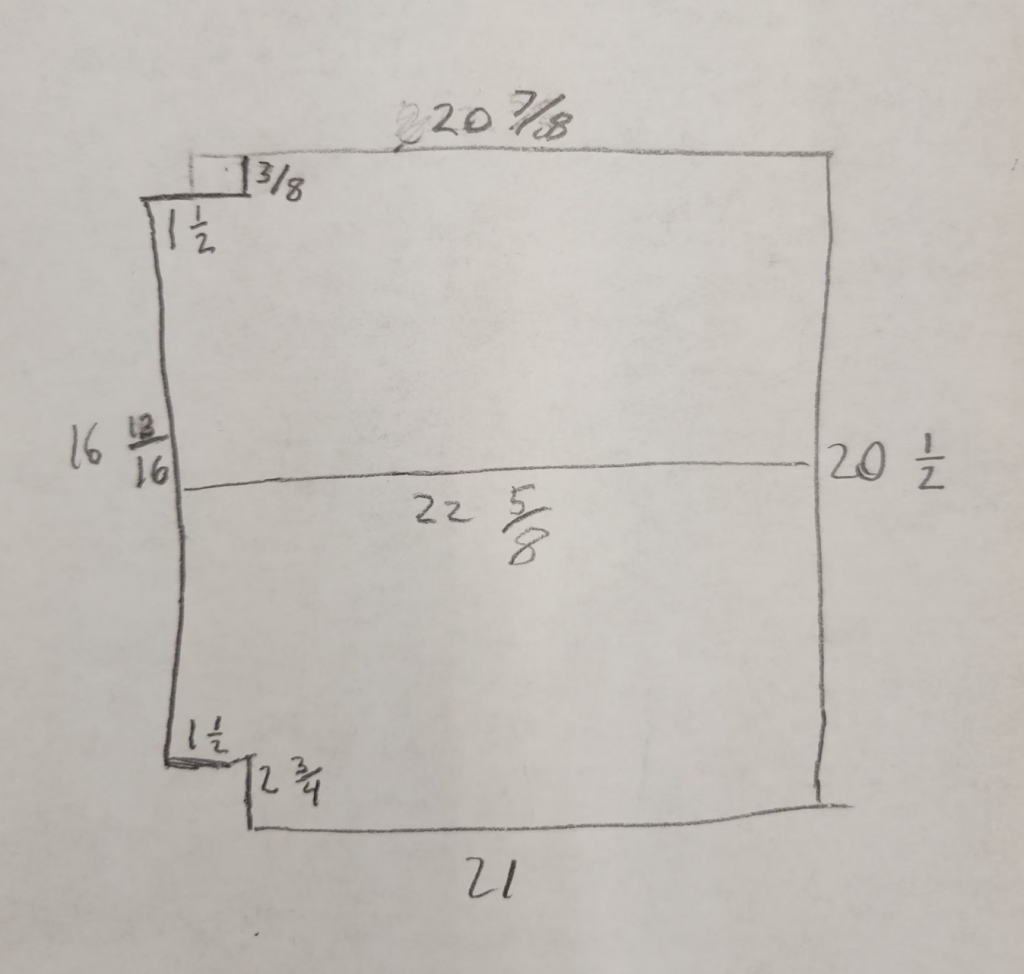
To combat this issue, I decided to modify the existing shelf/platform that Clementine sits on. This proved to be a bigger challenge than I initially thought, as the wood had warped the platform from a square into a parallelogram by about 1/4 of an inch. I found this out the hard way after realising none of my measurements lined up despite all being correct.
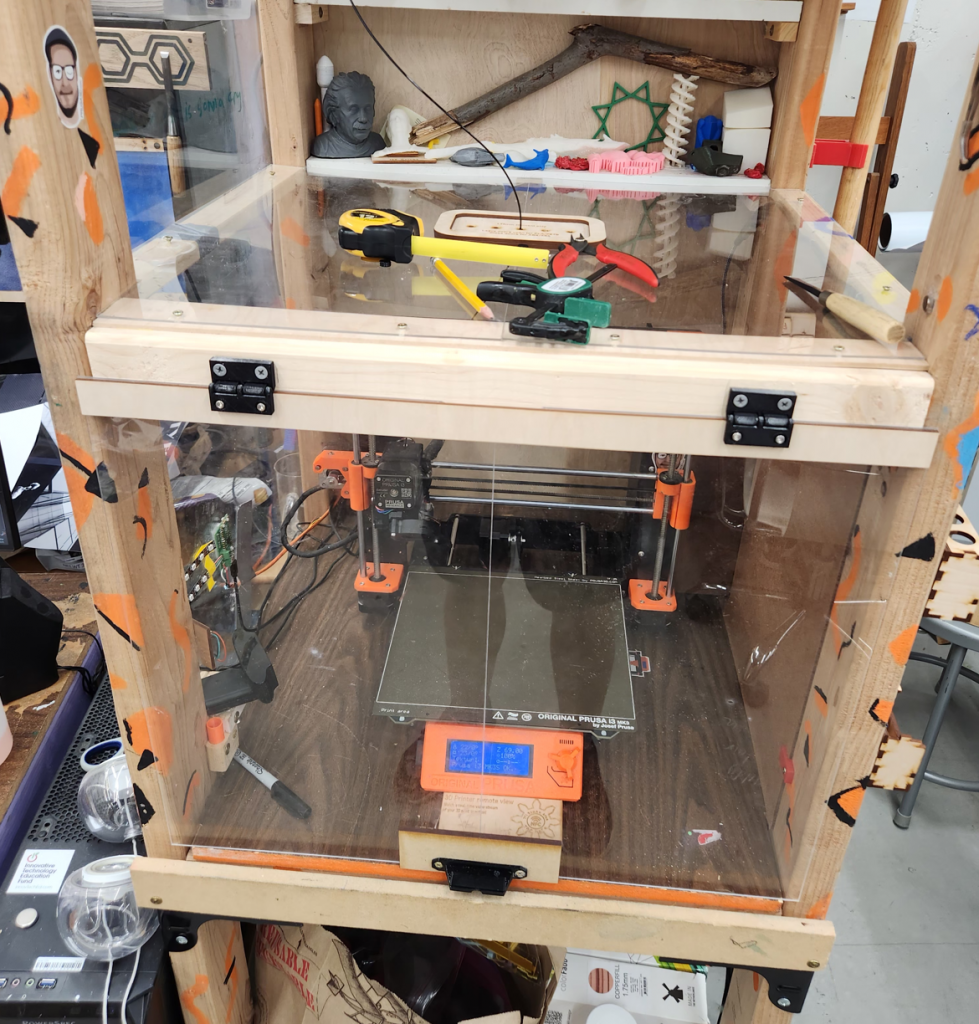
I started by screwing one 2×2 and two 1×2 pieces of wood into the walls of the existing platform to create a frame that would support the side panels. I used the Kreg jig to drill pocket holes into each board in order to keep the screws hidden. I then used a sheet of MDF from the laser as the right-side wall, with a cutout and duct for the printer’s power supply to keep it from overheating inside the chamber. I screwed this piece in using some clamp-style brackets that I printed in PETG.
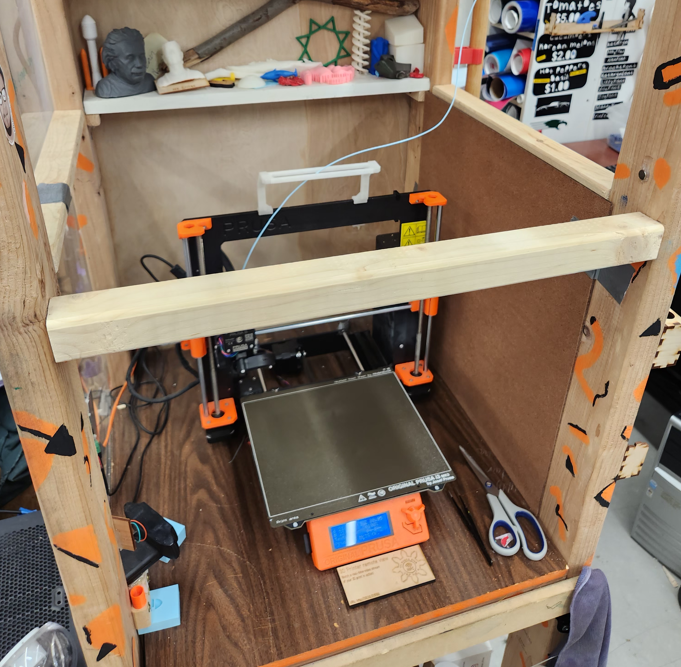
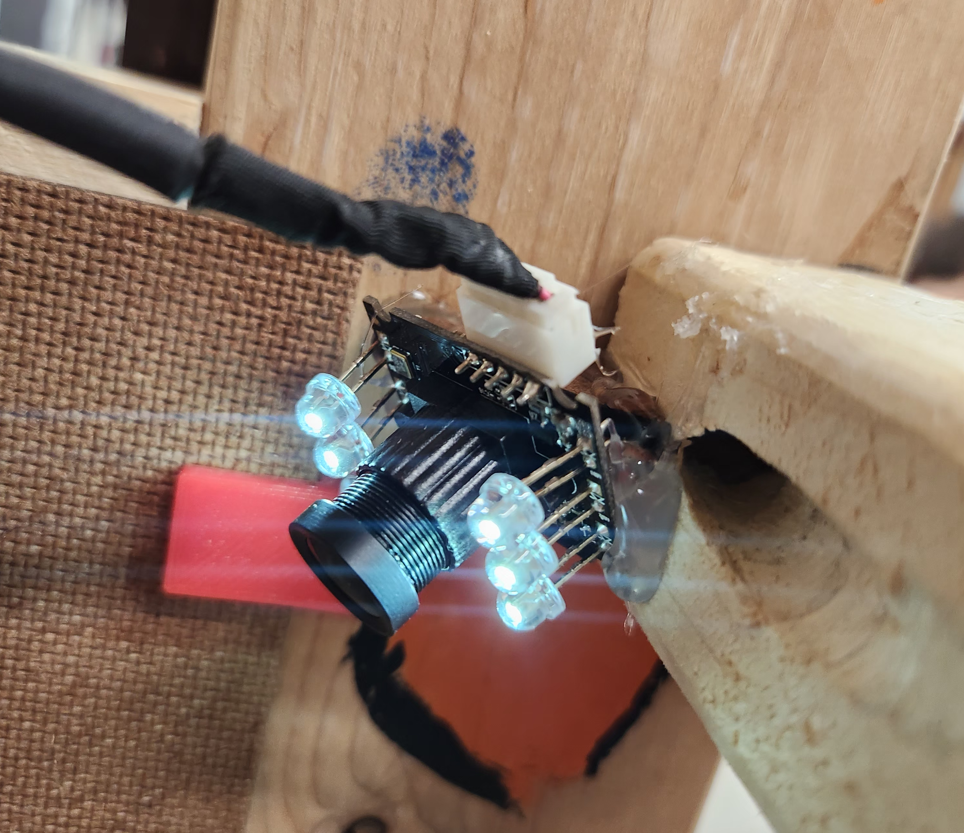
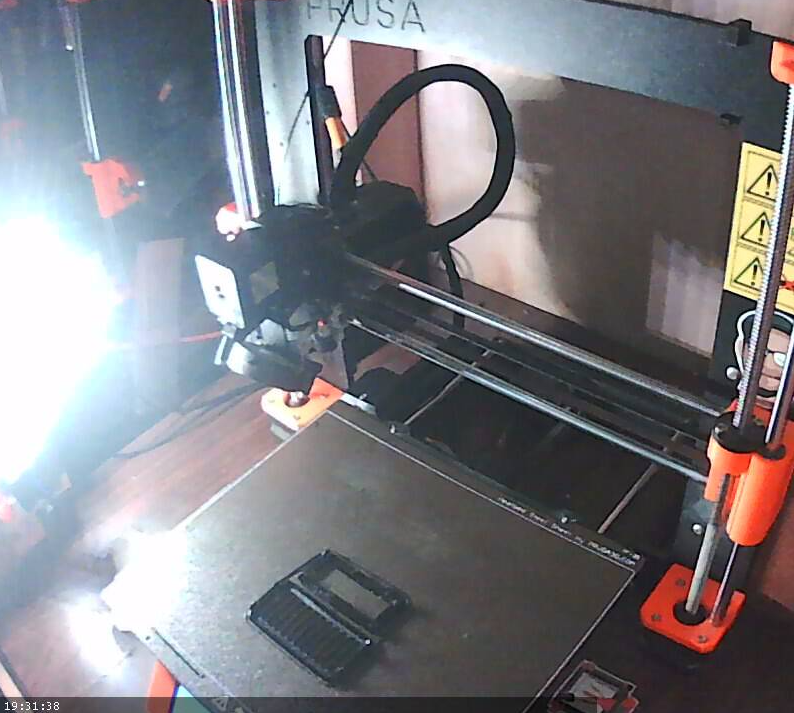
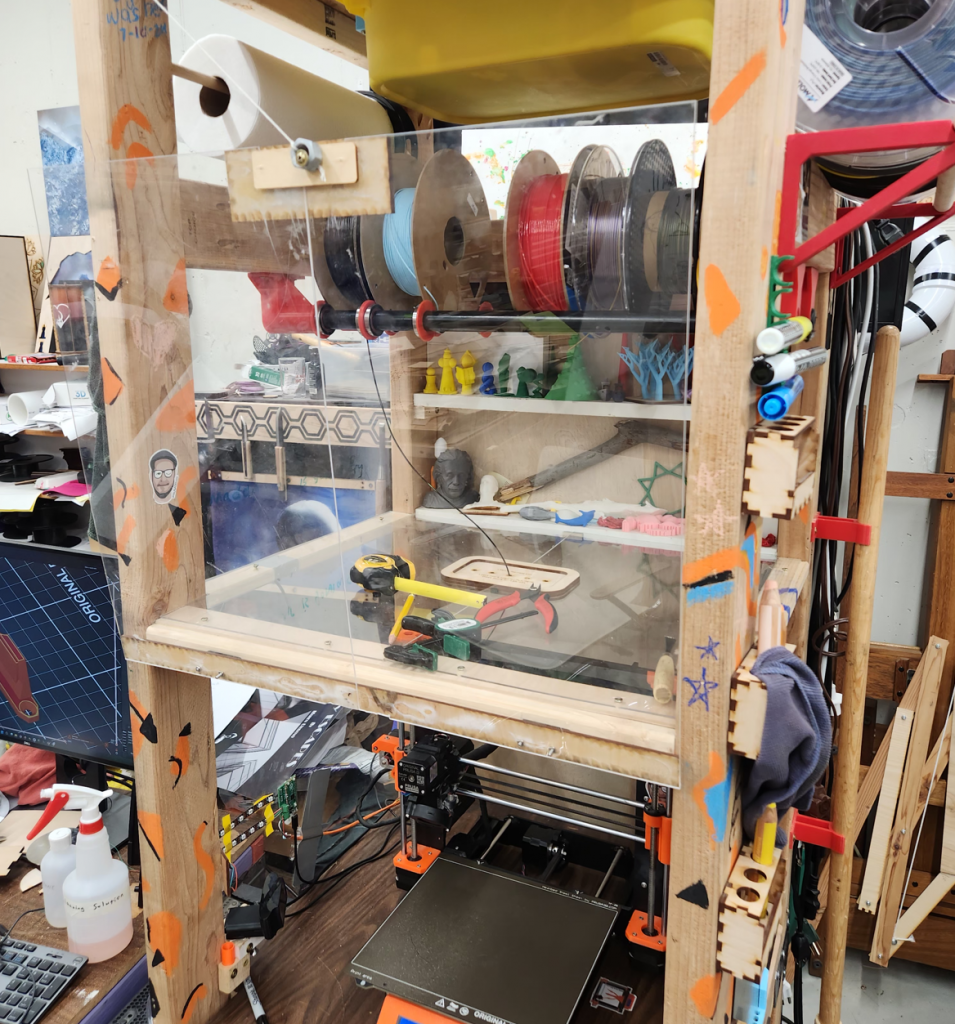
I also installed a second webcam taken from an old Polar3D printer in the top right corner of the chamber to provide a second angle for print monitoring via Prusa Connect. You can watch the live view from this camera through the Prusa Connect interface and selecting the “camera” tab when signed into the Makerspace Prusa account.
After that, I began working on the top panel, since it was too big to fit in the laser I had to make it in two pieces, which required lots of measuring and sketching to compensate for the slanted-ness in the structure. I made sure to use more of the cheap MDF for the laser to figure out the initial shape before cutting it out on the more expensive acrylic. I included a central cutout for a magnetic filament guide that has 5 holes in it, allowing for filament to pass through into the enclosure and enabling future MMU compatibility.
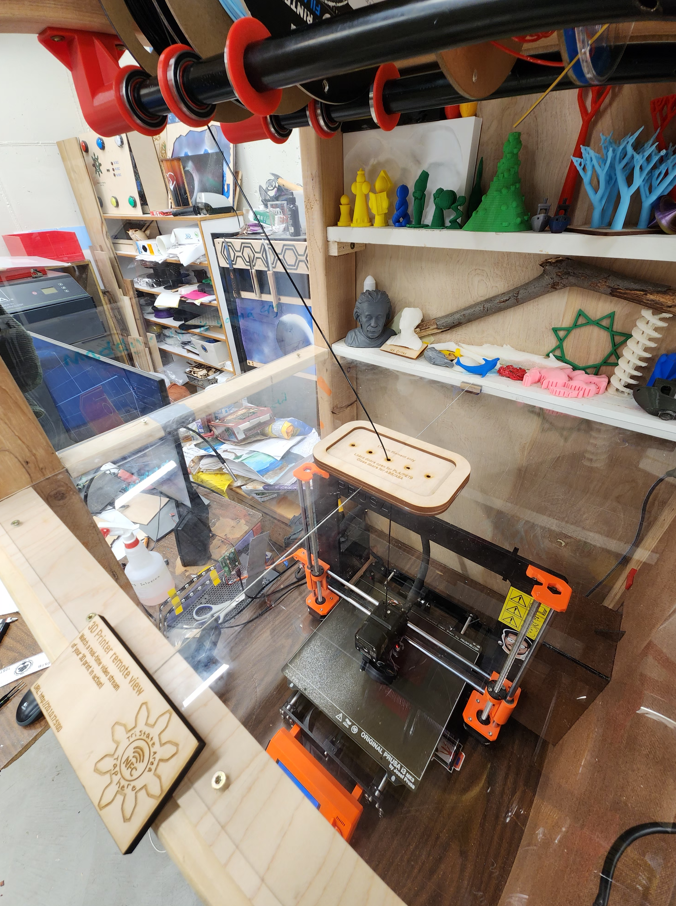
The final part was the door. I had originally wanted it to be a two-part articulating design as it would be more out of the way when open, and since we don’t do much ABS printing, that’s the state the enclosure would be in most of the time. Of course, this proved to be more challenging than I first thought. The weight of the door caused it to sag quite a bit on the hinges and made it quite flimsy and delicate and so I decided to switch to an upwards-opening design. This design is significantly more robust, but it gets in the way of the spool rack, which can make accessing the filaments a bit more inconvenient. It also can’t open a perfect 180°, meaning it has to be held open with a string instead of a latch or magnetic system, since it can’t sit flush with the rest of the structure. The hinges are a 3D printed design by wd73_ on Thingiverse and are attached to the door with M3 bolts from a box of spare Prusa parts.
Recent Comments