Makerspace at the Fulton School
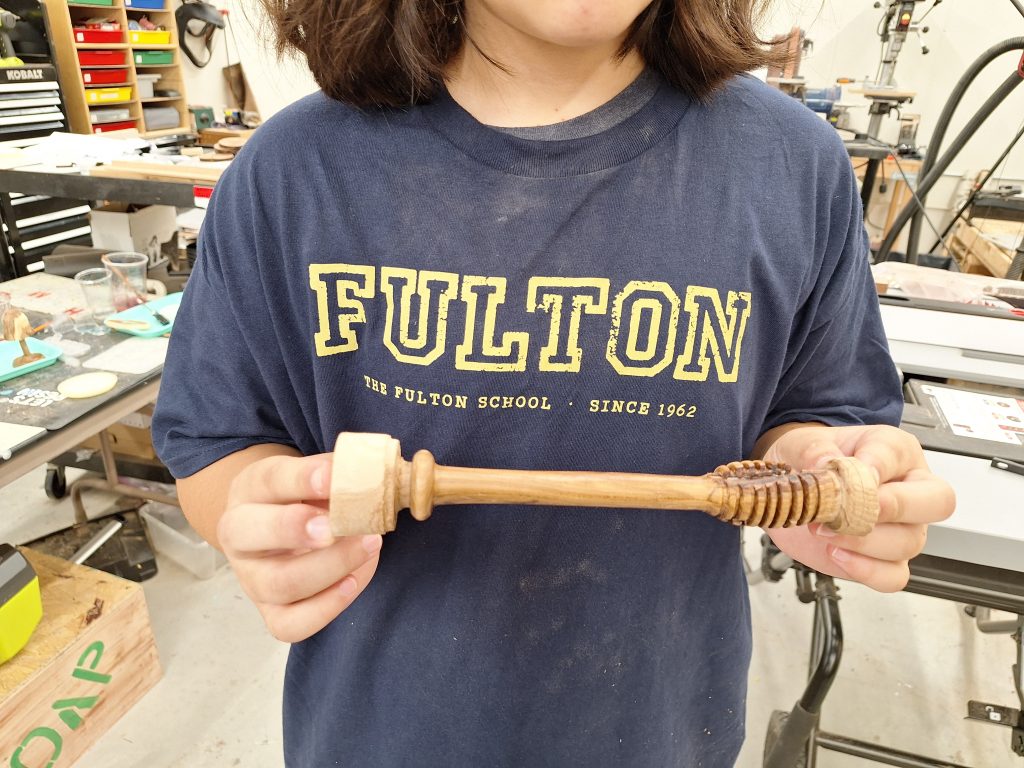
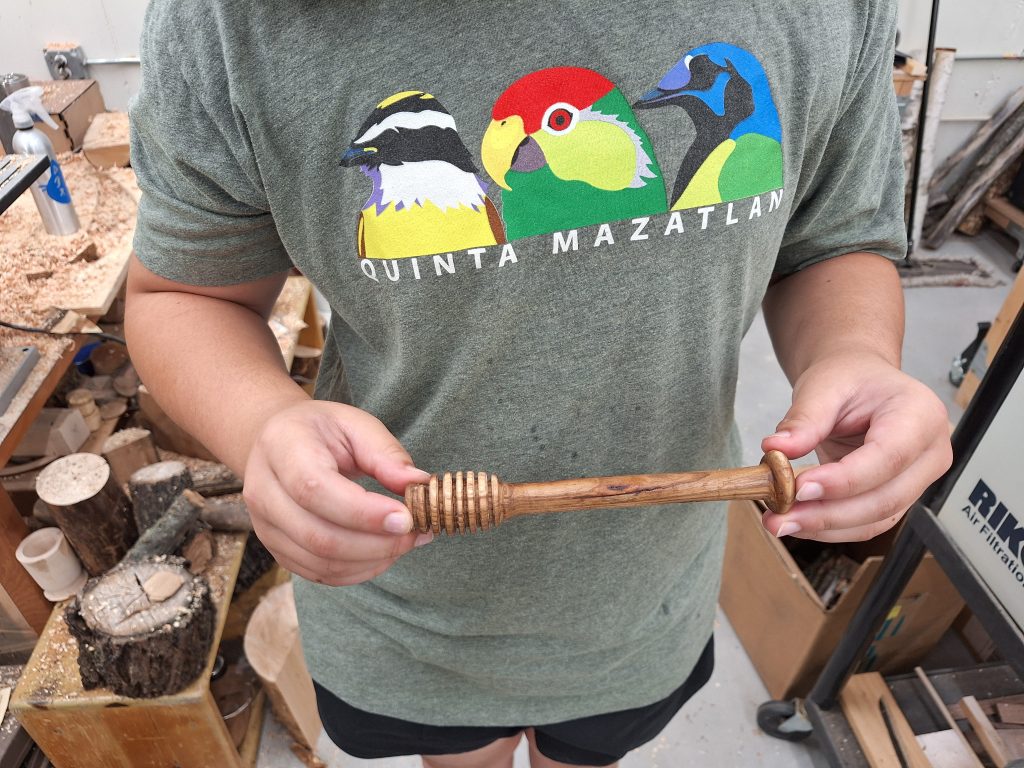
Honey Dipper
How I made the honey dipper:
- Selecting the wood: I scavenged the Makerspace for a nice piece of dark walnut. I chose a log that was about 3 inches in diameter and about 15 inches in length. Dr. Urbano helped me cut the log with the saw to about 10 inches in length.
- Debarking the wood: I put the log on to the lathe. I debarked the log, which took a while because the log was not perfectly straight. It had a natural curve to the piece. The tool I used to debark the wood was the square bit on the lathe and turn the wood into a perfect cylinder. The lathe was set at 900 rpm. When I was debarking, I found a crack through the middle of the log and I thought it was nothing.
- Measuring for the final piece: There are many pieces to the honey dipper itself: the blocks on each end, the base, the handle, and finally there is the comb of the honey dipper that is supposed to look like a bee hive.
- Blocks: I measured about 1.5 inches on either end of the piece of wood, so that it is used as a block to connect the entire piece to the lathe. After I was finished with the entire piece on the lathe, I used a hand saw to cut that off.
- Base: From the bottom, the base end of the honey stick has a diameter of about 1 inch and a thickness of 0.25 inch. I used the detailer and the square bit.
- Handle: The handle is about 4.5 inches in length, from the end of the base to the start of the comb and is 0.5 inches in diameter. I used the square bit for the handle.
- Comb (or Head): I took a ruler to mark a centimeter apart for each ring. There are 9 rings total on the top of the honey dipper. I forgot to account for the negative space. That is why the rings came out smaller than predicted. Once I was done with the first ring and the handle cracked and a piece of the top chipped off. When it chipped off, a small chip flew into my face. Luckily, I had a mask the whole time! But it was a happy accident, because now the honey dipper does not roll off the table. It also has a unique look to it. One more thing to note on the comb, there is a gradual taper. It is smaller at the ends, than the middle of the comb. I wanted it to look like a honey comb. At the base of the comb, I used the circular bit to make a gradual curve. I used the parting tool to make the grooves of the comb. Because of the diamond shape, the I used the detailer to make the each edge smooth.
- Sanding and Polishing: I made sure to put a mask on. I sanded the base, the handle and then the comb. I gradually increased the grit to be finer, going from 100 to 600. Once I finished the sanding, I folded the sand paper and I put it in between the comb, to sand that as well. I sanded the chipped parts so that they were smooth and would not splinter. I polished the piece with wood polish. At the very end, I had to cut off the ends and sanded the ends.
Recent Comments