Tri State Area
Makerspace at the Fulton School
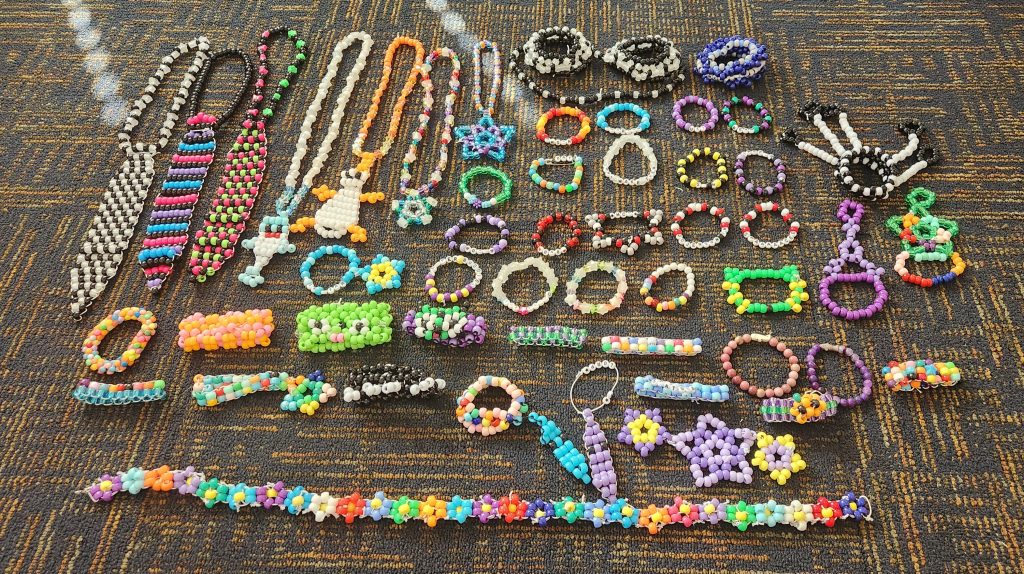
Beading (Kandi)
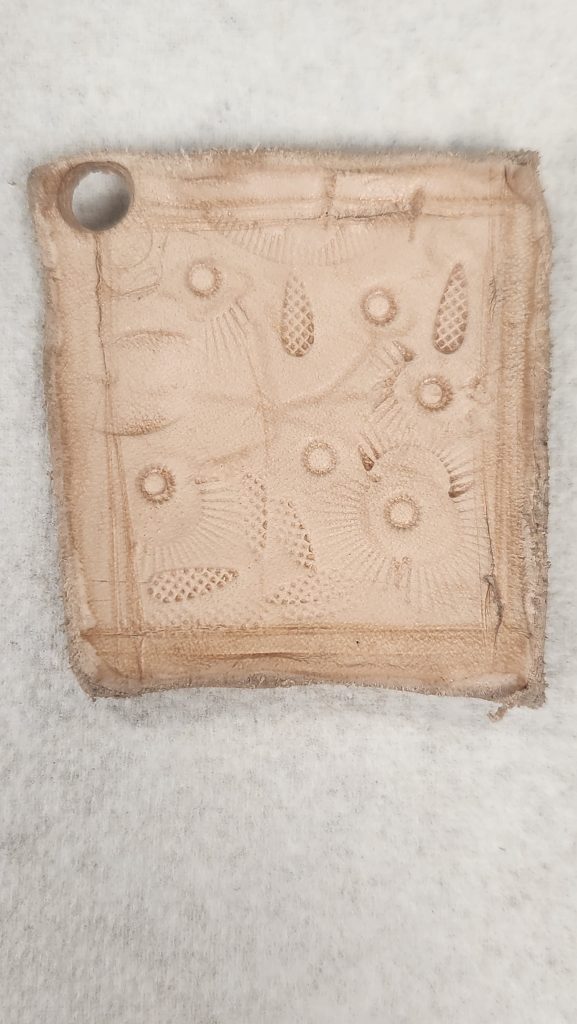
Leather Key Chain
The process was a little long but I finished my leather key chain. The process was first started by cutting the leather with a very pointy tool. Then I learned to wet the piece of leather. Next, I would smooth the edges by a tool that’s kinda like a thing you put in honey. then I did the designs on the leather, the tools were different shapes and patterns on them, they kinda looked like stamps. Then I would poke the hole with a tool that looks like a pen. This whole process was also done with Dr. Urbano teaching me how to do it.
Lathe

-Thomas
Leather Purse
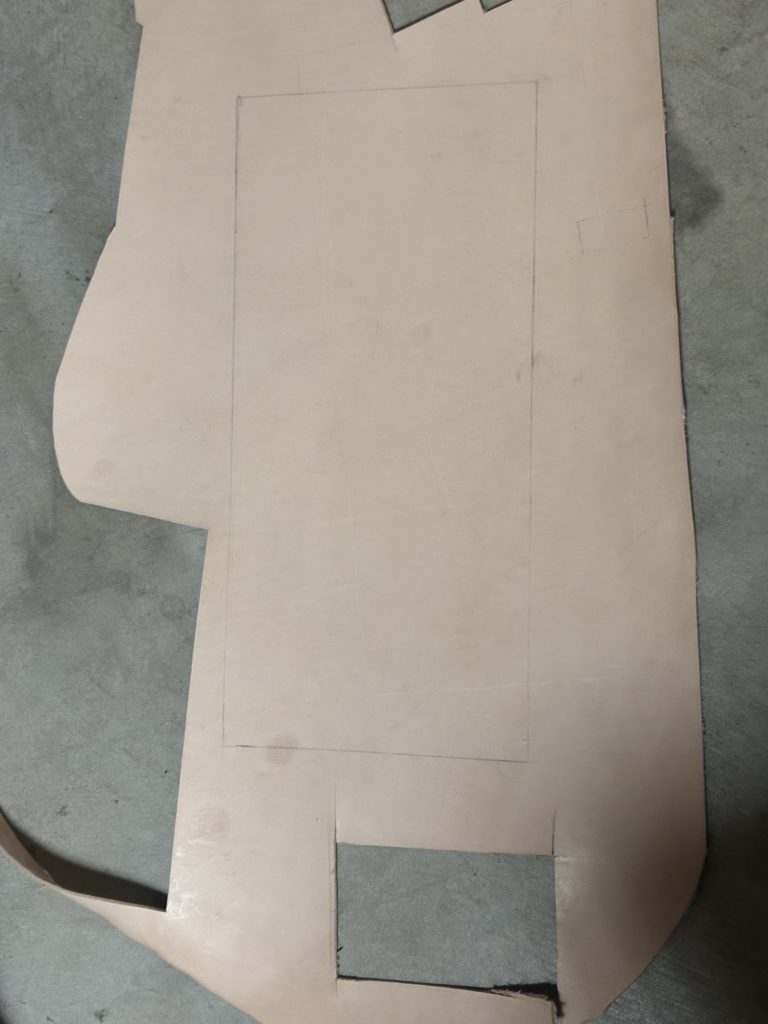
This quarter for makerspace one of my projects have been making a purse out of leather. The first step to this was to sketch out the design and do some math to calculate how big the pieces I needed to cut out were. The second step was using a ruler to sketch it out with pencil. This proved to be harder than I thought because of the corners that I had to make had to be a perfect 90 degree angle (I ended up using more tools then I probably needed to do that). Next step was to cut out the pieces of leather which I am still in the process of. I have used many leather cutting tools because it turns out leather is more difficult to cut then I thought. The tools that worked the best for me were this pizza slicer leather cutting tool and the leather cutting scissors. My next step for this project which I plan to do over interims is dying the leather black. which I will probably have to google how to do.
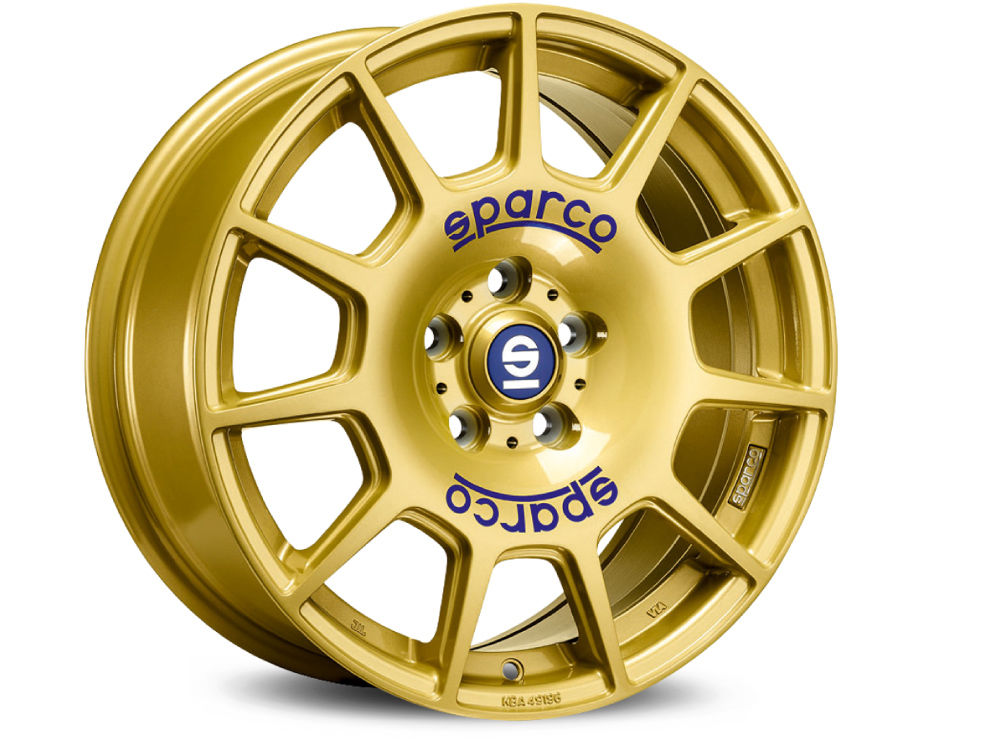
Sparco O/Z Racing table
During cross county practice I found 2 rally car rims (Sparco O/Z Racing) gold. My original plan was to put them on my car but there was a dent and crack on the outer rim so it was not able to hold air with a tire. I had 2 of them so I decided to turn it into a table. I’m not finished yet because I need to find a glass or plexi glass circle around 19 inches. I also need to get some long bolts that will connect both rims together so they don’t fall apart. I’m stacking them on top of one another.
Skull Bowl
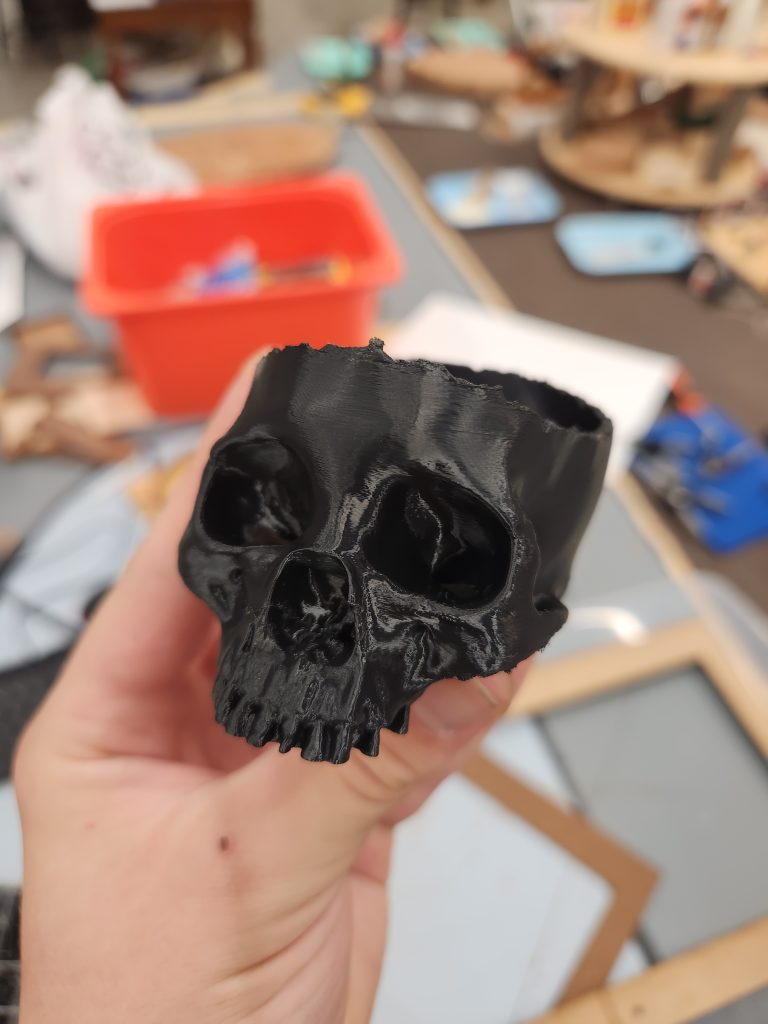
One of the projects I did this quarter was make a skull on the 3D printer. The first step to this project was downloading the file from printable. After that I put it onto the computer, sliced it and printed it. Peter helped with the process of slicing it.
Volumes of Revolution-Shell Method
Similar to the disk method, the shell method is used to find the volumes of shapes rotated around the x-axis or y-axis. Instead of dividing the shapes into disks, they are divided into shells. The shell method is necessary when the shape formed is hollow in the center.

Volumes of Revolutions-Disk Method
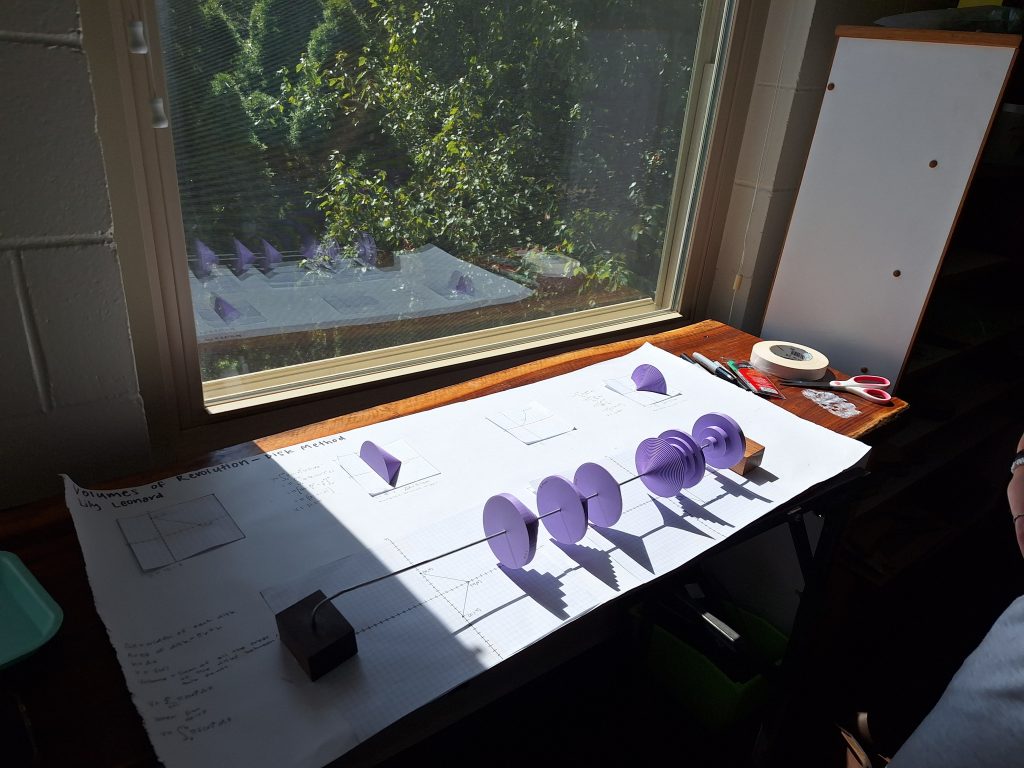
To solidify my knowledge of the disk method in calculus, I created a visual representation of the method, explaining it.
The Disk method is used to find the volume of shapes made by rotating a function around the x or y axis. After rotating the object to make a shape, divide the shape into multiple disks. Then find the volume of each disk, using the volume of a cylinder equation, $$ V=πr^2h $$. r= function, h=the width of the disks. After finding the volumes of the individual disks, the sum of them is found to get the entire volume of the shape. As the h, or the width of the disk, goes to infinity, use the equation, $$ V= 2πr^2dx $$. To find the sum of the volumes of the disks as h goes to infinity, use the equation, $$ V=∫2πr^2dx $$. The following picture and presentation demonstrate this.
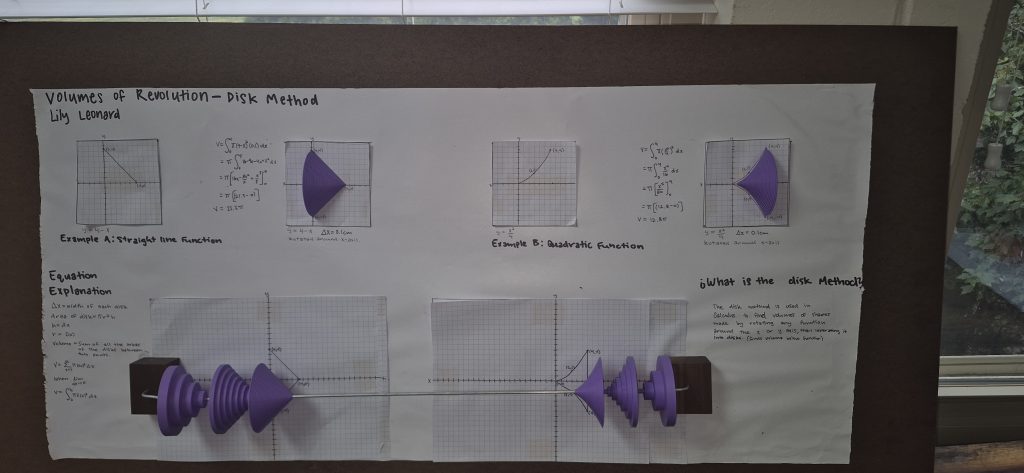
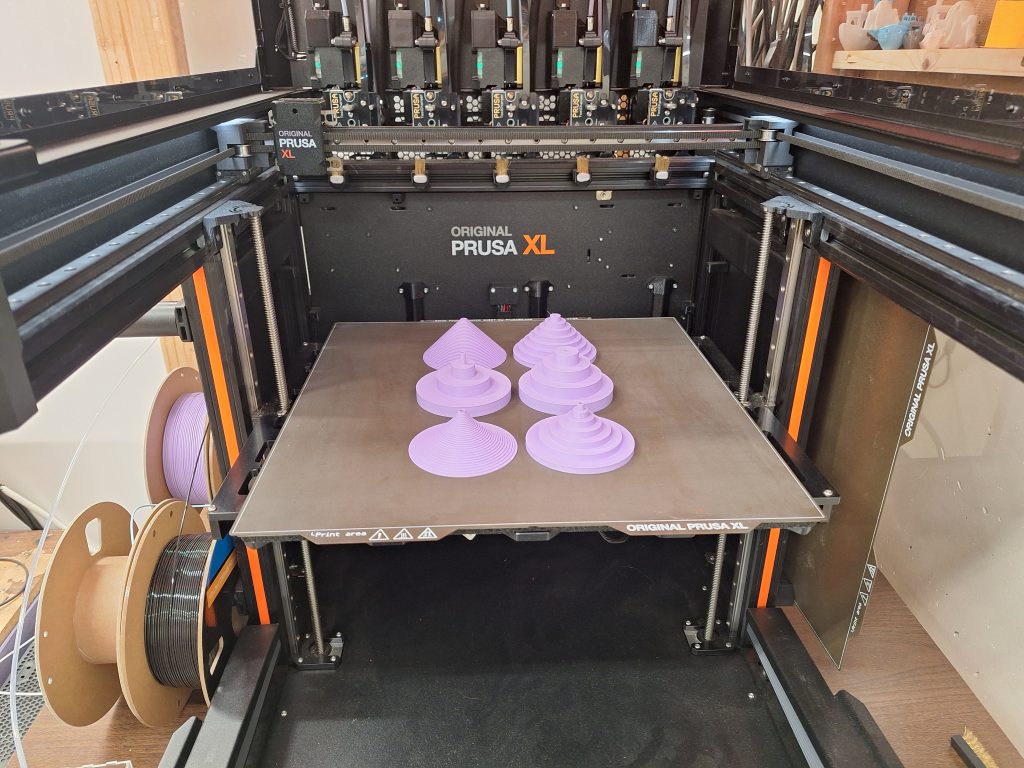
The process of making the presentation started with learning the concept and doing practice problems. I then mapped out how the presentation was going to look. Then I made the 3D shapes on OpenScad and printed them out. I used two different functions to show this concept. One linear, $$ y= 4-x $$, and one quadratic, $$ y= (x^2)/4 $$.
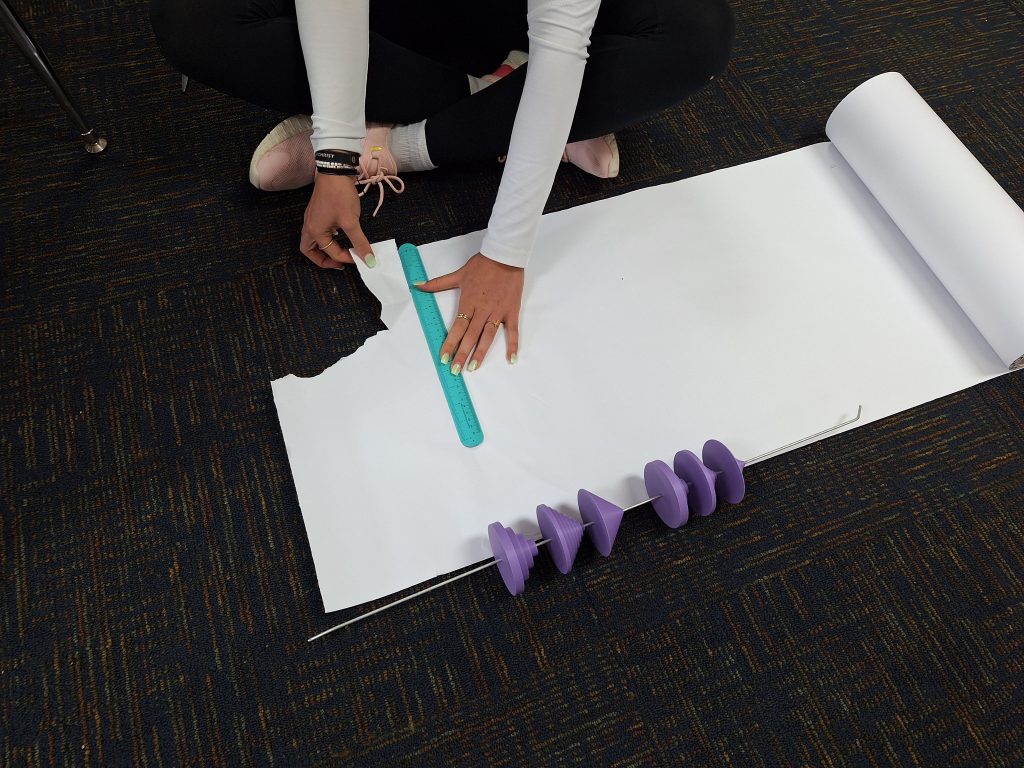
I put the 3D shapes on a rod so they can slide across the graphs to demonstrate the different widths of Δx. For aesthetic purposes, I anchored the rod in wood blocks that I oiled, so they are pretty now.

$$latex \int{x} $$
Big Gutenberg Pt. 2 – Unboxing and repair
Our Prusa XL had been shipped to us from Czechia via FedEx, costing roughly $500 along with a $600 import tariff (are we great yet?), which unfortunately wasn’t enough money for FedEx to treat the obviously expensive package with any sort of care (having later heard from Mr. Waide that the boxes were practically dropped by the delivery driver). When the boxes arrived beat-up, I still had faith that the printer would be in good condition, of course, that later proved not to be the case…
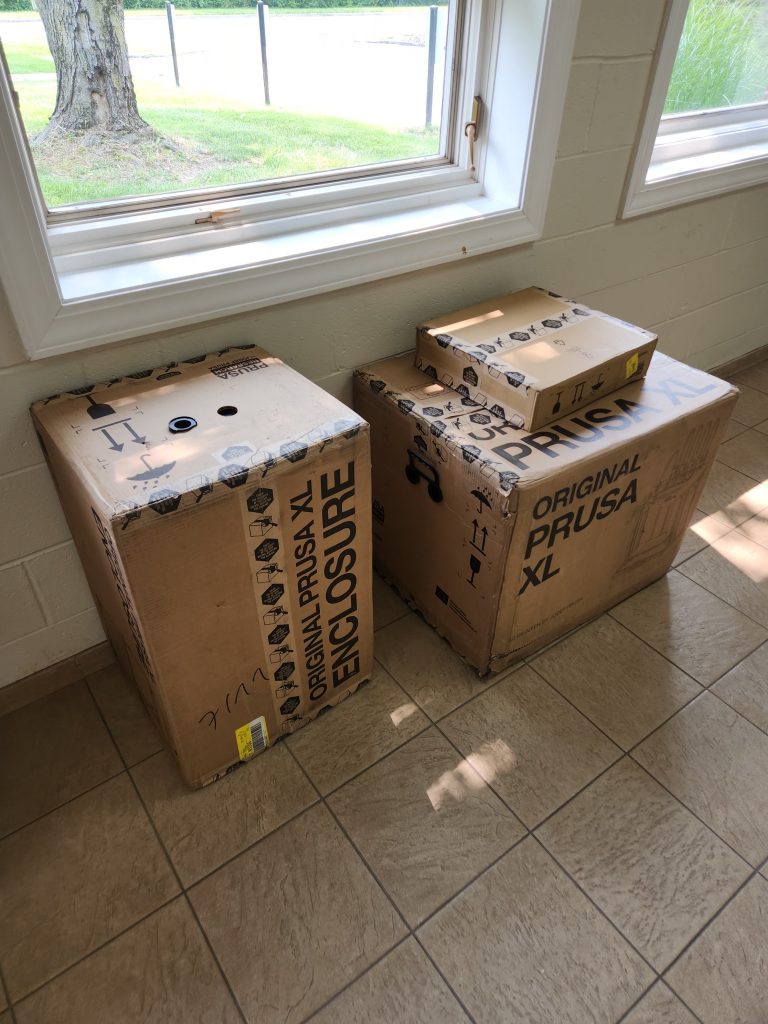
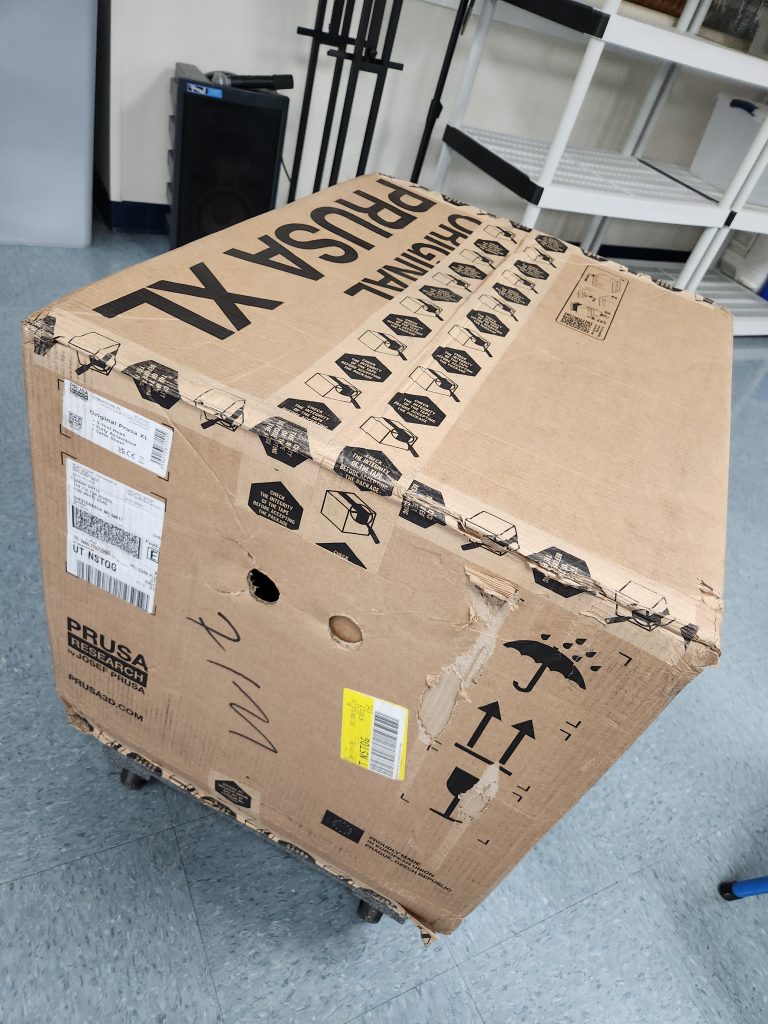
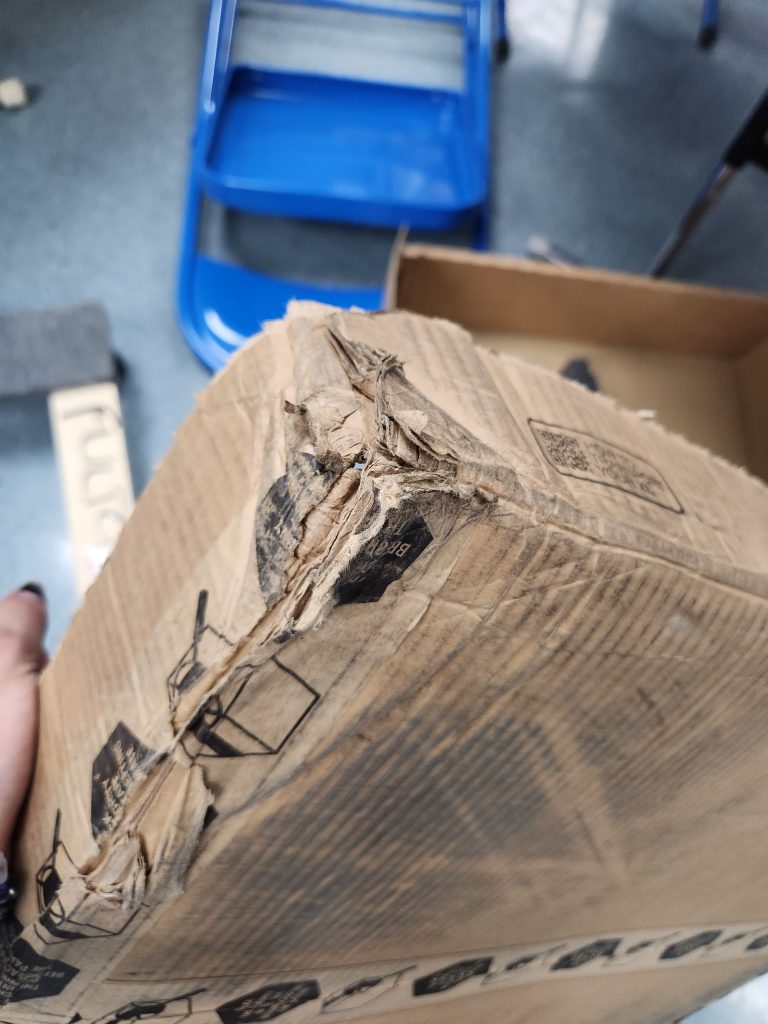
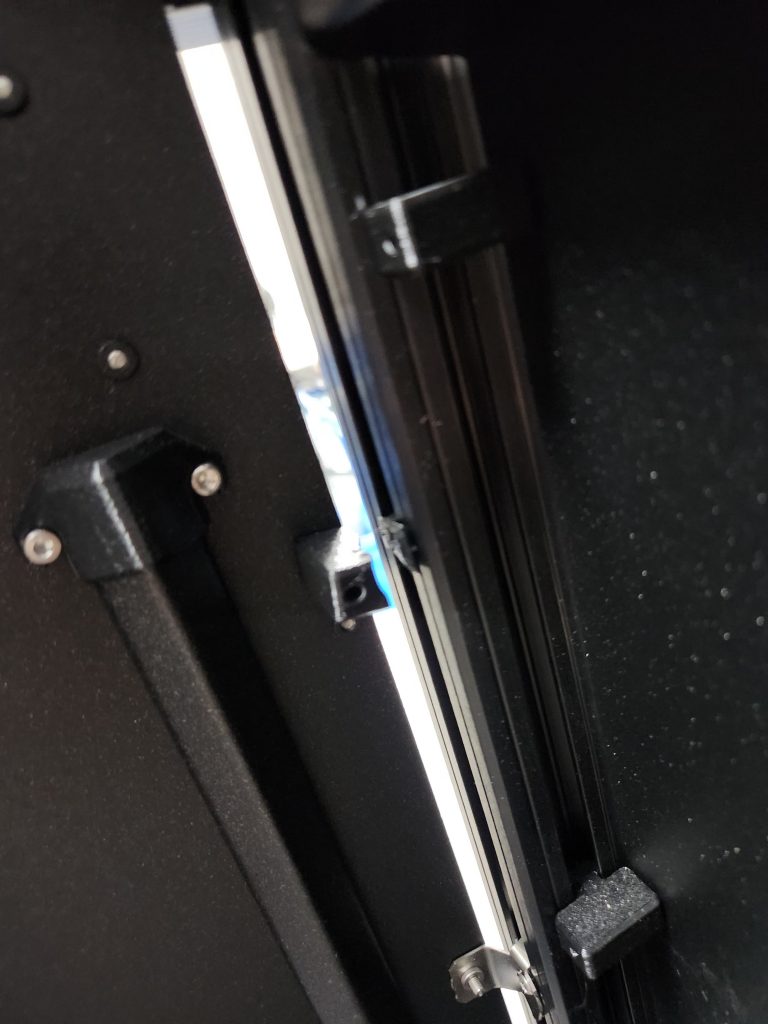
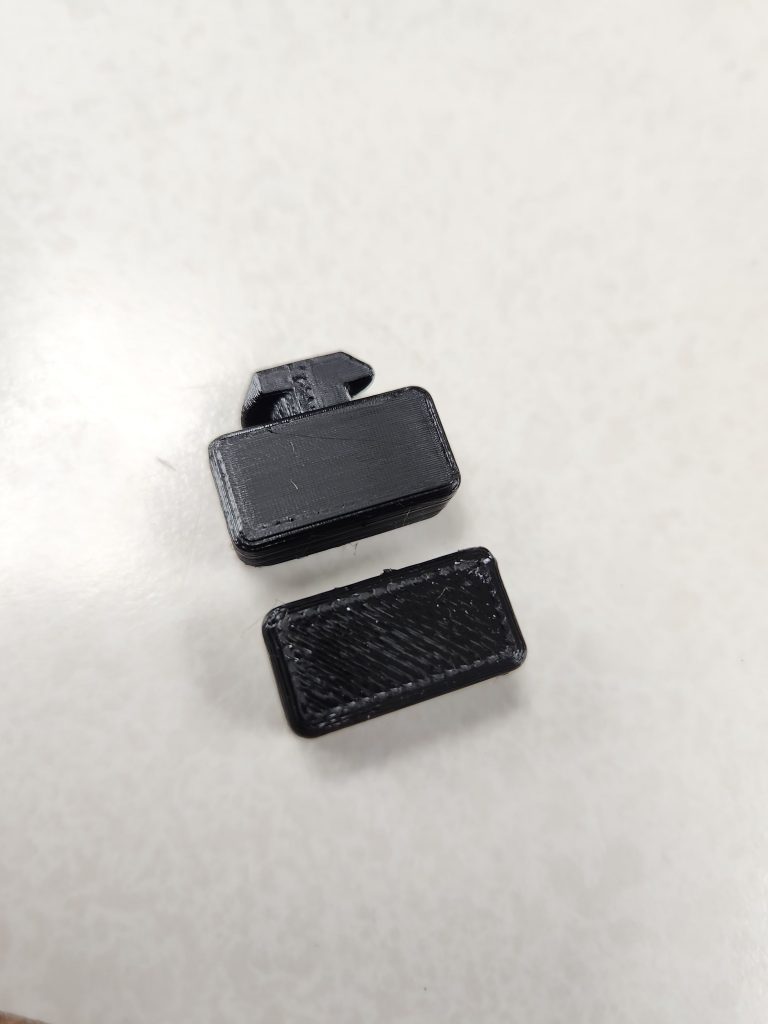
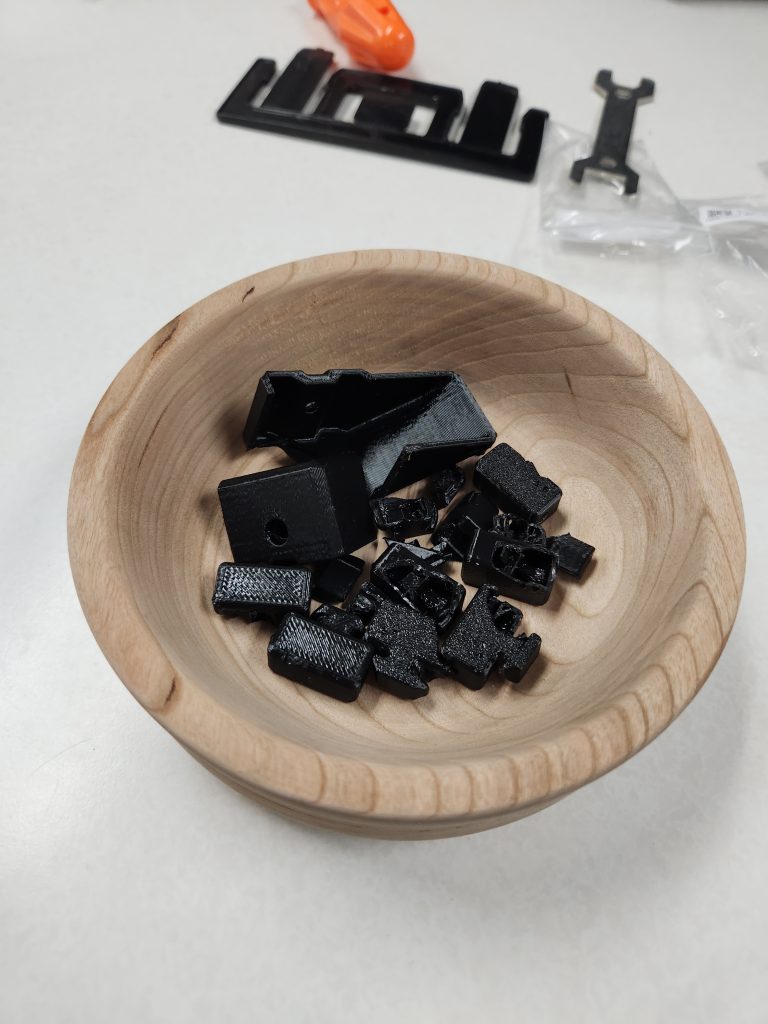
When unboxing the printer I had noticed a few broken plastic pieces floating around inside the packaging, I soon saw a cable cover on one of the bottom corners of the printer was broken. I figured it wasn’t a big deal and I should easily be able to reprint the part. It wasn’t until I got the printer set up on the table that I noticed the severity of the damages.
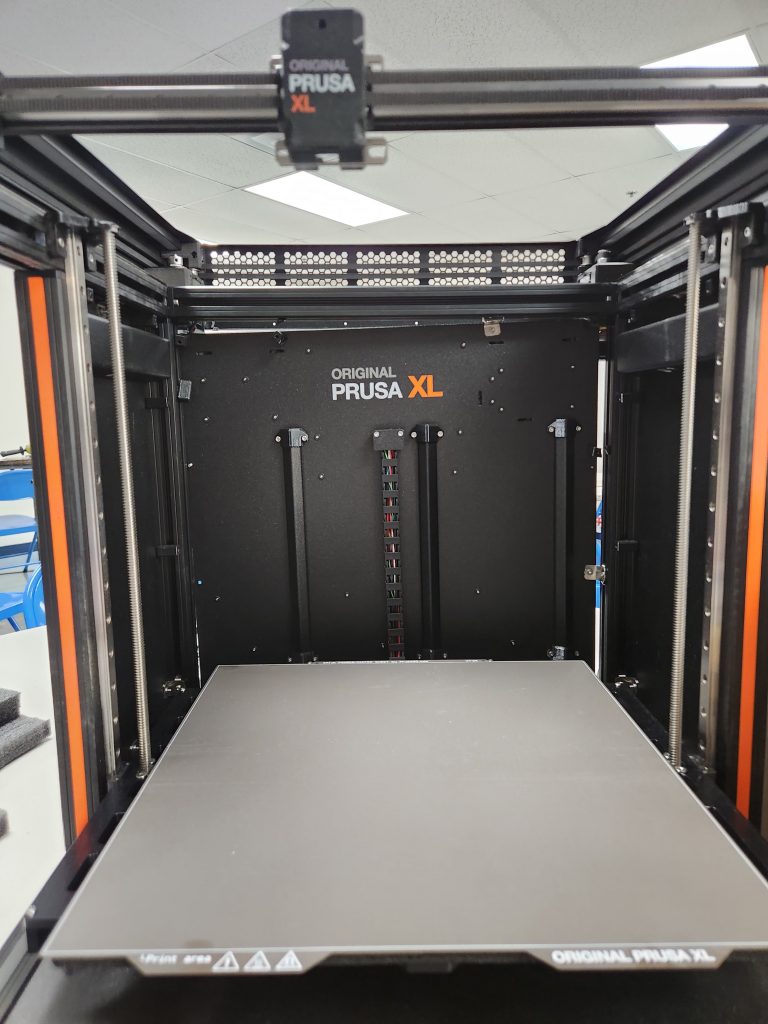
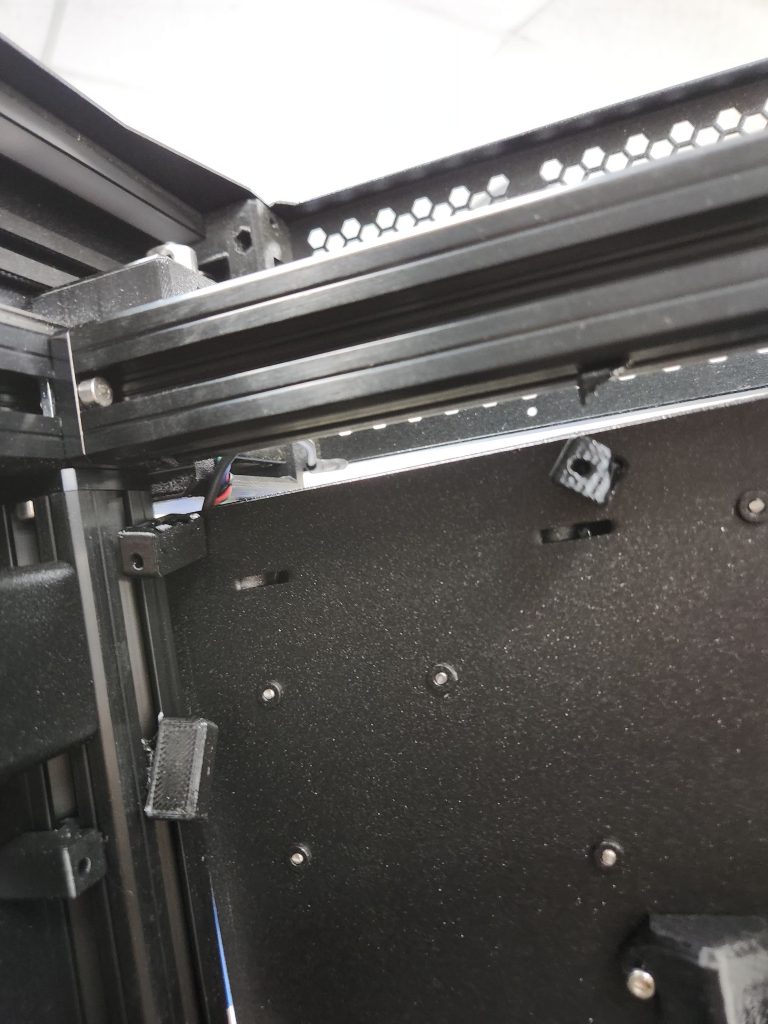
The entire back panel of the printer had snapped off its brackets and fallen crooked into the frame, this panel is fairly crucial and is what the cables for the heatbed are attached to, along with the three power supplies and the PDU. I quickly went on with customer support about the issue, the conversation soon became one of the best customer support inquiries I have ever experienced.
The support representative walked me through troubleshooting steps to ensure that it was just the back panel that was crooked and not the rest of the CoreXY gantry. After finally reaching the conclusion that it (thankfully) was just the back panel, they offered the choice of sending the printer back for repair or sending out some spare parts and walking me through how to fix it myself, acknowledging that it would be another few weeks of waiting for the printer. I chose the latter, and since the major damage had only occurred to the 3D printed plastic parts I was able to print new ones off in a few hours. Since there were also damaged bolts and a bent grounding bracket, they offered to send me replacements for those as well. I declined, citing environmental/emissions as my reason, and that I could find enough spare M3 bolts lying around. They told me I could then just bend the grounding bracket back, and as long as I didn’t snap it, all would be well, and if so I could get away with any piece of steel in its place.

Since the issue was now resolved and I knew what all I had to do, I thanked the representative for their time and cooperation. In turn, they congratulated me on my willingness to leverage my right to repair and resolve the damage myself. As compensation for the troubles caused by the damages and a bonus for enthusiasm in DIY they gifted me a voucher for 1 Kg of free PETG filament. The also reached out for as many pictures of the damage to the packaging as we had, in order to see what failed and how to improve it (as this is, unfortunately, a fairly common issue for US-based Prusa users).
Big Gutenberg Pt. 1 – Prusa XL Introduction and Capabilities
During the summer of 2025, the Makerspace acquired the 5-toolhead version of the Prusa XL. The new printer allows us to go beyond what our Prusa MK3S/+ printers could do in terms of speed, reliability, print quality, and much more. This blog post will go into the specs and highlights of the new system.
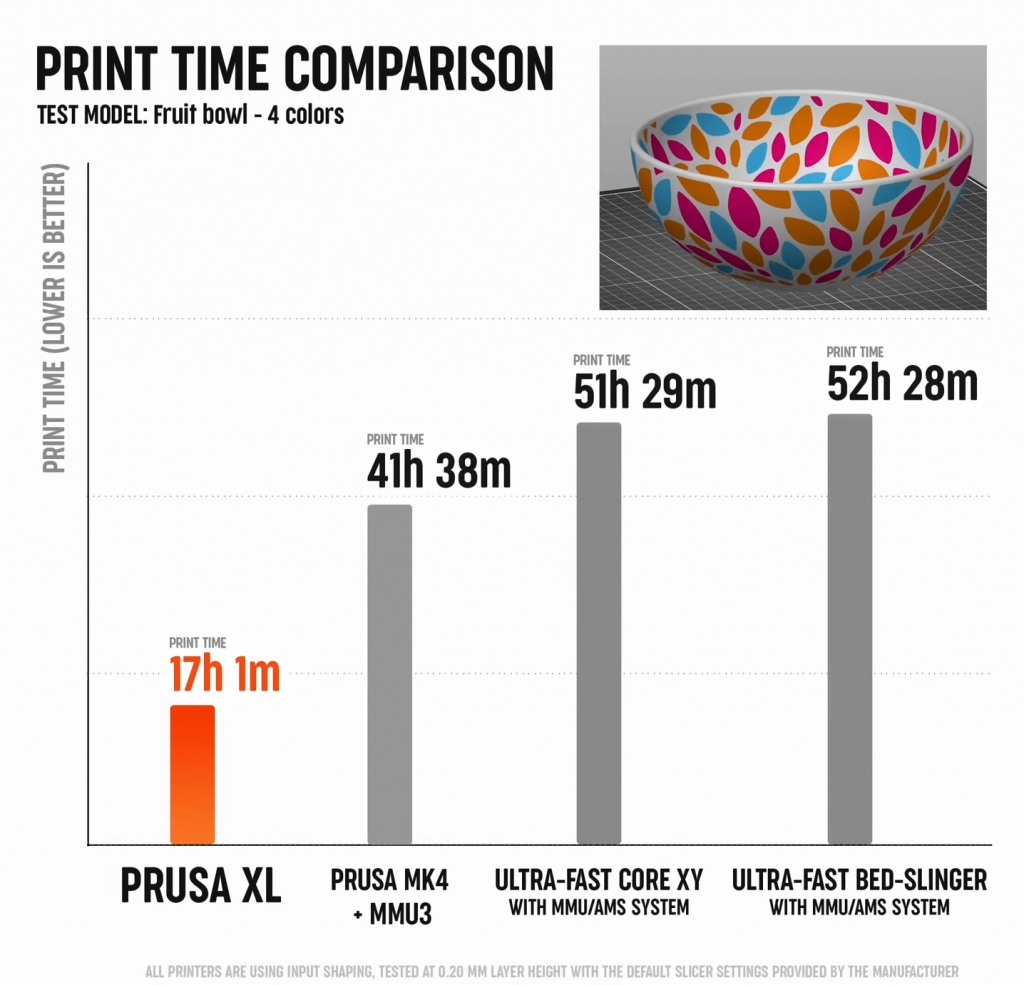
For starters, unlike the MK3, which can only do multiple colors on different layers (without the MMU (AMS) addon), the Prusa XL can make use of its toolchanger design to swap toolheads mid-layer. Comparing a toolchanger to a multiplex system like the MMU is like comparing using one paintbrush to using many. If you want to do multiple colors on one brush, you need to wash the brush before and after every use, which adds time and waste. A toolchanger is like having multiple brushes for each color; you simply grab the one you need and put it away when you are done. This significantly increases the speed of color changes compared to systems like the MMU, which need to unload, retract, switch color, reload, and purge before they can print a new color. In contrast, a toolchanger wipes the nozzle, switches color, wipes again, and prints. This results in a time reduction from 1.5-2 minutes down to roughly 30 seconds and reduces purge waste by a significant amount as well. While a competing system from a company like BambuLab may be faster in terms of actual print speed, the time the XL saves on color changes more than makes up for its somewhat slower speed.
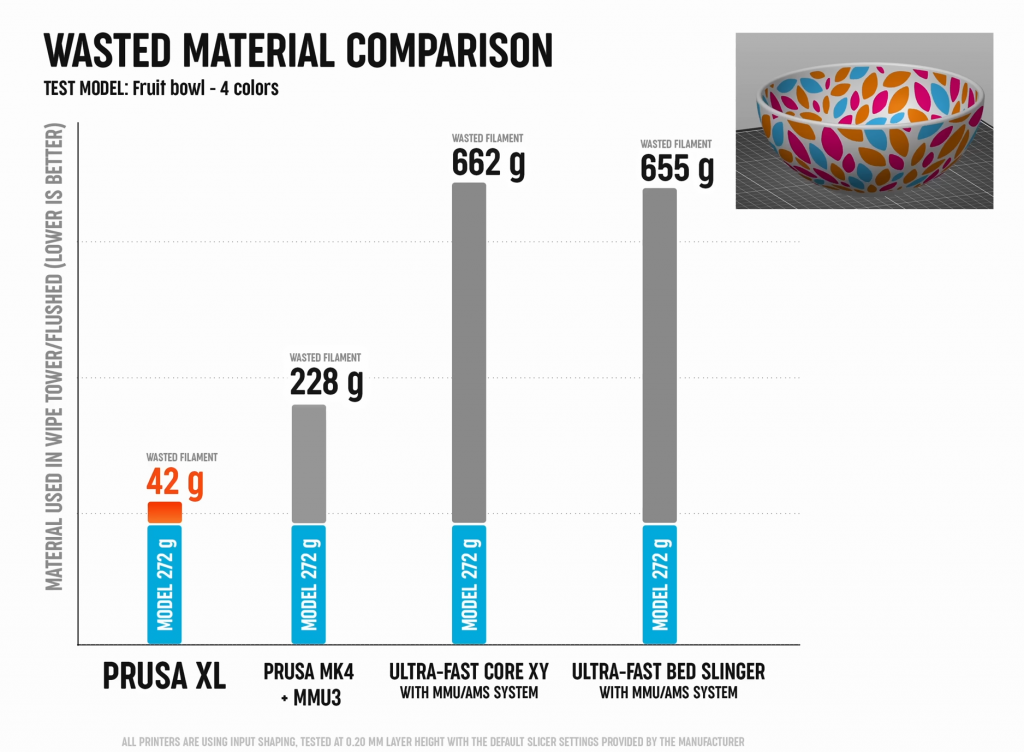
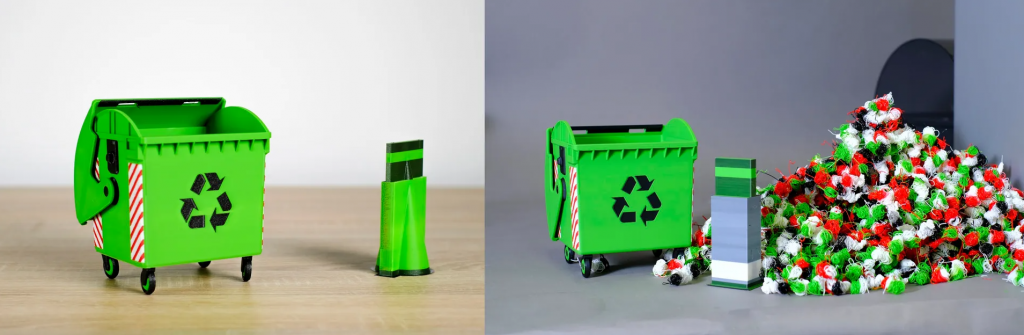
While Prusa’s MMU3 already significantly cuts down on waste compared to Bambu’s AMS, the XL takes it a step further with its mostly hollow wipe towers. The XL also has another advantage in that it can print with zero waste from material changes, assuming you have properly dried filament, which further decreases print time since it no longer needs to pass each nozzle over the wipe tower.
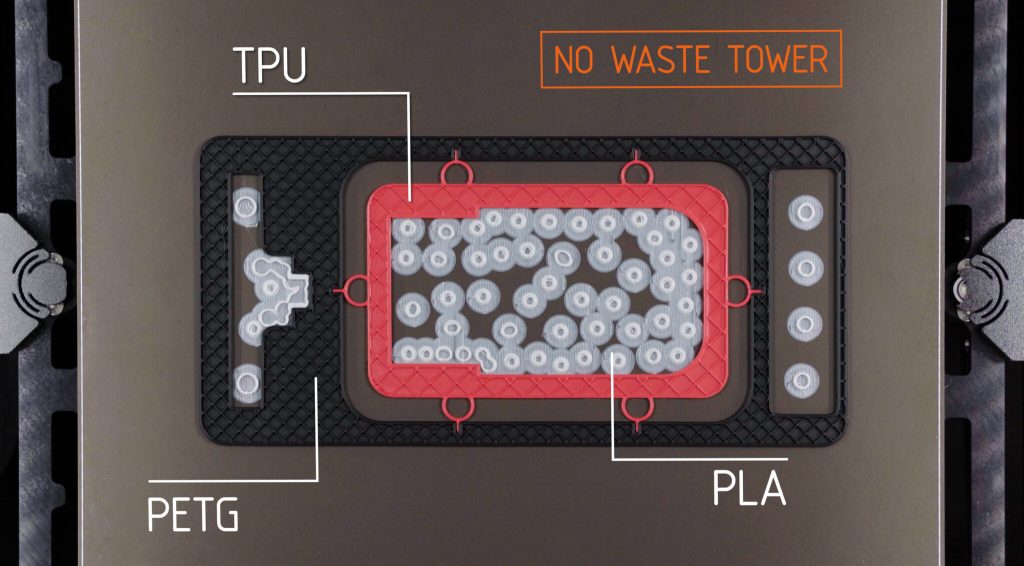
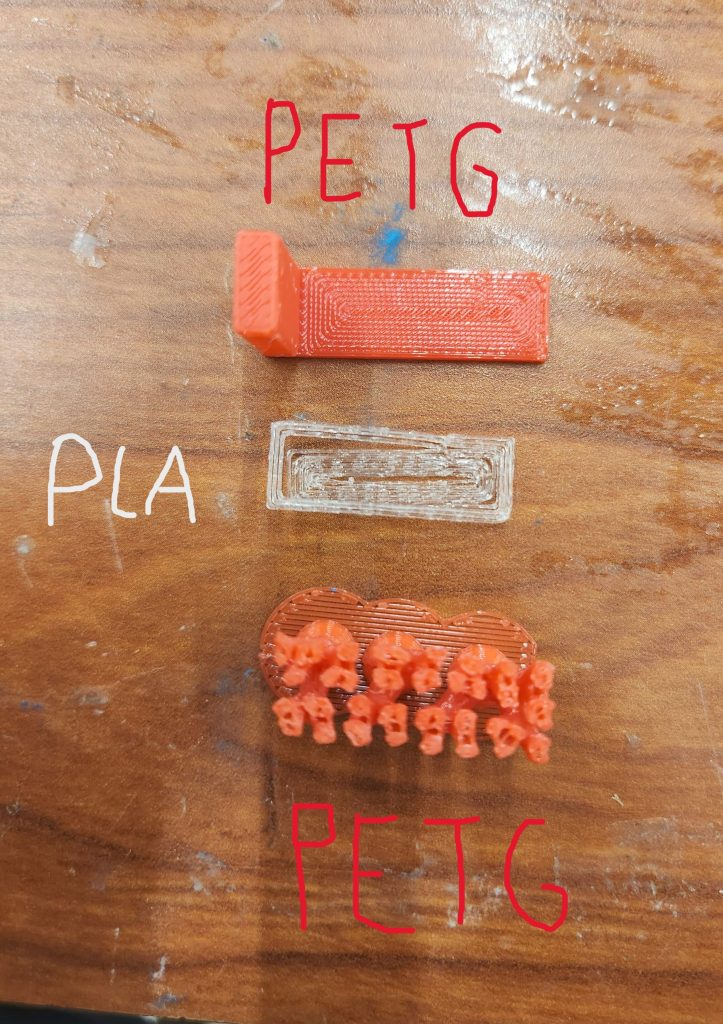
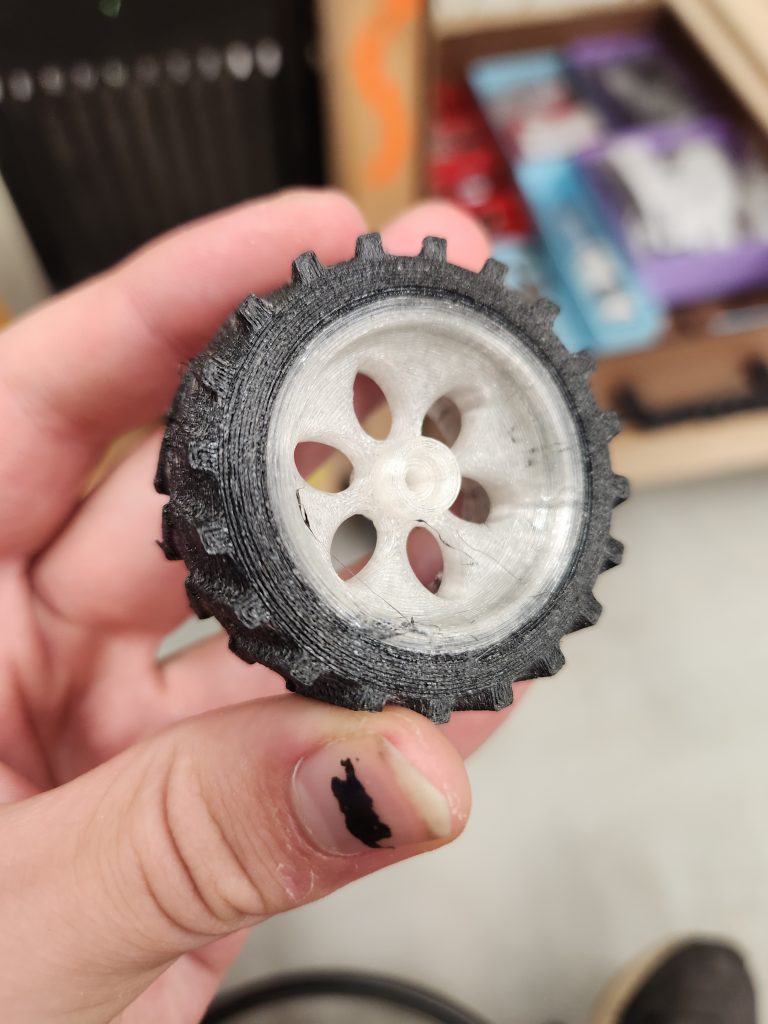
The Prusa XL’s toolchanger system also lets you take advantage of true multi-material, not just multi-color. This means you can print a PETG box with a flexible TPU hinge, a wheel with a solid hub and flexible TPU treads, PLA supports and interface layers for PETG (and vice versa), or have a carbon-fiber infused filament used for the walls of a print with its virgin counterpart as infill to save costs but keep the thermal benefits of CF. While this is possible on a multiplexer system, it greatly lengthens print time and waste since the nozzle needs to heat up to different temperatures to properly load and flush out old filaments.
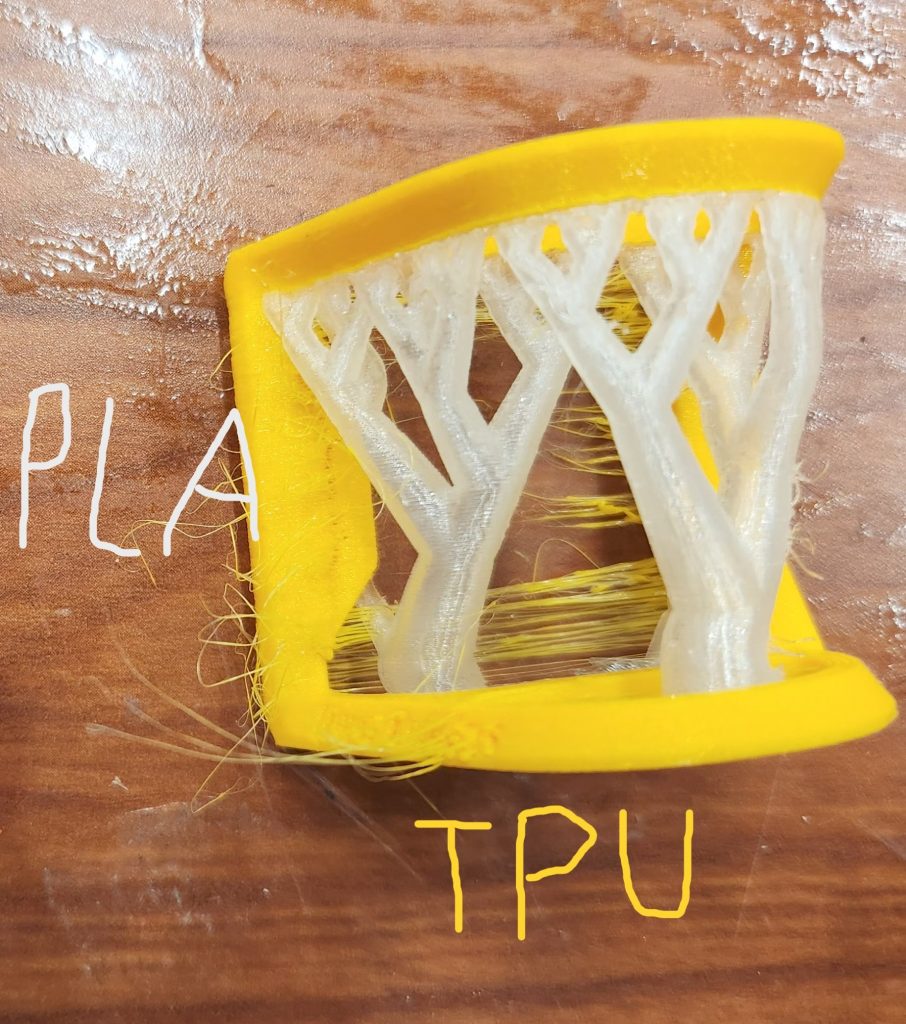
To combat the issue of different plastics not sticking to each other, Prusaslicer uses a feature derived from Orcaslicer (which in itself is a port from Ultimaker Cura. Oh, the beauty of Open Source!) called “Beam Interlocking”, which prints alternating lines of each material to create an interlocking cross-hatch pattern that securely locks the two materials together.
Another perk of the Prusa XL’s toolchanger system is that you don’t have to constantly change nozzles whenever you want to print at a different diameter or flow rate. Since each toolhead is capable of having an independently sized nozzle. Meaning that you can have a 0.6mm nozzle on one tool, a hardened 0.4mm on another, a 0.4mm high-flow nozzle on a third, and a 0.25mm nozzle all at the same time! You can even combine different nozzle diameters for different parts of the print, with 0.6 being used for infill, and 0.25 being used for rounded top layers. Though the most useful part of having multiple toolheads so far has definitely been no longer having to swap filaments all the time before printing, which is especially useful for remote print jobs, since you no longer have to manually swap from black PETG to blue PLA and can instead just pick whatever nozzle already has what you want loaded. Prusa has a great feature to go along with this called “spool-join” where the printer will automatically switch toolheads if you run out of filament mid-print, meaning that the Prusa XL can print up to 10 Kg of filament in a single go!
Furthermore, Prusa’s Nextruder design allows for easier nozzle changes and hotend swaps with an integrated nozzle heatbreak while still being compatible with older V6 nozzles from the MK3S. The Nextruder also features a built-in loadcell sensor that is used to perform automatic first-layer calibration and can also be used to detect filament jams and extruder skips. You can read more about the Nextruder here.
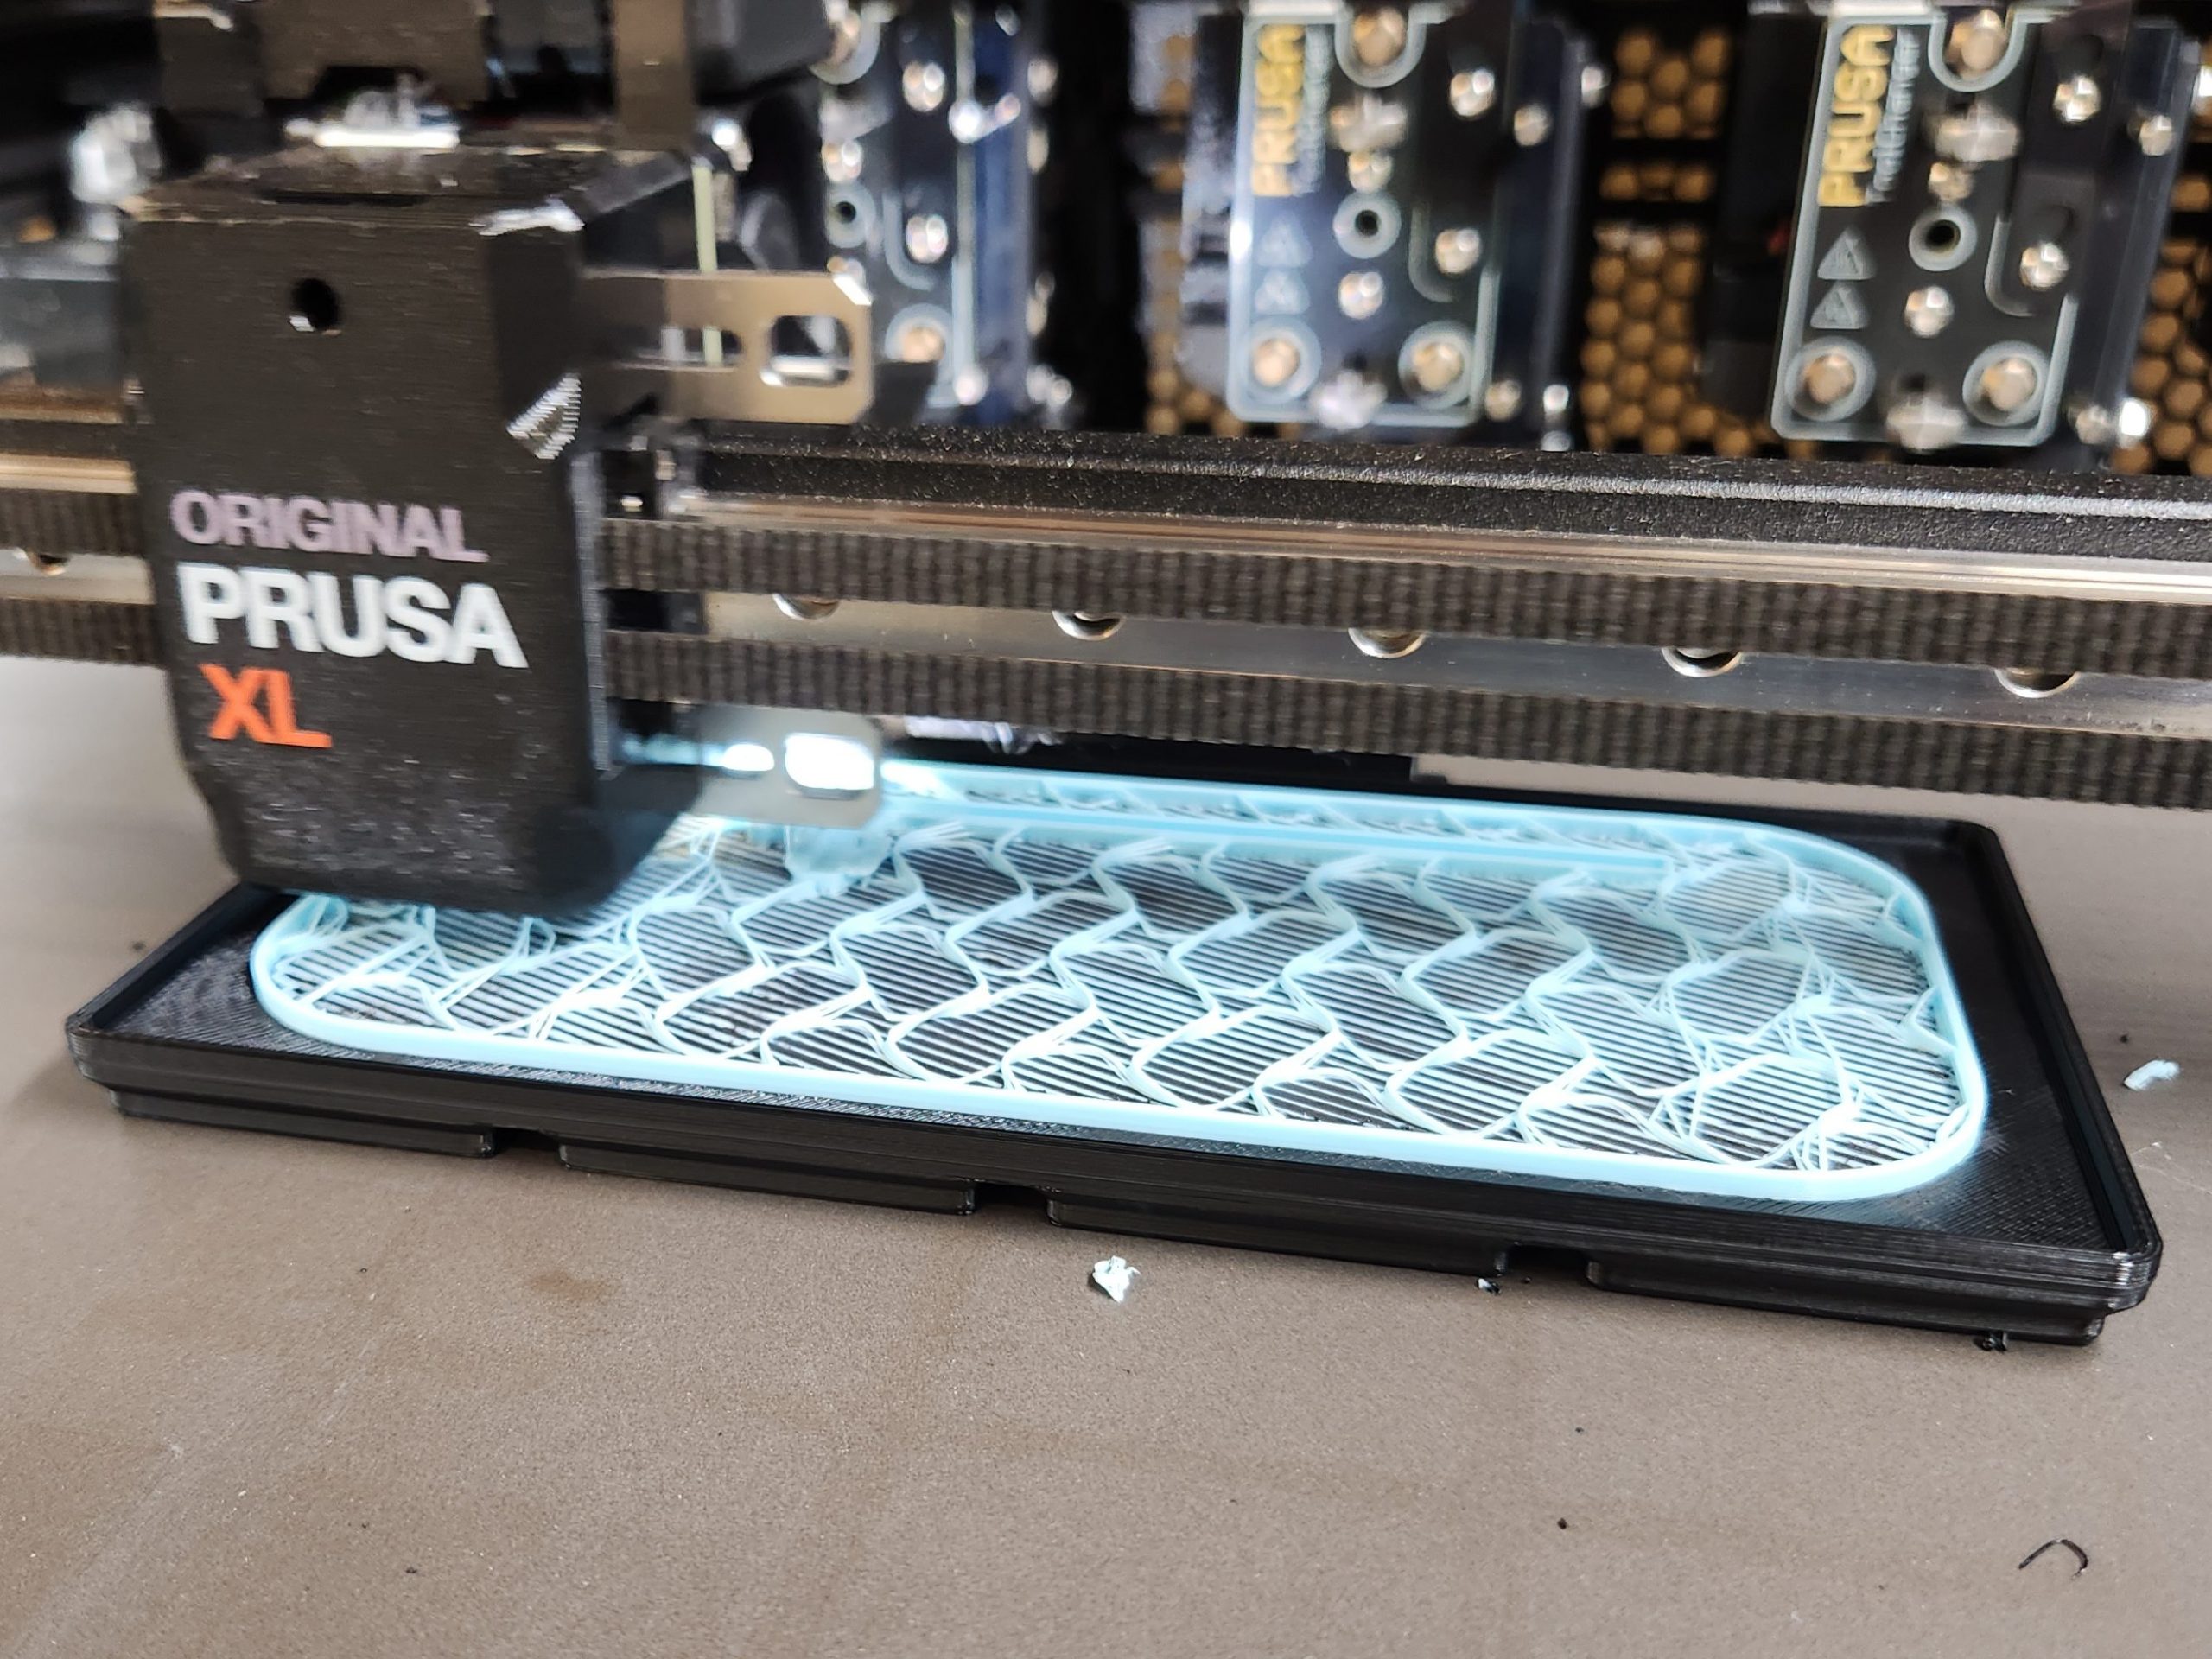
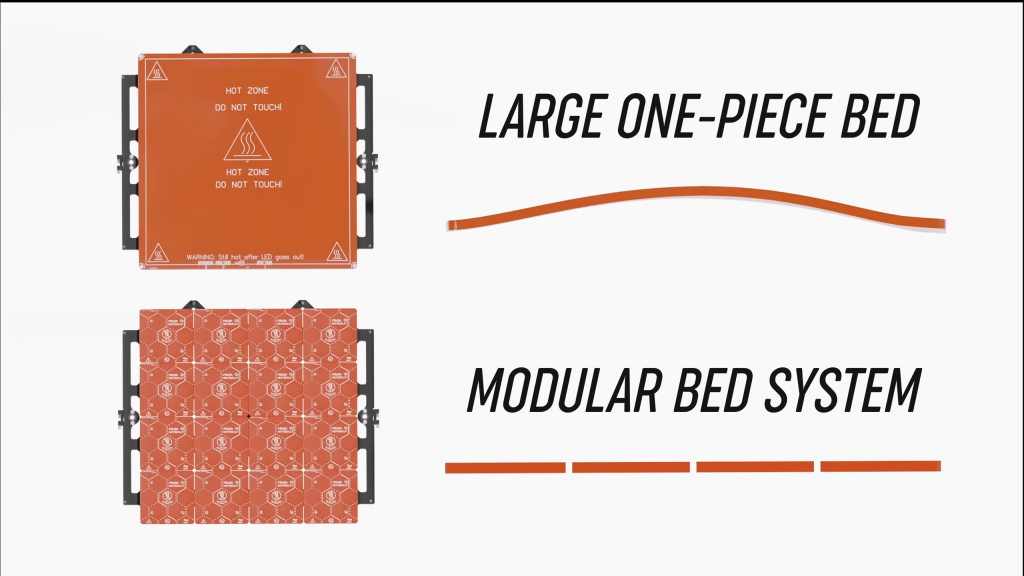
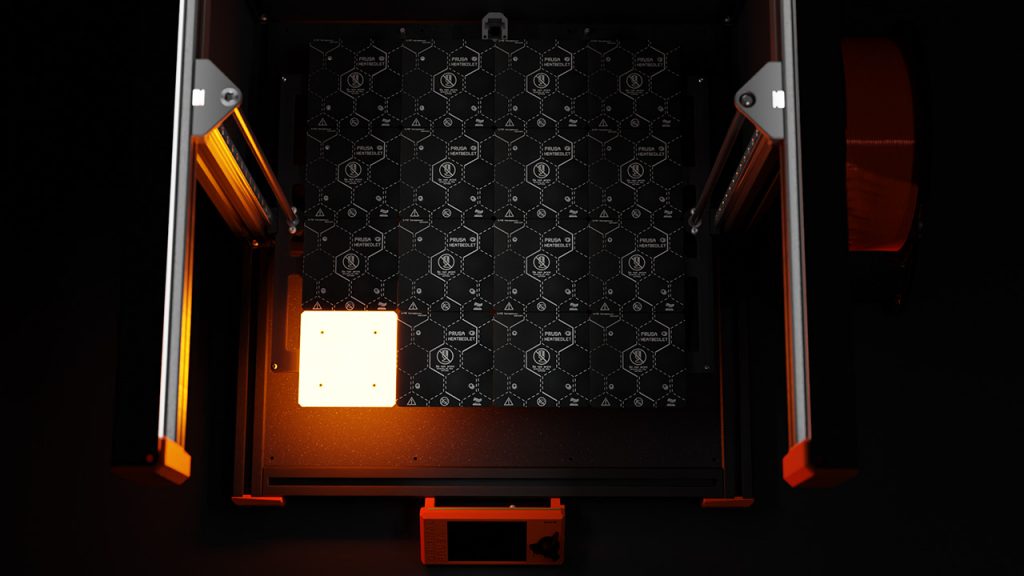
It’s not just the extruder system that sets the XL apart, though. The Prusa XL significantly improves print speed over our MK3S/+, with features like Input-shaping and Phase Stepping, along with its CoreXY kinematics. It can print at up to 350 mm/s with minimal print artifacts and vibration, and is significantly quieter than the MK3. The printer even comes preloaded with a 12-minute Bonkers Benchy (minus the heatup time, of course)! It also features many more quality of life improvements over the older printers, including a 3.5″ multicolor touchscreen and a unique segmented heatbed that splits one large bed into 16 smaller ones. This heatbed design allows the printer to minimize (the bed) warping from thermal expansion and only heat the active print area.
We also purchased the Prusa XL Enclosure, allowing the machine to print in an atmospherically stable environment with a built-in HEPA filter for use with plastics like ABS and other carbon fiber reinforced filaments.
Since we got the 5-tool version of the Prusa XL, it may seem like we have a fully maxed-out printer, but that actually is not the case. Prusa Research has mentioned future non-FDM (3D printing) toolheads for the Prusa XL, with Josef Prusa even posting a sneak peek video online. Meaning our Prusa XL may soon become more than just a 3D printer, with potential abilities including vinyl cutting, pen plotting, and pick-and-place capabilities.
Recent Comments