Tri State Area
Makerspace at the Fulton School
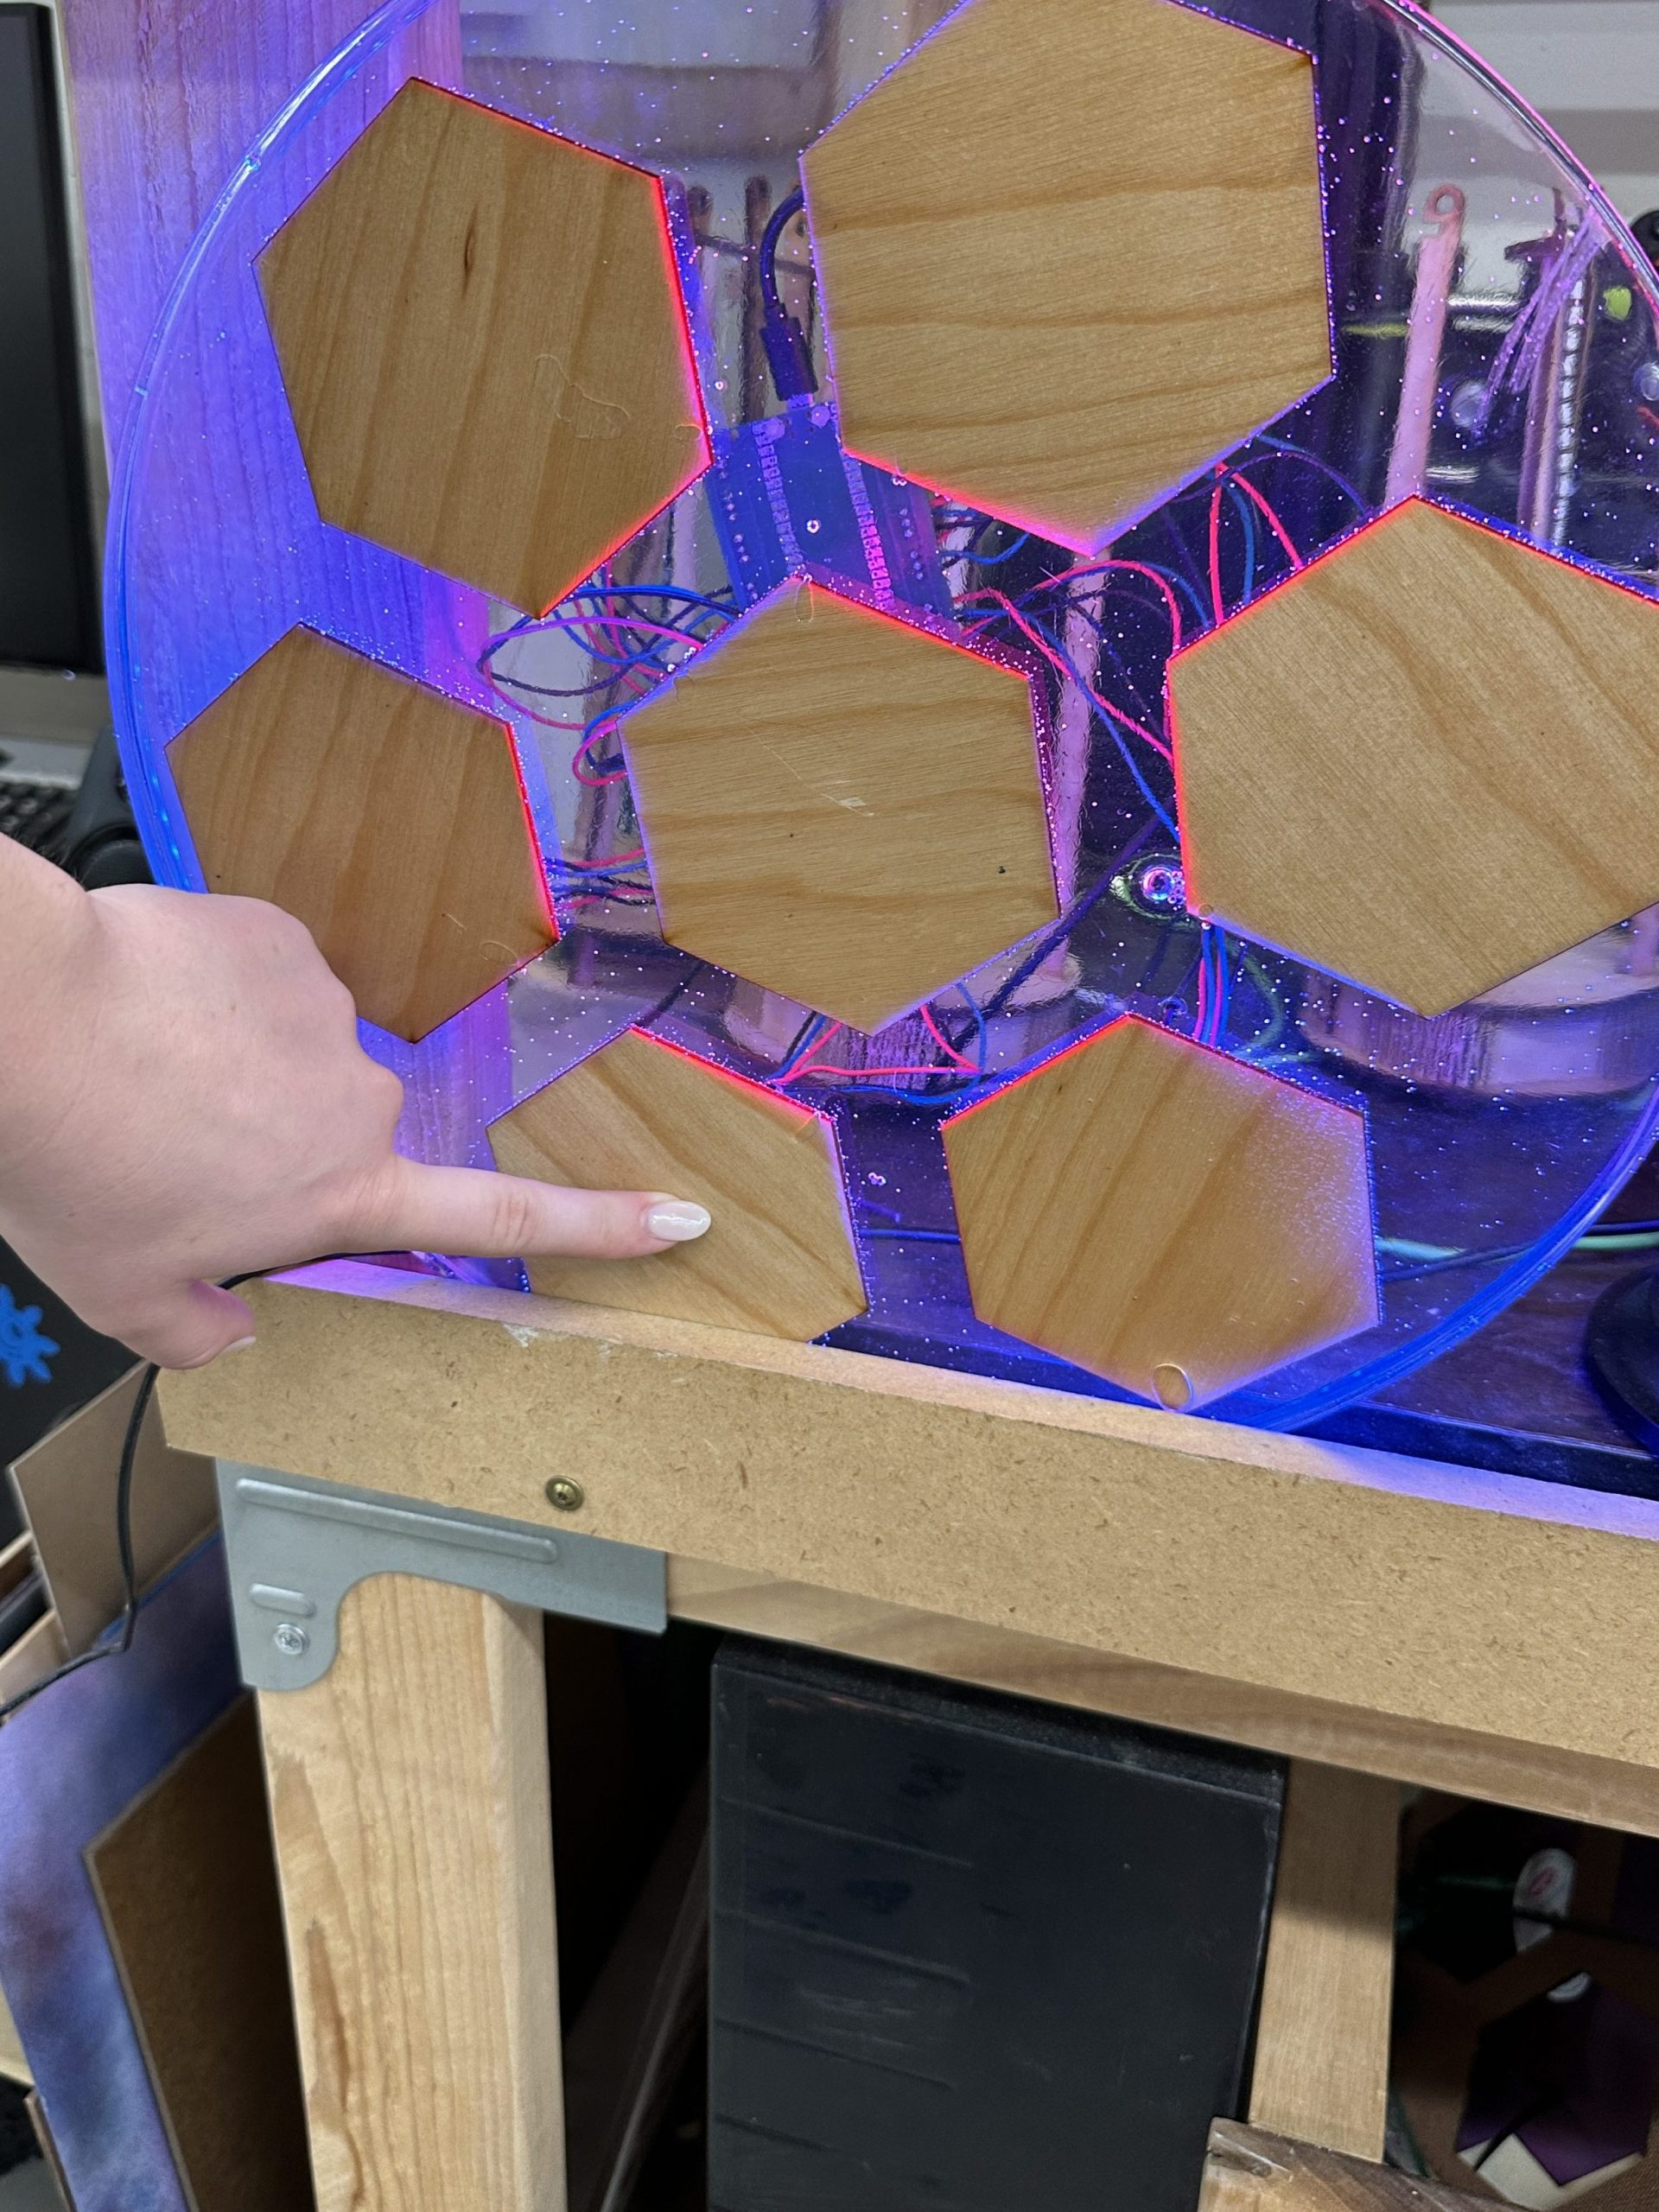
LED Table
In the Makerspace Interim we are going to use the following LED table as inspiration to make a better table with the CNC machine. By using the CNC machine, the hexagons will be perfectly lined up which will make the table look better.
This is the first LED table we made that we’ll be basing the new one on.
Transforming Education: The WWT Project’s AI Lecture Summarizer
This year’s World Wide Technology (WWT) project has unveiled a groundbreaking AI lecture summarizer designed to revolutionize the learning experience. Powered by Hugging Face models for transcript extraction and ChatGPT for customizable summaries, our AI promises to streamline learning for all students, especially those with ADHD and Dyslexia.
Beyond mere transcription, our AI optimizes learning environments in real-time using integrated sensors. Plus, a unique dial provides teachers with live feedback on lecture comprehension, empowering them to adjust their teaching approach instantly.
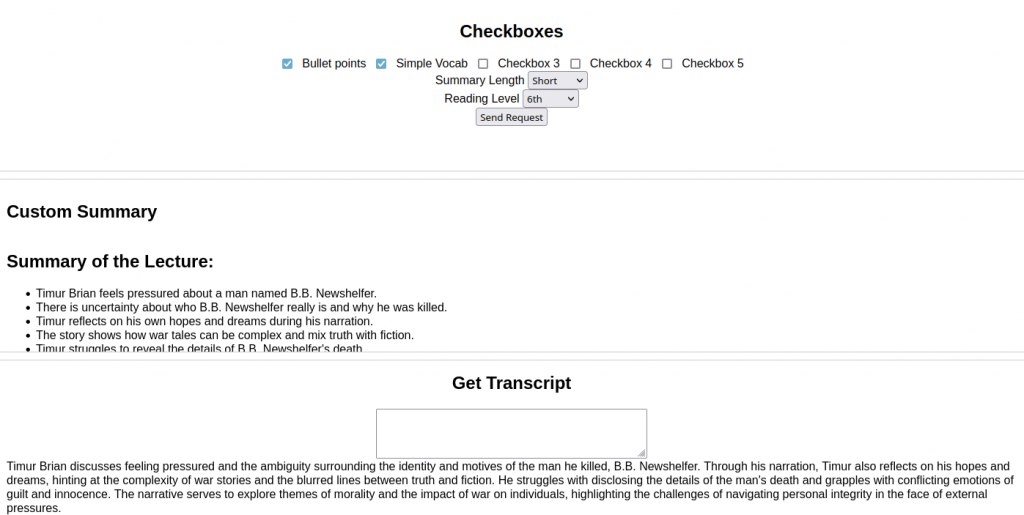
Our user-friendly website simplifies access to these features with checkboxes for customization and a “get transcript” button powered by aiohttp and Raspberry Pi.
In just a few clicks, educators can tailor summaries to suit individual learning profiles, making education more accessible and engaging for all.
The implications of our project are profound, ushering in a new era of inclusive and equitable education. With the WWT project leading the way, we’re closer than ever to realizing a future where every student has access to personalized, high-quality learning experiences.
Credit – Chatgpt
WWT-2024
For this year’s World Wide Technology project, our group created an AI that records lectures and summarizes them. We used Hugging Face models to get the transcript and summary of the lecture because it runs locally which gives us a faster response time and it is free. Then we used the ChatGPT API to do a final summary. The summaries on ChatGPT can be customized through our website for different students’ learning profiles. This will be particularly useful for students with learning disabilities like ADHD and Dyslexia.
We also have incorporated sensors into the AI to optimize learning conditions for students and a dial that will give teachers live feedback on the lecture so that the teachers know what parts of the lecture students understand the most and least.
The main part of my work was in creating the code for transcribing and summarizing the lectures and editing the video.
Webpage:
You can visit the code at: https://github.com/l4589/WWT-2024
Video:
Highschool P2.
Junior year was crazy. There was the new school building, which was a much longer drive for me (45 minutes compared to 10 minutes), I was also doing a lot of school, active in stucco, and playing volleyball. The sad, sour cherry on top was that my grandma had her cancer return. She had an operation to remove it, but was continually in and out of the hospital, which was exhausting for the whole family. Then in October, she died at the age of 95. She lived a good life and was suffering, but my mom was really upset since they were close so that was really difficult, and I had to kind of be rocketed into the role of woman of the house for a time period, while still being a kid and in school. It was all difficult and my childhood dog also died, which made me really sad. I was glad when junior year was over, it was tough, but still good. Like, I had a blast playing volleyball. Senior year started off, bad, Bill (haha “Bogus Journey” reference). I wasn’t having any fun, the volleyball team was filled with drama, I felt alienated, like I wouldn’t get into a good college, judged, pitied, and to make matters worth (here comes the sad, sour cherry, again…) I wasn’t eating much or sleeping much, I lost my period for six months, and chunks of my hair were falling out. Suddenly, in about November I started having more fun and by January had really turned it around. I felt so happy! Basketball was a blast, I hung out with people, I was having fun, and I just felt good again and I still do despite multiple RJM’s!! Anyways, I’m sad to leave highschool, but I am also excited for my future and college. I want to stay in touch with my friends and I am excited to see the people we become, which there is no doubt in my mind, that we will all do great things. Also, here is a link to my “Freaks and Geeks” reboot pilot episode script. Give it a read and let me know what you think! Hey, and maybe one day, you’ll see my show on t.v. (if Jeff allows it!)! https://docs.google.com/document/d/115oLQS564FjFJHxtX8Ha9Q2YFDC5ghuIur7qwqBf1xA/edit
Makerspace 3Q & Highschool P1.
If I am being honest, I haven’t done a lot during this quarter at all. I think I did some tiles. I think I cleaned the makerspace and I helped Alex paint chest pieces. None of that is that interesting to me, so in lieu of a traditional post, I am going to write about highschool memories and my show I want Amazon Prime to pick up (come on, Jeff!). I have a lot of good highschool memories and I think I am very fortunate to say that. Some people have a terrible highschool experience, and while it had its downs and felt pretty bad at times, all and all it was good. Freshman year was just crazy, and if I am being honest is painful to think about. COVID-19 was still out and fresh, I thought I was gonna be in person and play volleyball, and then suddenly, on the first morning of the first day, actually, I decided to do online, which quite honestly wasn’t my full decision. Freshman year, was difficult because I wasn’t allowed to go out with friends, which led to an accusation that I was lying and just didn’t want to go out with them and that really hurt. Sophomore year was, in the words of Ben Hoskins, my comeback season. I was going crazy. I was super outgoing, joined stucco, went out with friends every weekend. It was a lot and I was really overcompensating for not being able to do those things the previous year. Overall that year was super fun. Ana and Charlotte were also on their exchange year then and I loved them. This was also the year I met Ava Harkey, who I love! Now, things took a turn when, during homecoming week, it was announced that we would move schools. I was shocked and saddened.
Maker space project
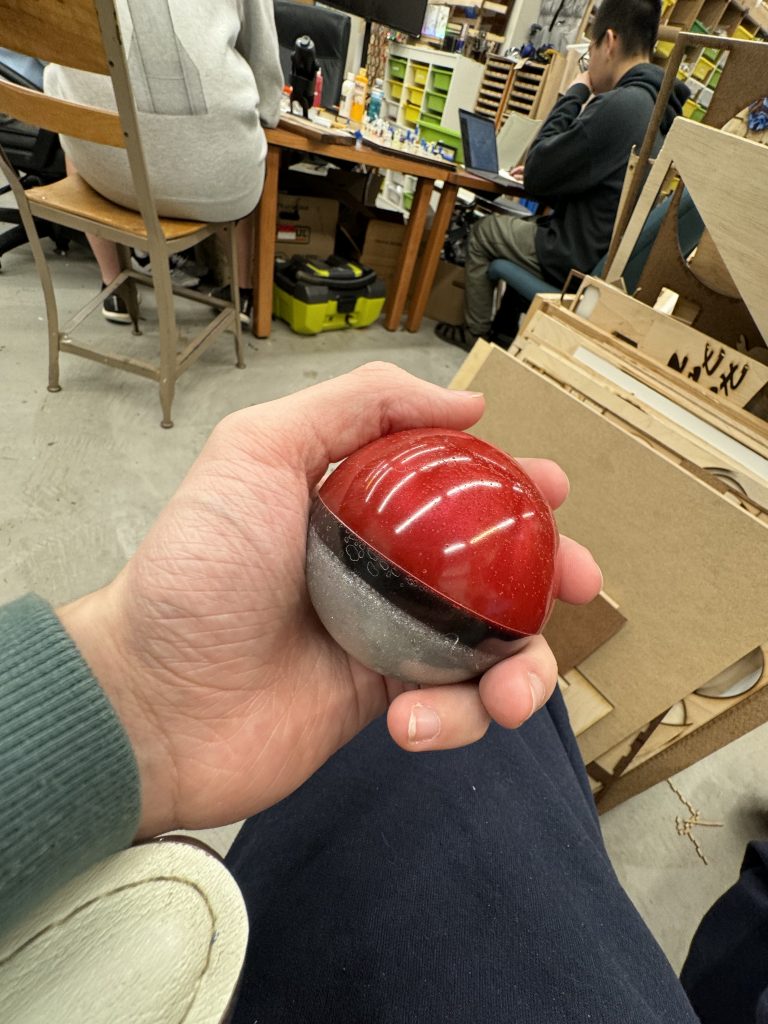
For my maker space project this quarter I made a pokeball out of epoxy. Ben was actually the person who helped me come up with this idea so credit to him. I also really enjoy pokeball so that is also why I chose this project. I did have a few struggles while making it. But first mix the export for the first layer. I had to do it in multiple layers to get it to look good. I poured the first layer and then waited 24 hours poured the next layer which was black. Then finally the last layer which was red. The struggles I had was try to get the ball to be smooth and look the way I wanted it to. But overall I really like how it turned out
clock
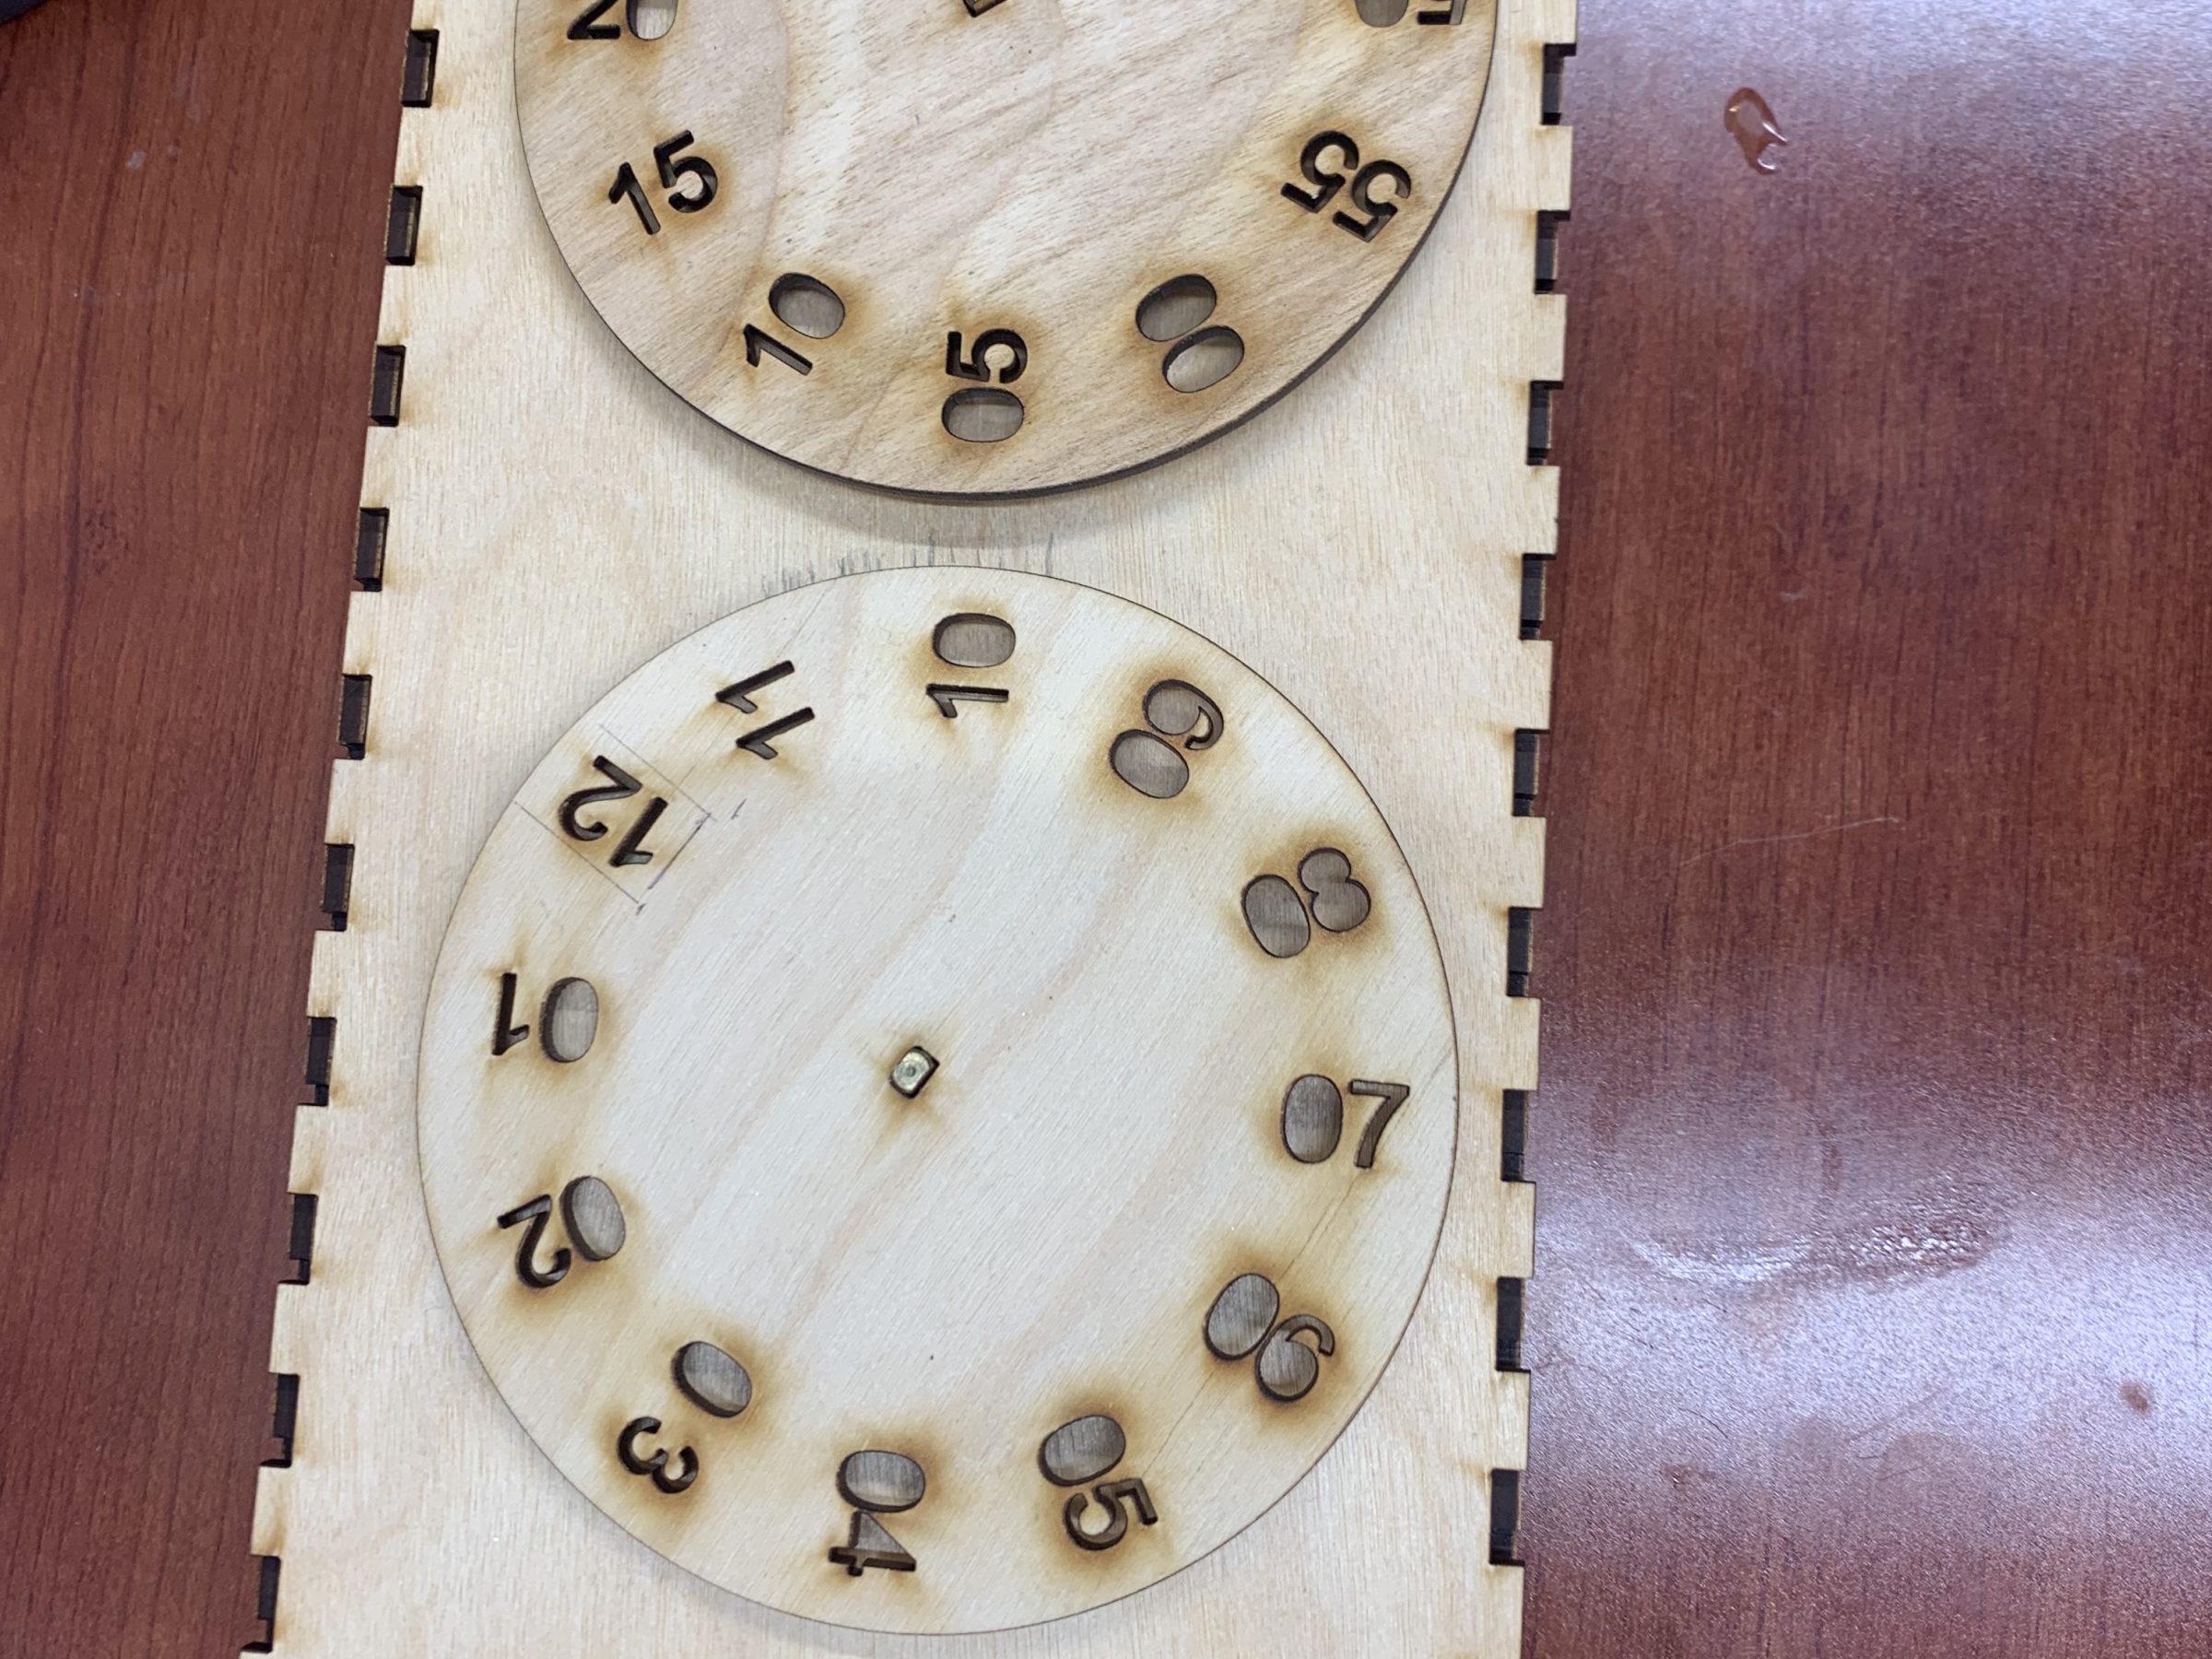
I have decided to make a clock because it seemed fun. I just need to finish programming it and it will be done.
WWT – Comprehension Feedback System
For WWT 2024 I helped Damien and Peter assemble a box with a dial, and you can turn the dial to show how much you understand the lesson. This information will be used by the AI to help make accurate and useful notes and study guides. An alternate method could be to simply have an input on the website interface, but the dial is cooler and makes it easier to understand how the system works.


WWT – AI Student
For this year’s WWT we made an AI that intakes the audio of, for example a lecture, and customizes the transcript as the person wants it. The projects physical aspect would be interactive dials, buttons and sensors to show the understanding of a lecture. This project will help people with learning disabilities such as ADHD and Dyslexia better understand the lecture they are in through these customized notes. Along with this the teachers will get live feedback from the students adding more depth to the project.
My contribution to this project was the programming that utilizes the Open AI API given custom prompts (through the webpage) to take the transcript and write a summary of it. Along with this I helped with the video and the connection of the website to the Open AI summarization allowing our website to function for our MVP.

WWT 2024 – Human interface for AI
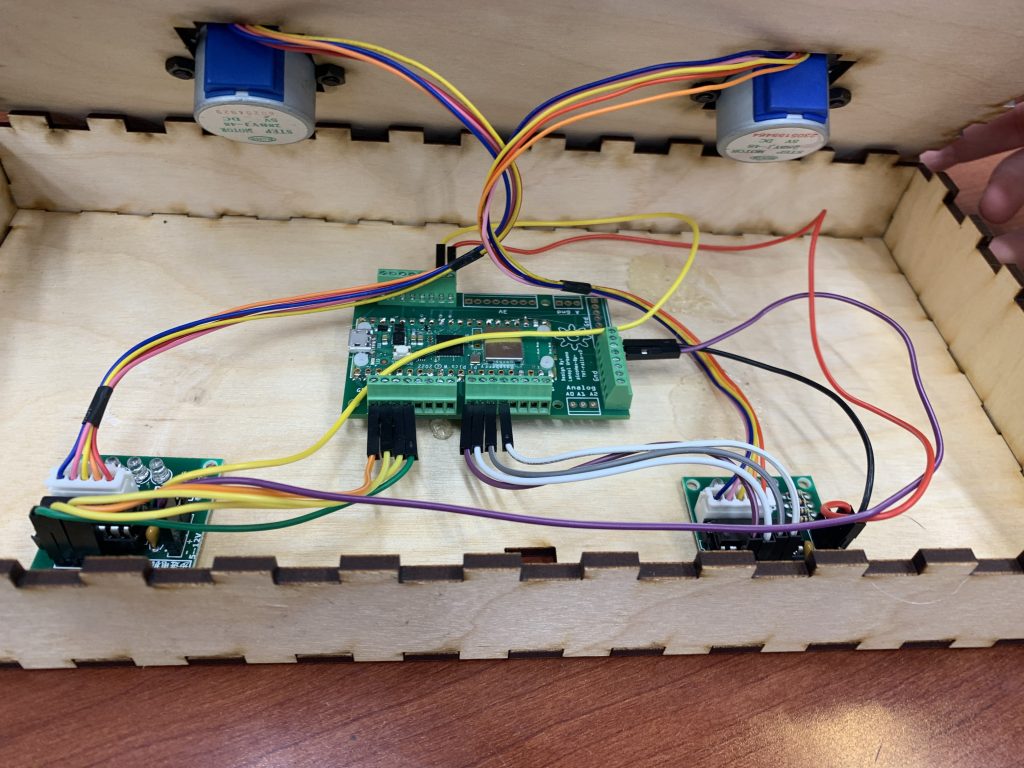
For 2024’s WWT challenge we had to build an ethical AI for use in the classroom. My job was building the human input devices or HIDs, similar to a keyboard and mouse for a computer, these devices allow the teachers and students to control the AI to make it carry out different tasks. I also setup one of desktop computers in the Makerspace to act as the server for the AI.
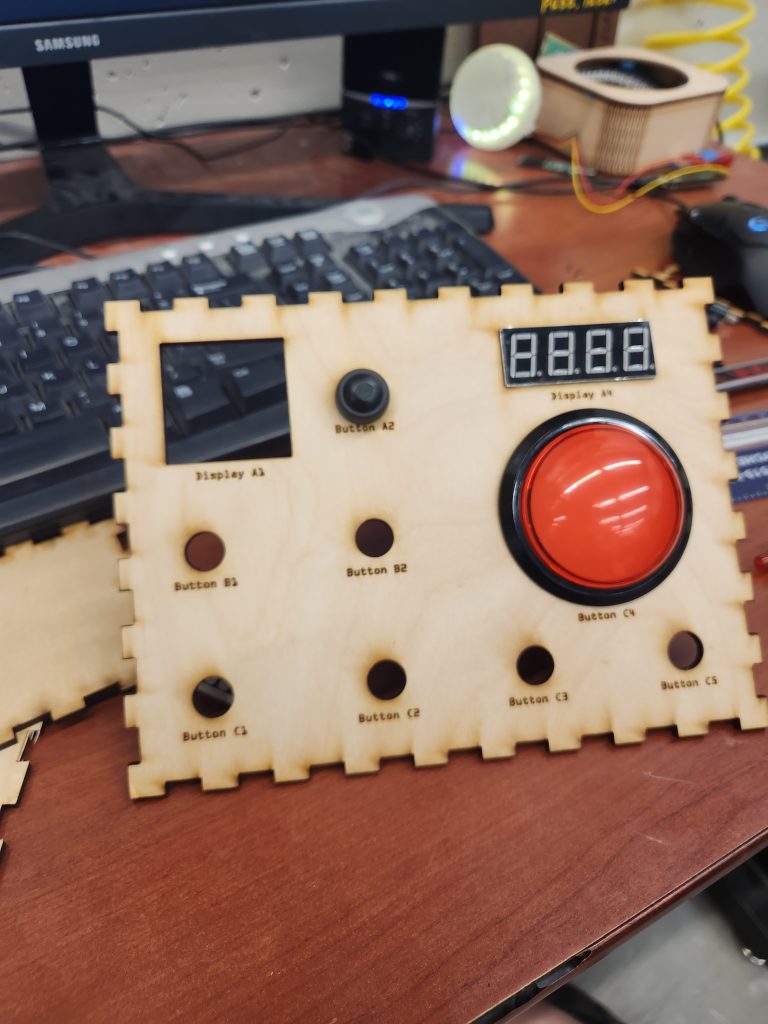
The first device is a control console, this would sit at the teacher’s desk and connect wirelessly to the AI. It features multiple buttons and displays for controlling the AI’s many functions such as starting a recording, stopping a recording, and physically powering down the system.
The next HID is a dial input for the student, this allows the AI to collect real-time input of the student’s classroom comprehension and use it to help better understand the student.
Setting up the server for the AI was fairly straightforward, I first had to create a separate partition on the computer’s solid state drive. This would act as an entirely separate drive and allow me to install a Linux operating system while still keeping all of the previous student data and Windows operating system intact. After this I installed Git (a program for sharing code across devices), and Huggingface, a suite of free/open-source AI models.

Recent Comments