Tri State Area
Makerspace at the Fulton School
WWT 2024 | Environmental Sensor
For WWT I worked on setting up enviormental sensors cameras and microphones to help us get all the data we need to create the optimal learning enviorment for our students. The enviormental sensors like the light sensor and co2 sensor paired with our attention dial help us find the optimal conditons for our students.
WWT 2024- AI as a Student
For WWT this year I interviewed multiple teachers and got their input on our project and their ideas for improving it. I also did the overview of our project for our video and brainstormed what this project could eventually turn into. Some of the big-picture ideas that were thought of were:
- Train the AI preschool teachers to prevent the AI from turning evil and killing everyone
- Thinking about the AI as a student makes unreliability a good thing to make sure the AI isn’t thinking for the students.
- Thinking about it as a student is also good because it increases the acceptance of it into the classrooms by teachers.
Final video:
I dialed
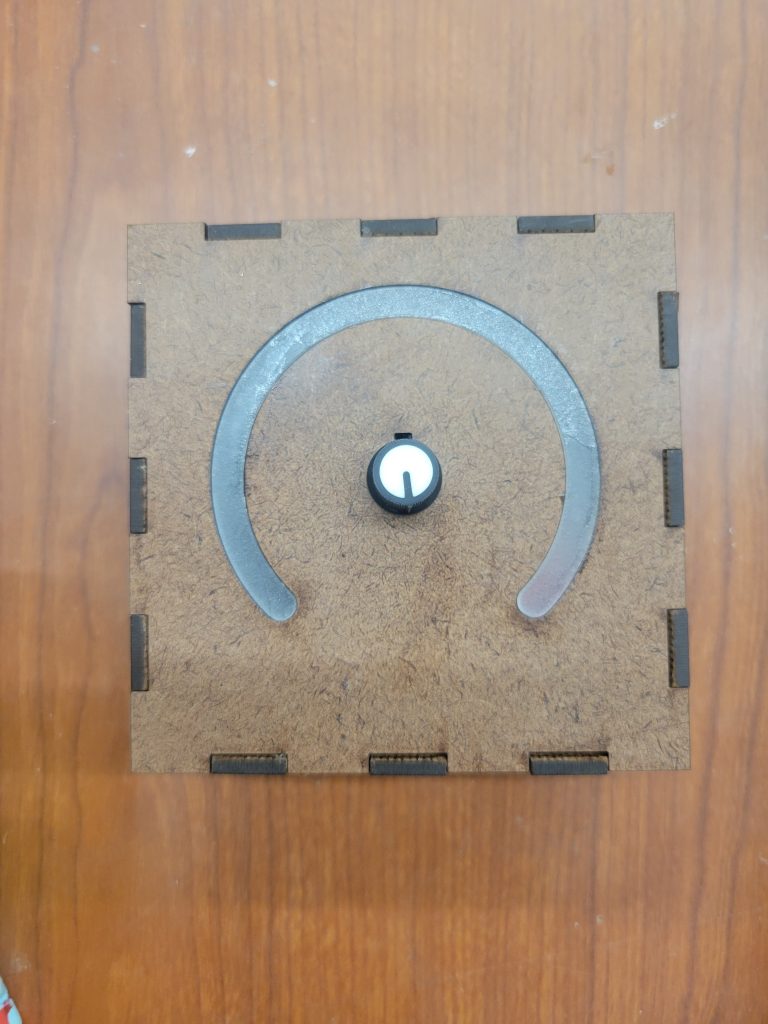
Peter and I made the dial box out of laser-cut particle wood. This box will show the user’s comprehension of a lecture to help the teacher know what to talk about more. I also made the 2nd top for the dial box, this version will have a frosted acrylic segment cut into the top, with LEDs under it. Whenever the dial is turned, that amount of LEDs will show up to indicate where the dial is pointing.
negative sword
i chose this because it was left in the up cycle bin so i decided to use the negative sword and bring out the negative with no sword

Generator for steam engine
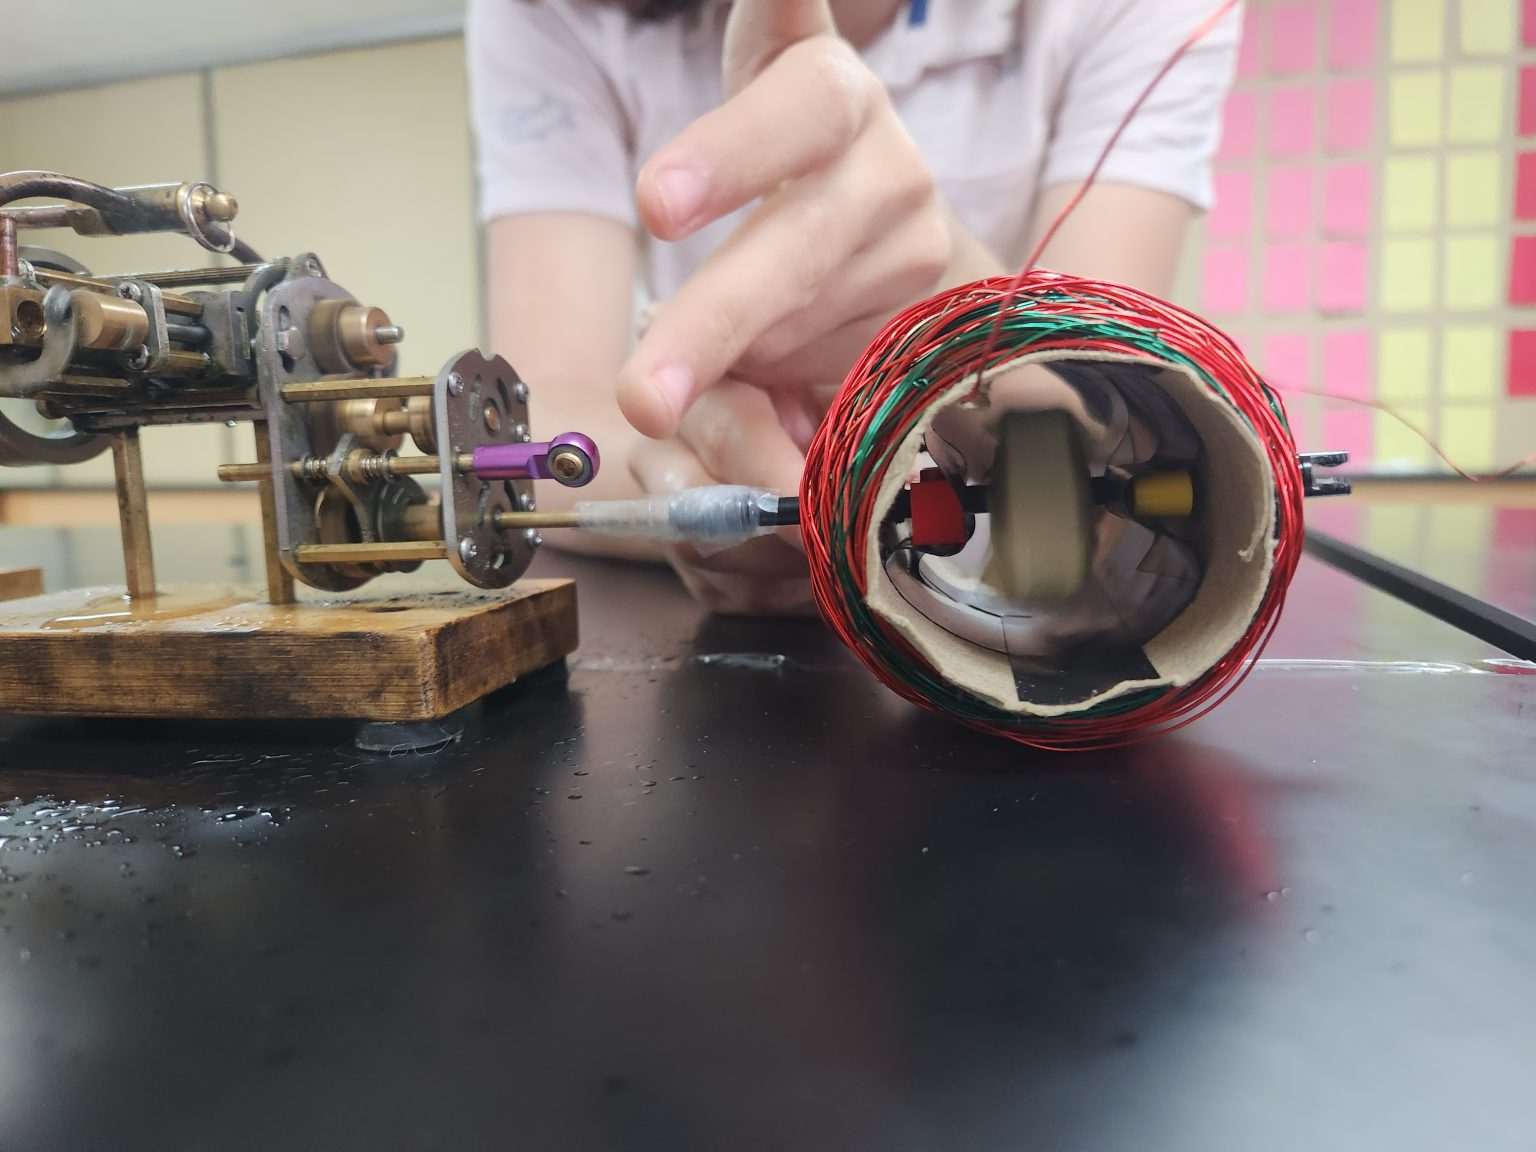
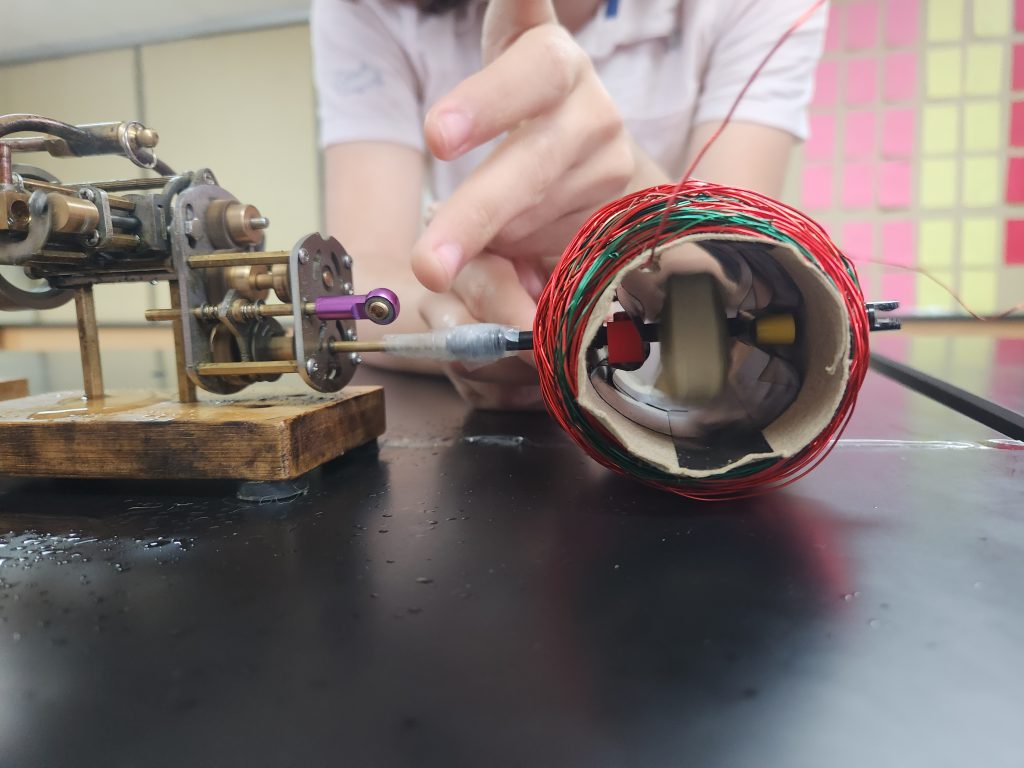
Me Damien and Peter made an electric generator for Oliver’s steam engine.
It is some wire wrapped around a cardboard toilet paper roll and a magnet inside the coil, attached to the output of the steam engine.
what I did for 2nd quarter
Miles, Peter, and I worked on an electric generator. We tried to attach it to Oliver’s steam engine to generate electricity. It sort of worked, its just copper wire wrapped around a cardboard tube with a magnet on a rod in the middle of it.
Epoxy Cutting Board
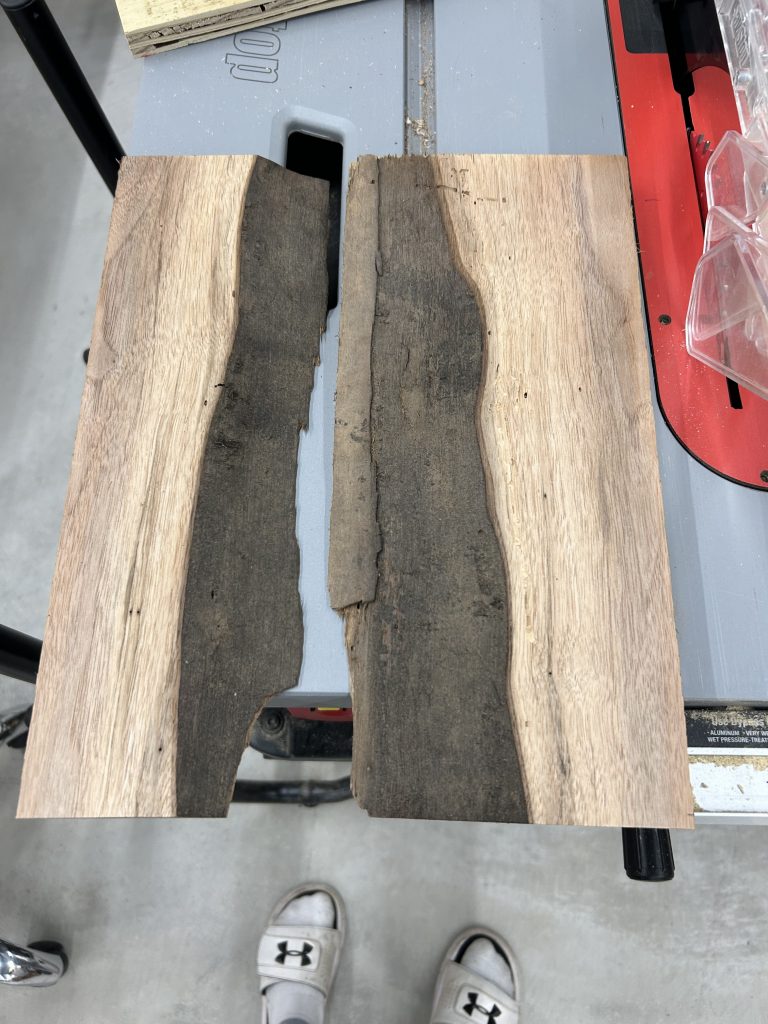
In this project, opposed to other epoxy projects, I used a nice live edge board of wood to create an epoxy cutting board. The project is still in the process of being made.
First, I cut the pieces from the live edge board the same length so that I could make a board.
Next, I clamped them together and used a vinyl to keep the epoxy in and poured the bottom layer to secure them together.
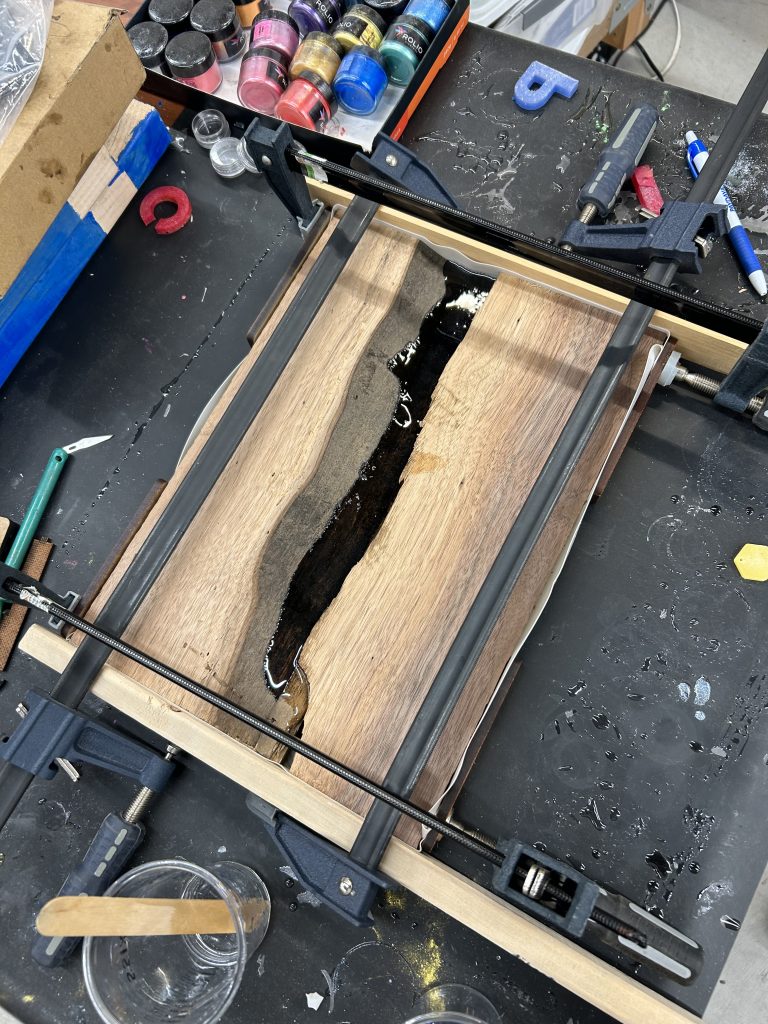
Next I poured another layer that I also put on the surface of the board as a sealing coat.

I didn’t like the surface, so I sanded it.
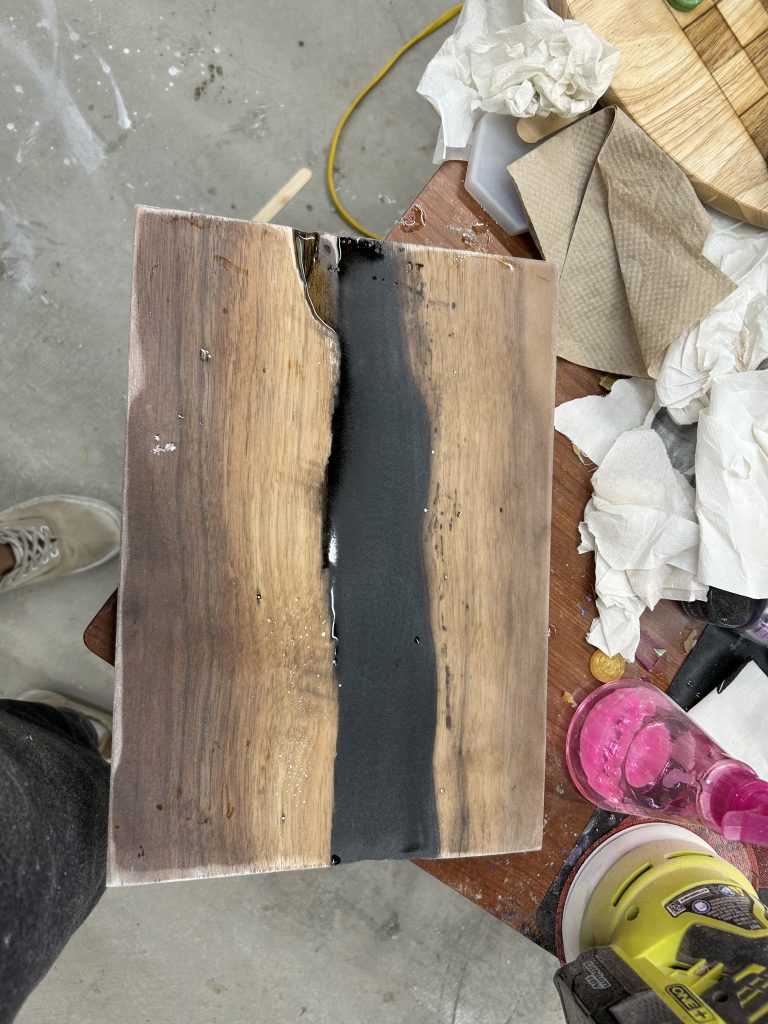
Then I poured another sealing layer that didn’t work, so I plan on pouring another layer.
Sticker
This quarter I made another sticker to put on my iPad. I got more comfortable with using the vinyl machine. Doc did help me a little bit but It was mainly by myself. The worst part was picking a picture to use. The best part of this project was separating the excess vinyl from my sticker.

Econ
I’m in the process of developing a game that focuses on developing a virtual community and simulating a real-world economy. Players serve as community leaders, planning, managing resources and facing economic challenges. Goals include improving community happiness and learning economic principles. Tasks involve infrastructure planning, cooperation and economic policy development. Aimed at high school students, college students, and adults interested in economics, the game provides entertainment and education.
Learning objectives emphasize understanding and applying economic principles. The game introduces various resources such as funds, manpower, and land to contribute to community development. The user interface includes interactive maps, task cards, time periods, decision trees, and role-playing elements. Players visualize various aspects of the community, make decisions and experience the passage of time through events.
Role plays involve community planning and leadership, managing image, interacting with residents, and responding to events. Players can choose characters such as the Economist, unlocking new skills based on decisions and success. The game encourages collaboration, social interaction and virtual democratic decision-making.
Recent Comments