Tri State Area
Makerspace at the Fulton School
Makerspace project
For my project I made coasters with my dads company logo on the coasters. My first step was to load the logo up on the computer and in the software. Then I made a circle and put it around the logo adjusted the it to the size I wanted. I then turned on the laser cutter. Then printed it out, it didn’t turn out completely finished so I’ll have to rerun the laser over it to finish it.
(when it’s finished I will post a picture)
Tiles (part 2)
After we print all the tiles out and sort them by grade we will pass them out to each of the teachers. If we missed any students or if there are any new students the teachers can let us know and we will create a tile for that student. Sorting through the first batch of tiles was a difficult process because after printing them we just put them all jumbled up in a bin and we couldn’t find our list of grade levels. Once the tiles have been decorated we plan on helping put them on to our large tile board and hopefully finding a place to display it.
Continuation of Tiles from Last Year
During the third quarter Alex and I continued making tiles for the new students from the merging of the schools. After making all the templates online we began printing and cutting them out. The tiles have turned out really well and we are in the process of sorting through them.
SmartBins Project
WWT- My Involvement
For WWT 2023, I worked on programming the LEDs, calibrating a weight scale, researching scaling and budgeting options, and conducting interviews with teachers and staff to gather their input on our idea.
Ruthie, Joy, and Lily 2023
We made 3D models of basic houses in third-world countries in Africa, Lesotho, South Sudan, and Somalia. Originally, we were planning on creating landscapes around each house to represent where they are from, but due to time constraints, we could not get that done.
Props for Marigold story
Yellow spray print on 1/8 inch birch plywood

Touch Numbers
Made on the laser foe Ms.Lamb in thren123 classroom.

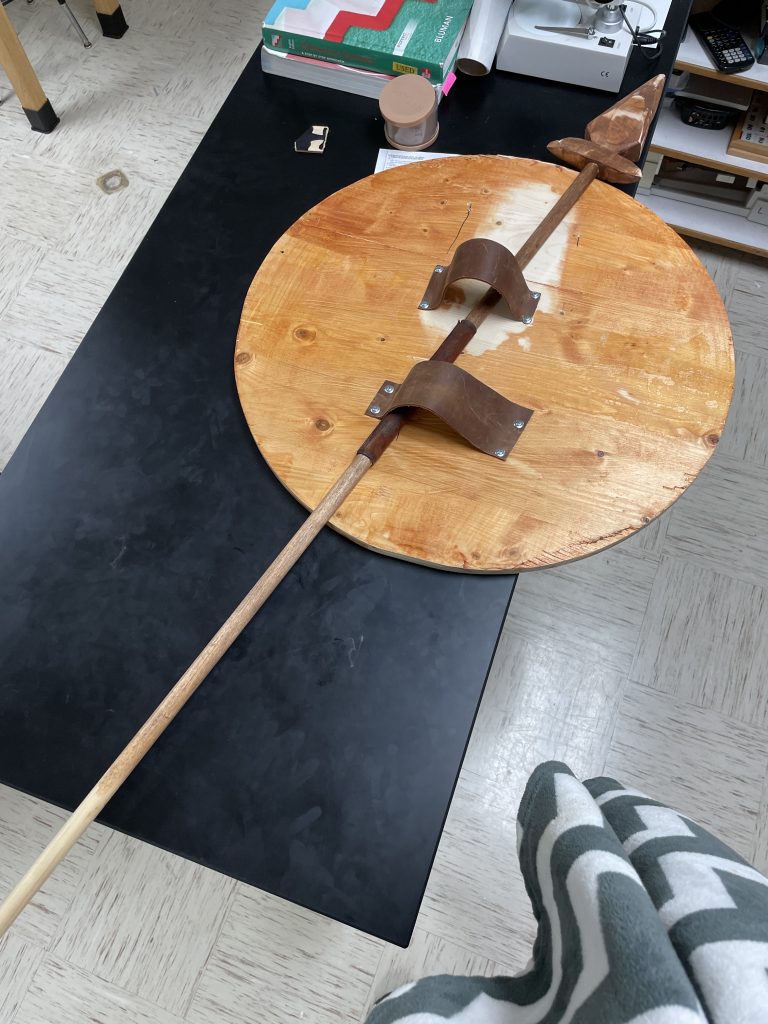
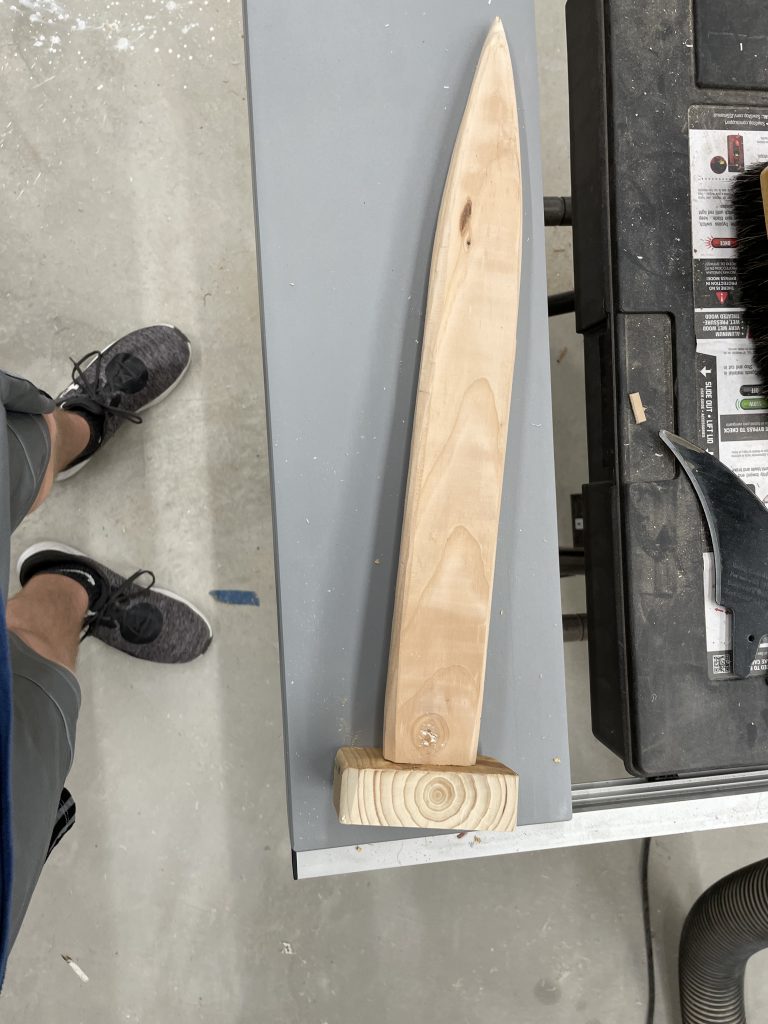
Maker space Interim 3
For this interim I am going to be working with josh and making different kinds of weapons from around the globe. The end goal of this week is to make Hadzabe, Tanzania, and also a gladiator sword from Rome, and if we have time make a shield from medieval Europe. We have finished making the spear and the shield so all that is left is the sword.

Global Seed Cannon
For this maker space interim, Miles, Peter, and I will be revamping the potato cannon, but better (and working). The way we are making this global is by using seeds as projectiles. The design of the cannon will change from the previous one because the propellant condensed on the side and there wasn’t enough oxygen inside the combustion chamber. A removable end cap will be added on the end, in addition to a grip for the trigger. The seeds we are using are the Black-eyed Susans and Butterfly flowers.
Recent Comments