Tri State Area
Makerspace at the Fulton School
Makerspace pro assistant
I spent the week just helping out people with projects that required some extra help. For example I did the measurements for a axe he made or attempted to make. I needed to do the measurements to calculate how much poxy he needed to fill up his axe. I also cut a Minecraft cake that turned out super well with no flaw’s whatsoever. I moved a bunch of makerspace projects into the lunchroom for people to gaze apon. I gave some of my opinions to help zoe with her art work. That is about the end of the list of things I did this week.
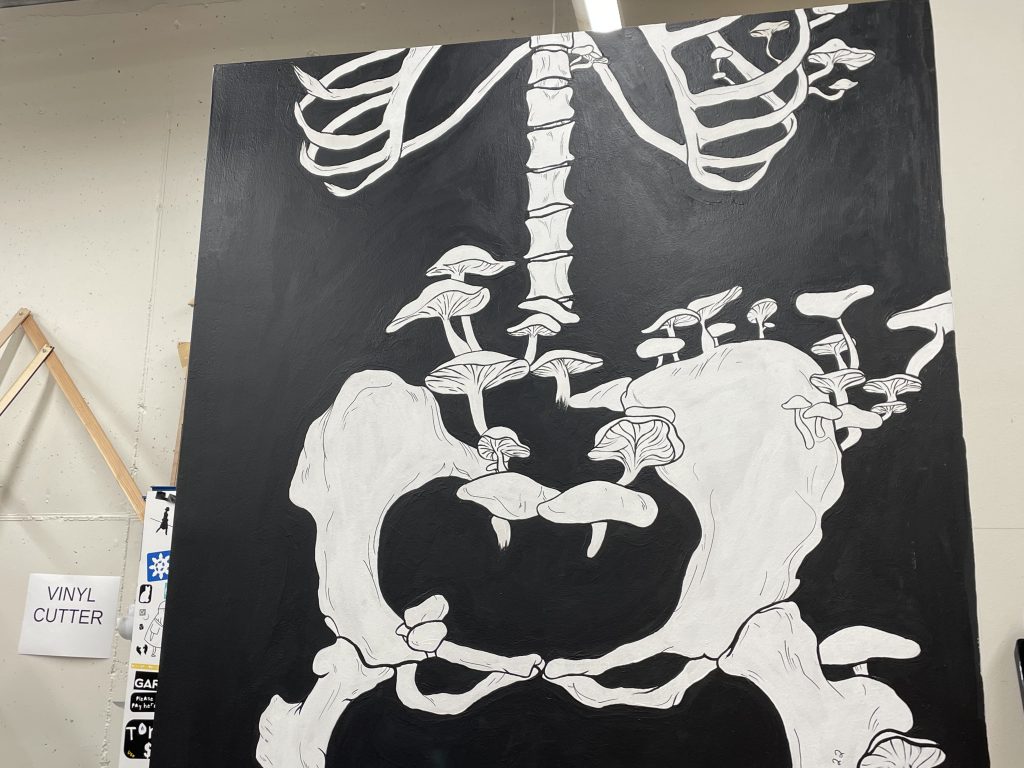
Skeleton
For this makerspace interim, I decided to take the time to finish my skeleton that I started at the beginning of the year. I had a few difficulties with the black paint; I used all of the matte black paint so thankfully Doc bought a new one only to soon find out that it didn’t match the one I already had on there. I took a few hours just to completely repaint all and finish the finer details. Thank god it’s now completed and I’m honestly very impressed with how it turned out!
makerspace interim
This was my first time doing makerspace for an interim. It was soooo much fun and I did a lot. My main project was a resin table. It is going to be clear with records inside of it. I wanted to finish it during this time but the resin got delayed in shipping so it didn’t come in time. I created a mold out of wood. This was my first time using the saw and drill. I covered the mold with this tape called “tuck tape” so the resin wouldn’t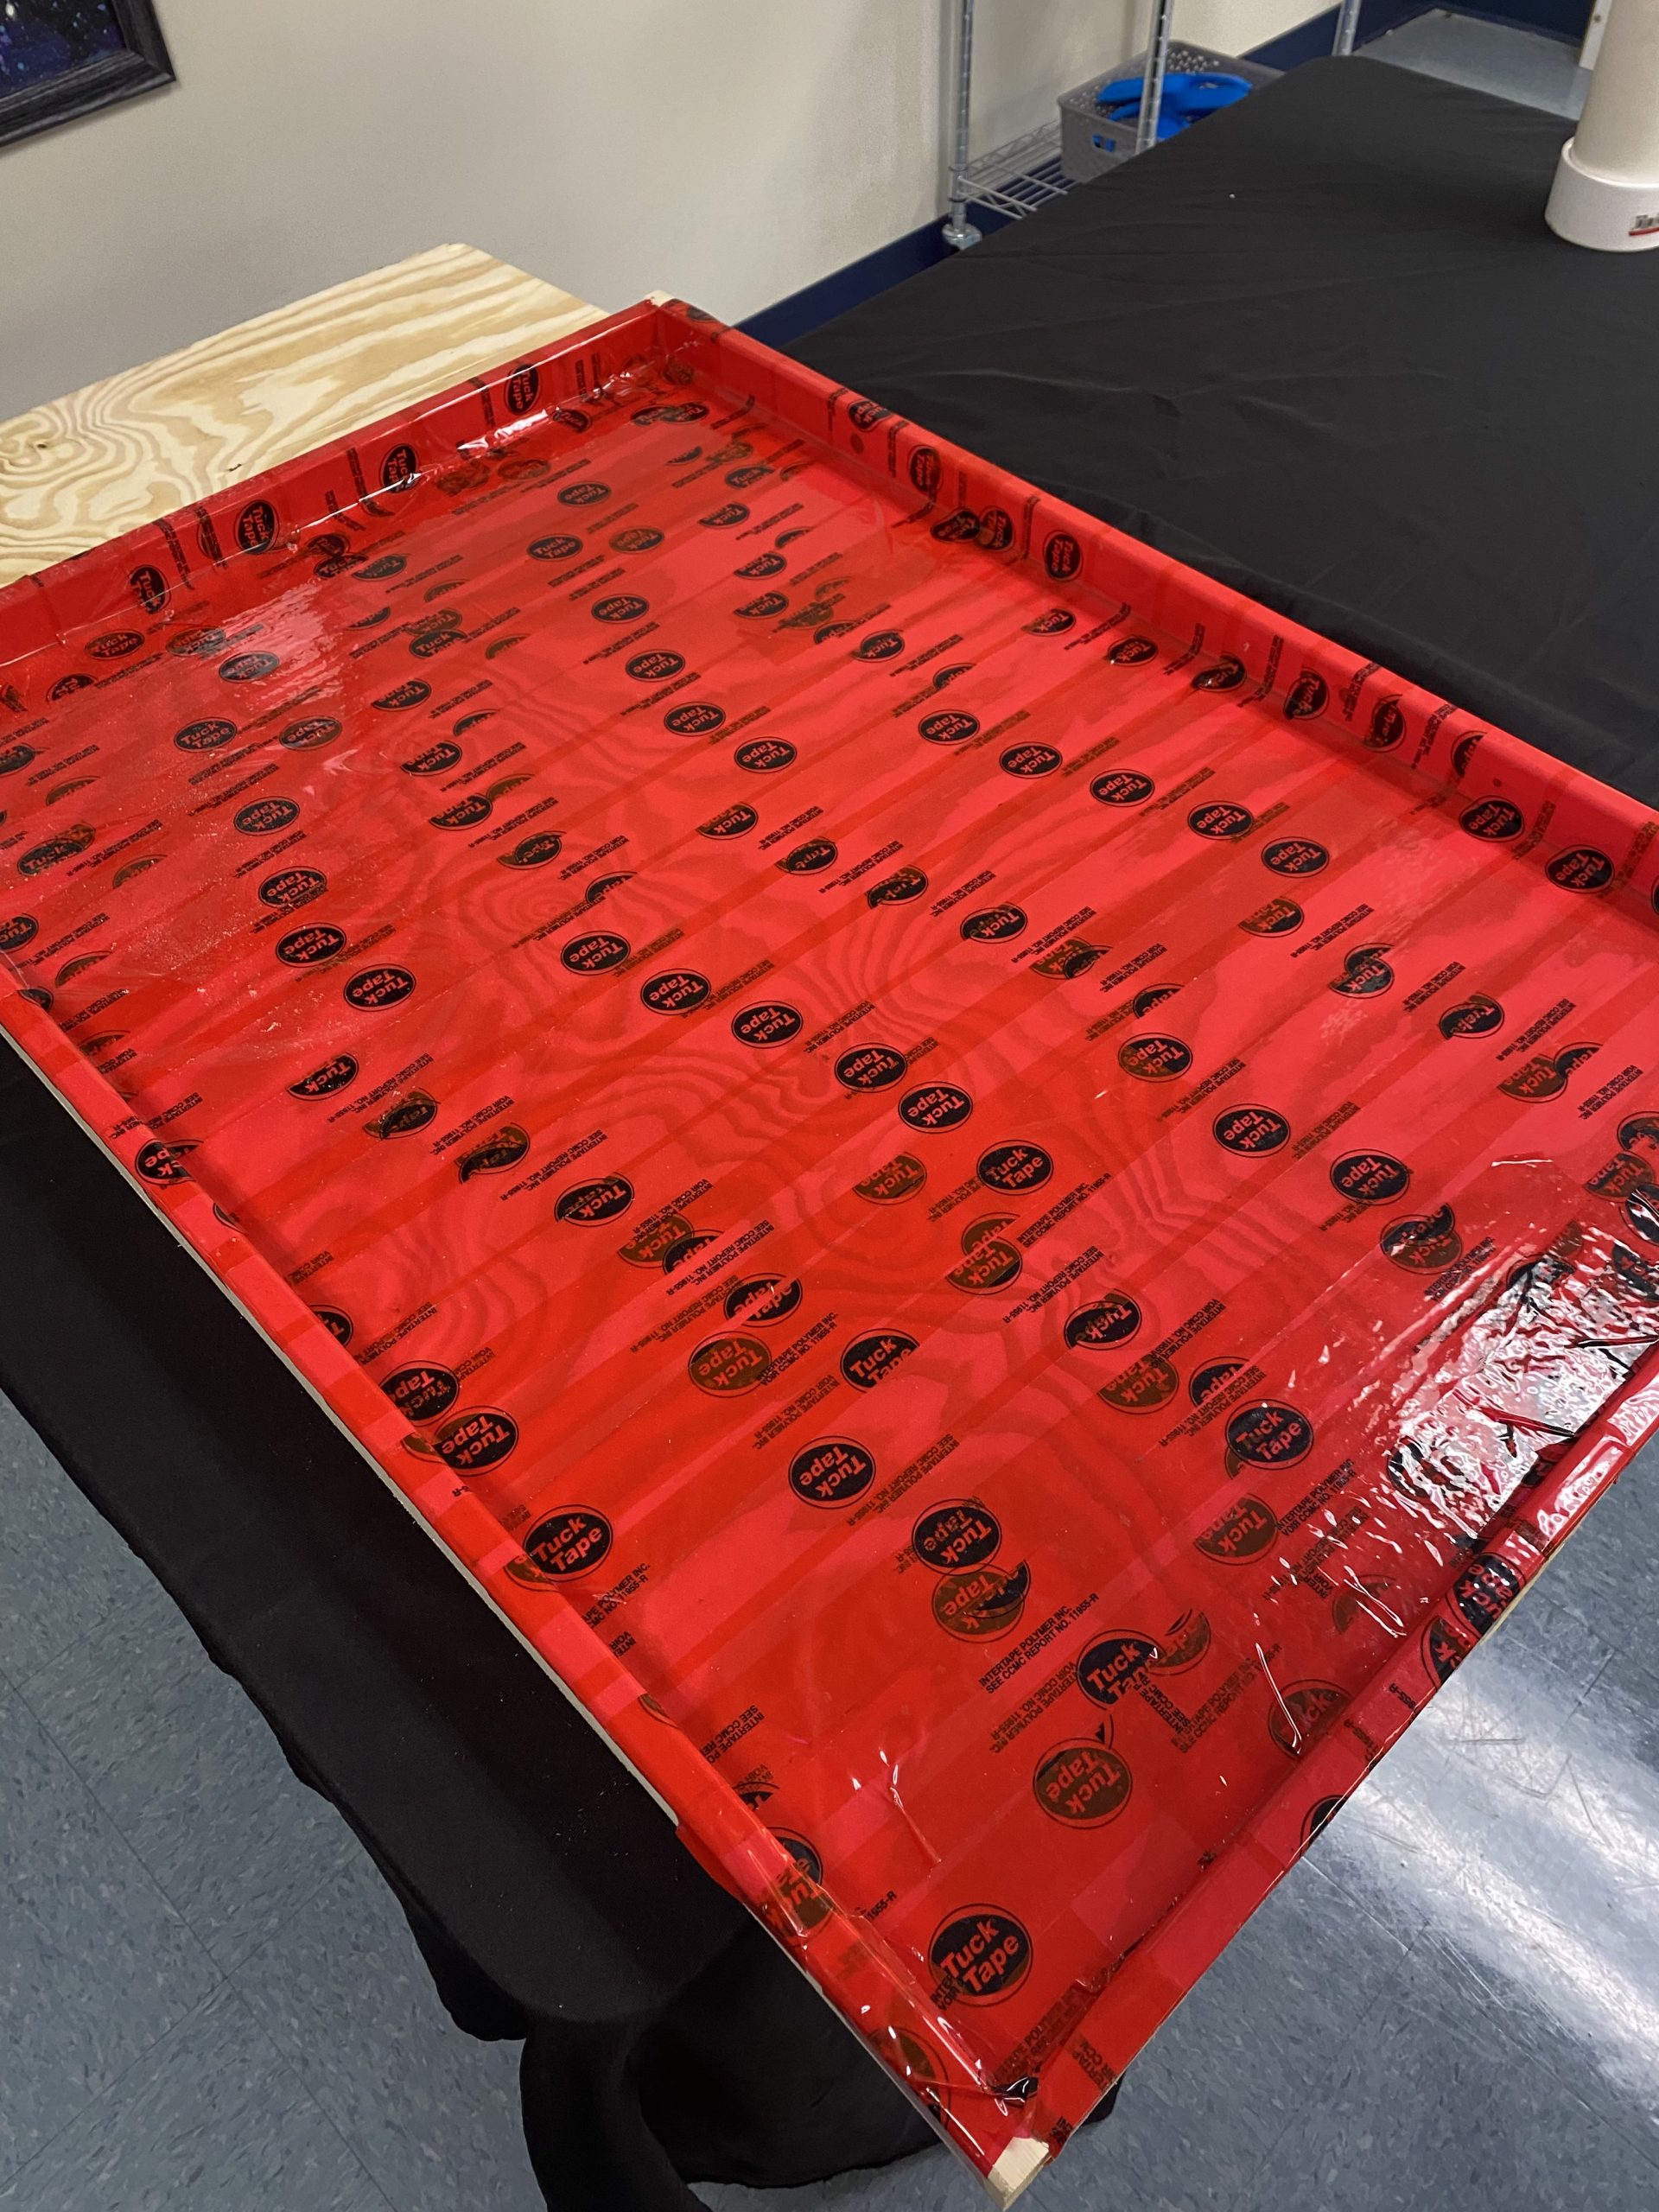 stick to the wood. This project was fun even though I didn’t get to finish it. I can’t wait to finish it!
The rocktopus
https://www.thingiverse.com/thing:5518084
The rocktopus is one of many variations of the thinverse octopus modle, being single print. The amount of variations of the roctopus itself is rather large on the site. This is the version with the sprite glasses designed as a keychain.
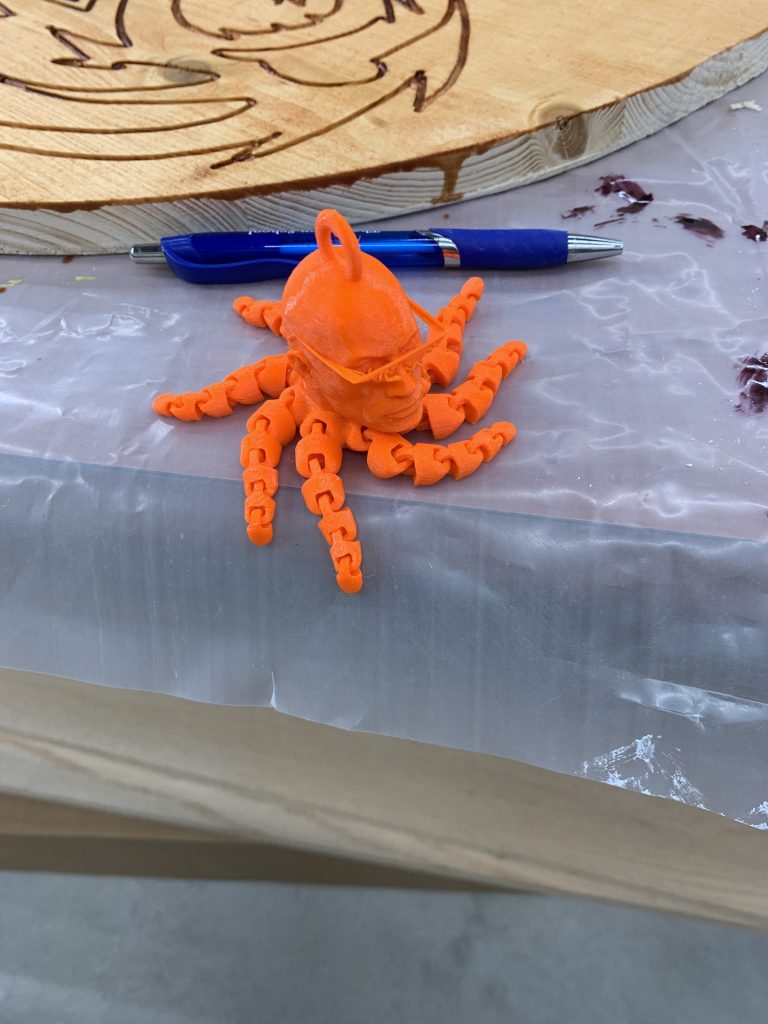
The glasses were too flat, and were mangled upon printing. The rest of it turned out fine though. The way the tenticals work is by having gaps in the print so the peices dont stay static, while having joints to keep them in place. There is a bar running through each segment of the octopus tenticals, with a gap of space behind it. The other end of the segment (save for the tips) features a circular clip thing that holds onto the bar, and can move around the bar to get some angles verticaly and horizontaly. Over all, a pretty cool design.
The one Print Transformer!
For this project, I found this creator on youtube who made single print transformers: Talmage Madsen.
The channel link: https://www.youtube.com/c/TalmageMadsen/videos
I chose Kombitron, who took the vehical mode of Volkswagen Bus.

For the robot mode, the arms are attached via a ball/socket joint with an indent on the top, attached to hinges on the torso for some backwards butterfly joint movement. the legs and head are attached to the body via a hinge joint. The robot gets printed out in a T pose, with the roof of the car (the sides of the arms facing the plate. Due to the lack of connections and the specialised cavities in the print, the robot is able to move and transform.
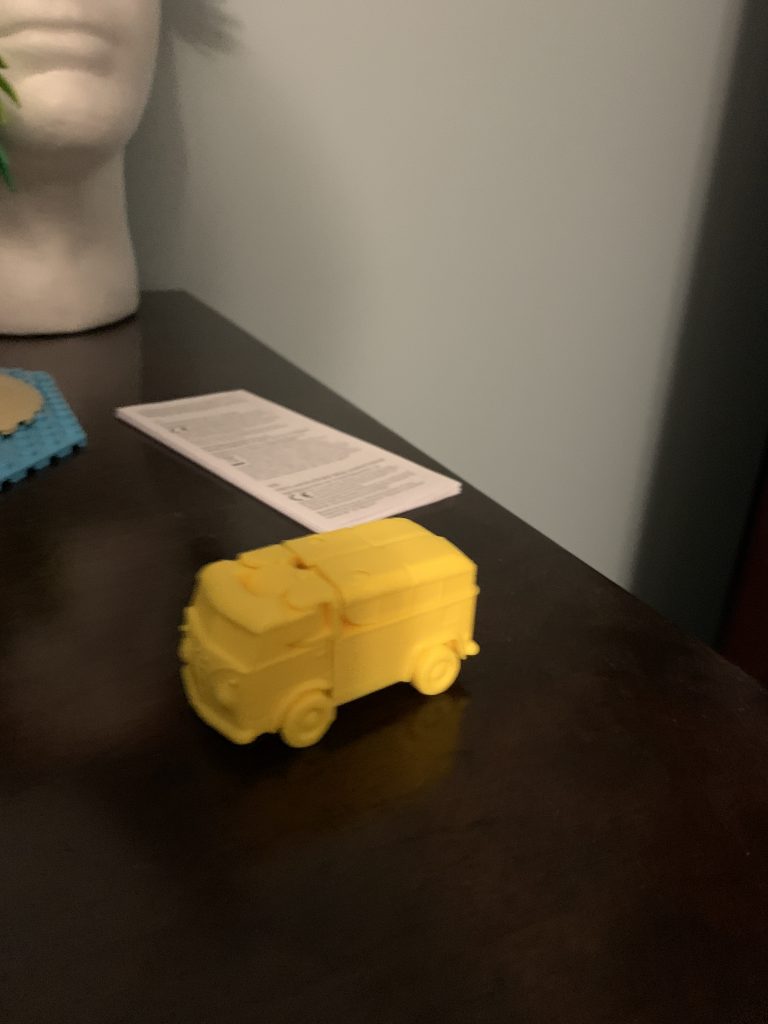
In vehical mode, it does look like the Volkswagon, which is pretty cool.
This is the video from the creator of Kombitron of the transformation. There are more videos on the other single print transformers he has made on his channel.
Posters

Table 2
This quarter Blas and I have been working on our second table. We poured the epoxy and sanded the sides of the table. We came across a problem after pouring the epoxy. The epoxy was not mixed correctly and in a small part of the table the epoxy did not cure completely. To solve this problem we heated the area with a heat gun and wiped isopropyl alcohol over the area. This took off a little of the non cured epoxy but not enough. We have not came up with a solution to fixing this problem yet.


Uncured area of the table top,
Triangular Puzzle
One of the projects that I have made is a triangular puzzle. I made a design with many different sizes of rectangles and patterned them randomly. Then I split the pattern into 16 smaller triangles that together made one big triangle and left a border around the big triangle to hold the puzzle pieces. I overlapped some of the patterns onto the border so that you know where to put the smaller triangles and the puzzle is solvable. I wrote the number of where the pieces go on the back of the smaller triangles so that if it is not solved you know where the pieces should go.


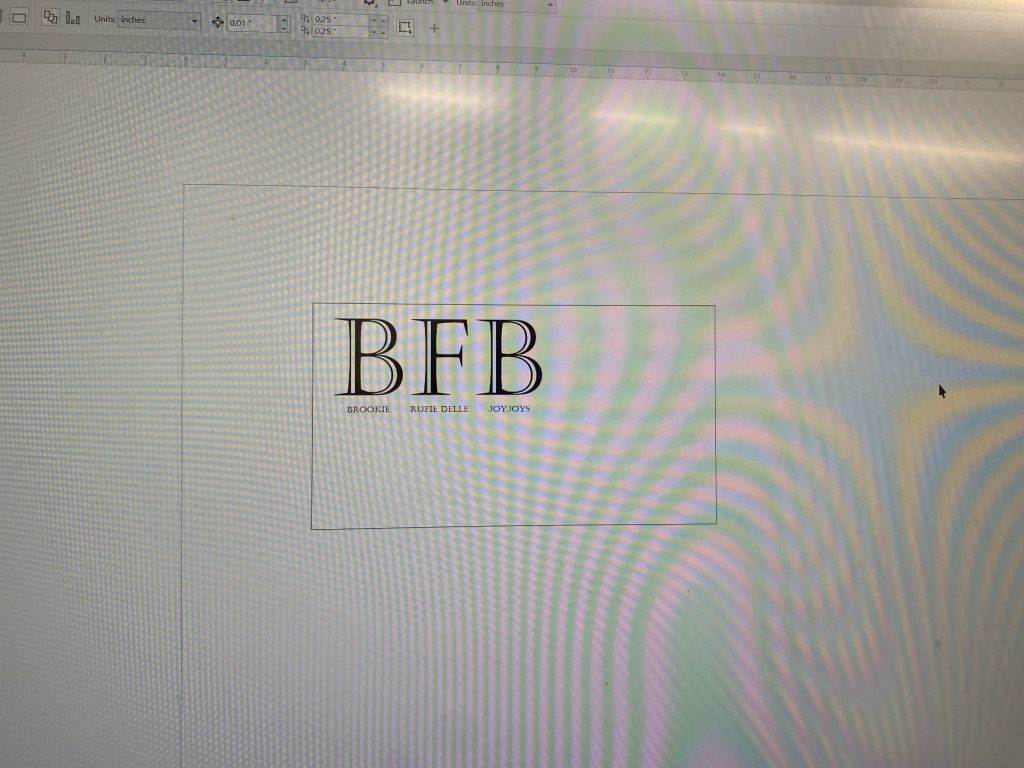
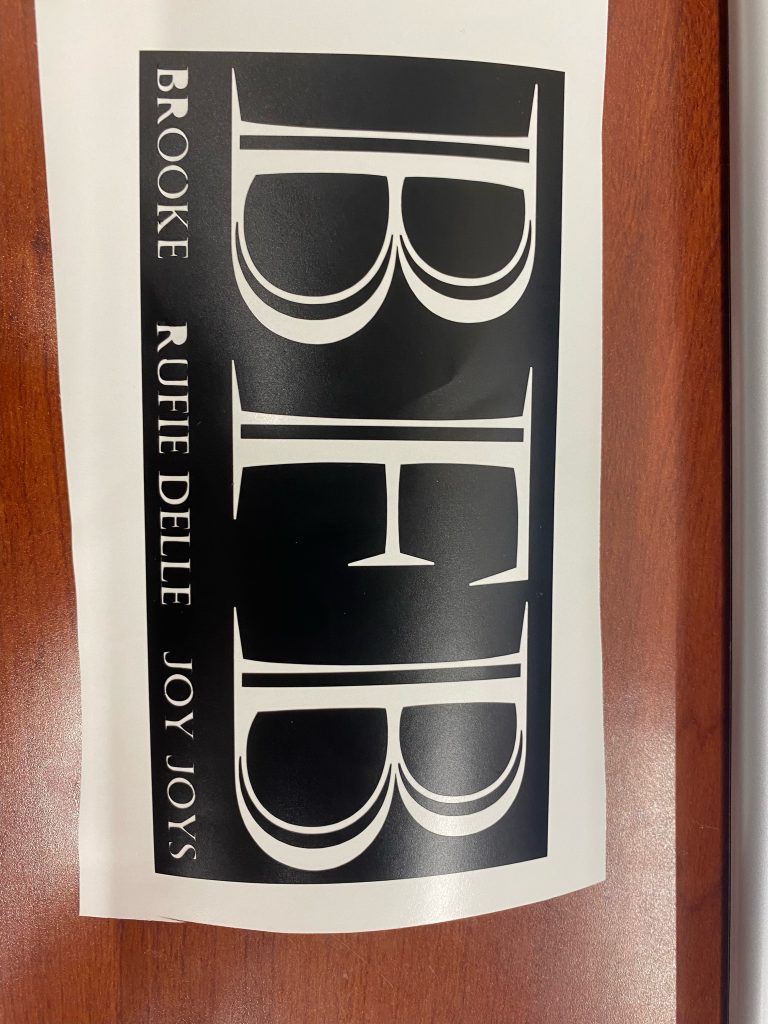
Decals in Q2
In the previous post, I explained how the test run stickers will help us with our future decals creations. For the decals we plan to make in the second quarter, we want to make them personalized. If those turn out well, then we will potentially advertise them to Makerspace Business for others who are interested. We are hoping the test we did in the first project will be able to help us customize the decals as we want them, and then potentially others who show interest. Between the three of us, we’ll likely have many more test runs before the final product. From there, we are uncertain as to how far the decal project will take us, but we will have a better idea as the time goes on. If there is a lack of interest, we plan to start another project by the end of next quarter, hoping we have satisfied our own goals.
Decal Prototype Project
For my makerspace project this quarter I worked with Joy and Brooke to make stickers as a prototype for a future larger project. The hope is that we will make decals for our cars, personalized to our desire. For our test run, we decided to print out BFB, with our names below it. This idea came from a previous project Brooke and Joy did together in makerspace. They loved what they did, so we decided to redo it, hopefully a little bit more advanced. We designed and edited our idea on Corel, trying to figure out exactly what we wanted it to look like. After this, we printed them out.
For the test run we were originally planning to put them onto hoodies, but because they are just a model we decided to simply print them out. Based on what decals we decide to make later in the year, we will adjust size, color, font, along with other necessary details.

Recent Comments