Tri State Area
Makerspace at the Fulton School
Ideas for future maker-space projects
For my future projects I have amazing ideas that would include the maker-space walls it’s actually an idea that me and my partner in crime ella we’re gonna start at the previous school so we decided it would be fun if we continued the idea at this school. The process of what we were are gonna paint is to discussed.
Fixing the earbuds!!
This term I am gonna be honest I haven’t been to maker space lately. However I have these wireless earbuds called trek air and a piece to fit on my head was broken which meant it was too big. So being the smart person I am I went to doc to help me fix them. The process of how I fixed these expensive earbuds is we took a piece of electrical wire and used some extra strong tape to wrap the wire in against the piece of the earbuds piece that is broken and it took a couple times to get it just right but than it was fixed! I would show a picture however I don’t have one.
Shapes
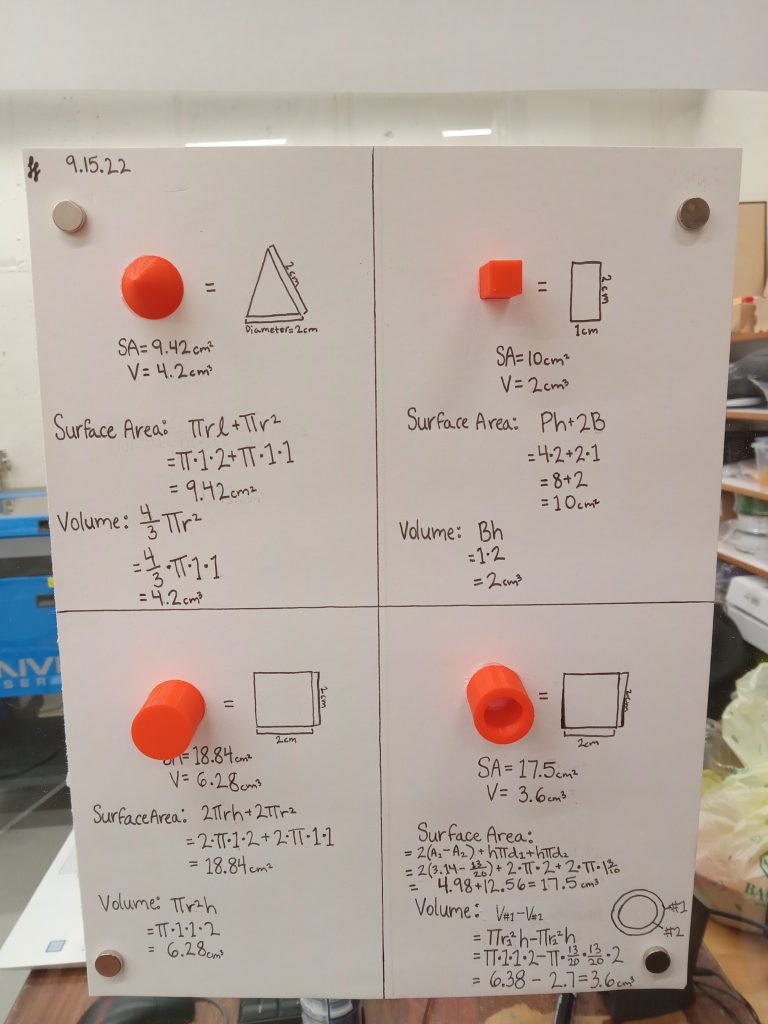
In geometry, I made these shapes on the computer platform, OpenScad, and then 3D printed them. Then I found the surface area and volume of each using the equations found in the images. They are now used in the math room for geometry references.
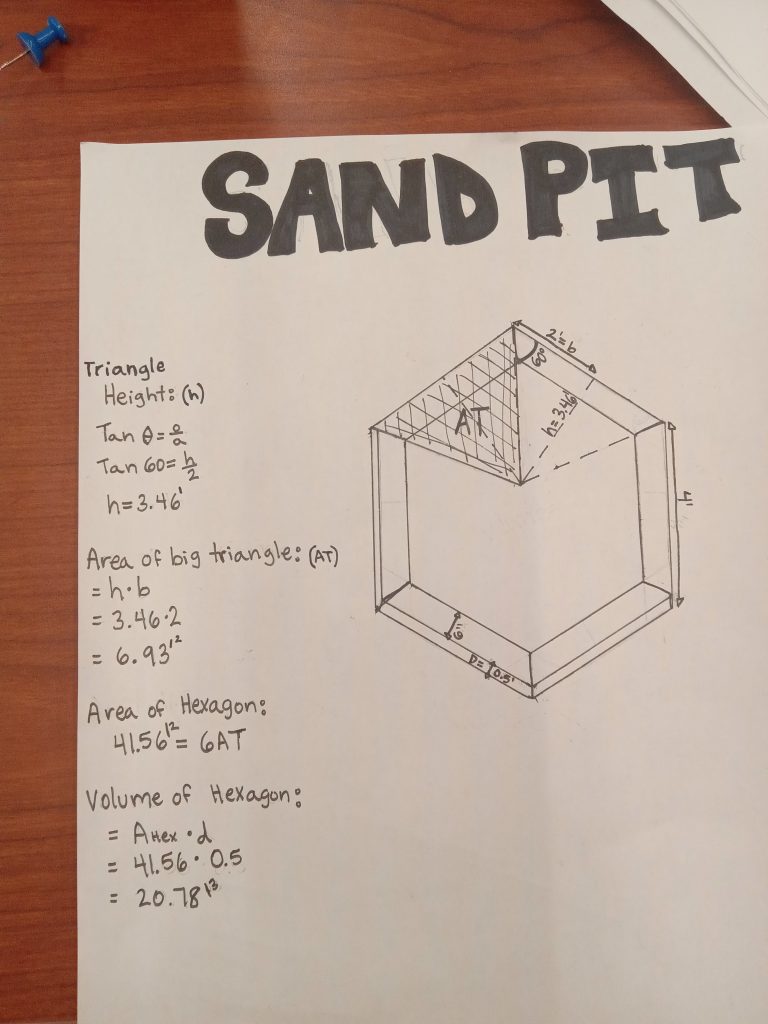
Sand Pit
In geometry class I am making a sand pit for the lower school classrooms. All the equations I used to figure out the surface area and volume are included in the picture. I will start building it once we get all the materials.
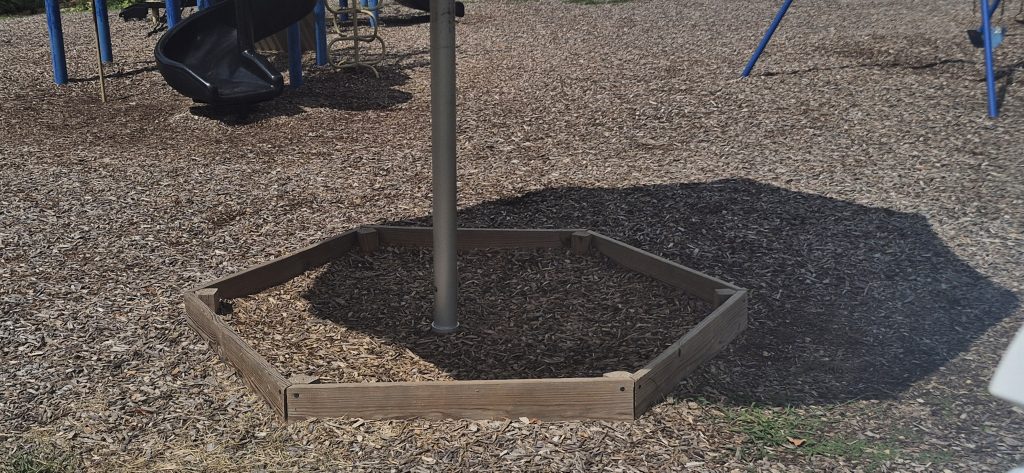
Here is the final product, designed by me and built by the junior boys.
Wooden Penguin

My first creation in Makerspace is this wooden penguin. Since couple of years ago, all my friends told me that I look like a penguin, so penguins became my favorite animal. Because I wanted to create something simple but cool for my first creation, I made this penguin.
The process of making the penguin was not that easy always. First, I picked a photo of a penguin in the internet. Then, I drew it on a paper and transferred the drawing into the computer. Once the picture is in the computer, I started making all the lines in a program for the laser. This process was the most tedious one, because I had to draw all the curve lines and spaces.
Once I finished the shape of the penguin, I just had to laser it with a piece of wood to make it real. Since I have the shape, I can (and I did) make more than one copy. The end result was amazing and for being my first project it’s incredible.
Website Development
For the fourth quarter, I continued to develop a website for the existing World Wide Technology project. I wanted to make it possible for individuals to enter their information on the profile page of the website and have all the added material saved. Due to time, I couldn’t make it to the step where the information would be saved, but the basic outline and design of the website were created.
To start, I created a new HTML document on Atom to write out the general outline of the webpage. This included all of the different items that were to be present on the page. The actual style of the website was made on a different document and frankly isn’t very elaborate. Both pages can be found below.
Next, I created a document to define the role of the “save button” at the bottom of the page. Along with this, a “serverconnection” document was made to connect the server that would save the data with the website (save button), but due to time, it is currently blank and won’t be necessary to preview.
Link to webpage: file:///Users/brookeleonard/Documents/ProgrammingWebsite/SSD.html
Code for page:
<!DOCTYPE html>
<html lang="en" dir="ltr">
  <head>
    <script src="jquery-3.6.0.min.js"></script>
    <title>Social Student Directory</title>
    <link rel="stylesheet" href="somthing.css">
  </head>
  <body>
    <h1>
      Social Student Directory
    </h1>
    <br>

    <img id="profilepic" src="brooke.PNG" alt="Profile Picture">


    <div id="studentname">
        Name:
      <input type="text" id="name" title="student name">
        Nickname:
      <input type="text" id="nickname" title="student nickname">

    </div>
    <br>
    <div id="grade">
        Grade:
      <input type="text" id="grade" title="student grade">
        Age:
      <input type="text" id="age" title="student age">
      <br>
      <br>
    </div>
        Bio:
      <br>
    <textarea id="bio">
      Type here


    </textarea>
      <br>
      <br>
    <div id="hashtags">
        Hashtags:
      <input type="text" id="hashtag" title="student hashtags">
    <br>
    <br>
    </div>
      Identification Tile:
      <br>
    <img id="tilepic" src="doctile.jpg" alt="Tile Picture">
    <br>
    <div id="QR code">
        QR Code:
      <input type="text" id="QR code" title="Student QR code">
    <br>
    <br>
    <input type="button" id="Submit" title="save" value="Save">

  </body>
  <script src="newprofile.js"></script>
</html>
Code for style:
  body {
    background-color: lightgrey;
  }
  div{
    border: 2px solid grey
  }
   .FirstClass{
      border: 5px solid black;
      border-style: outset groove;
    }
    button {background-color: blue;
    }
    #DeltaDiv{border-style: inset groove;
    }

#profilepic {
  width: 400px;
}

#tilepic {
  width: 200px;
}
Code for save button:
submitbutton = document.getElementById("Submit");
submitbutton.addEventListener("click",savedata);

function savedata(){

  name = document.getElementById("name").value;


  nickname = document.getElementById("nickname").value;

  data = {
    "name": name,

    "nickname": nickname,

    // (continue later)
  }
  console.log (data)
}
Stickers
Sofia and I made stickers this quarter. Some examples are the ones we have in our lockers. We made a S and a L. We also made gremlins because Super Gremlin is our song. We searched for pictures on the internet, than we copied them into a separate document. The hardest part was remembering all the steps. We printed them out and stuck them to our lockers.

Continued Chair.
Over the past couple of months I’ve been working on re-purposing a chair that was an orange chair. I painted a black chair black I am still currently doing touch ups. I plan to next year in the new school continue my work and paint designs on it. I feel very happy with my Makerspace projects this last semester and I’m happy that I got to start something in The Fulton School at Saint Albans’ location and transfer it to the next location, Chesterfield Day School.
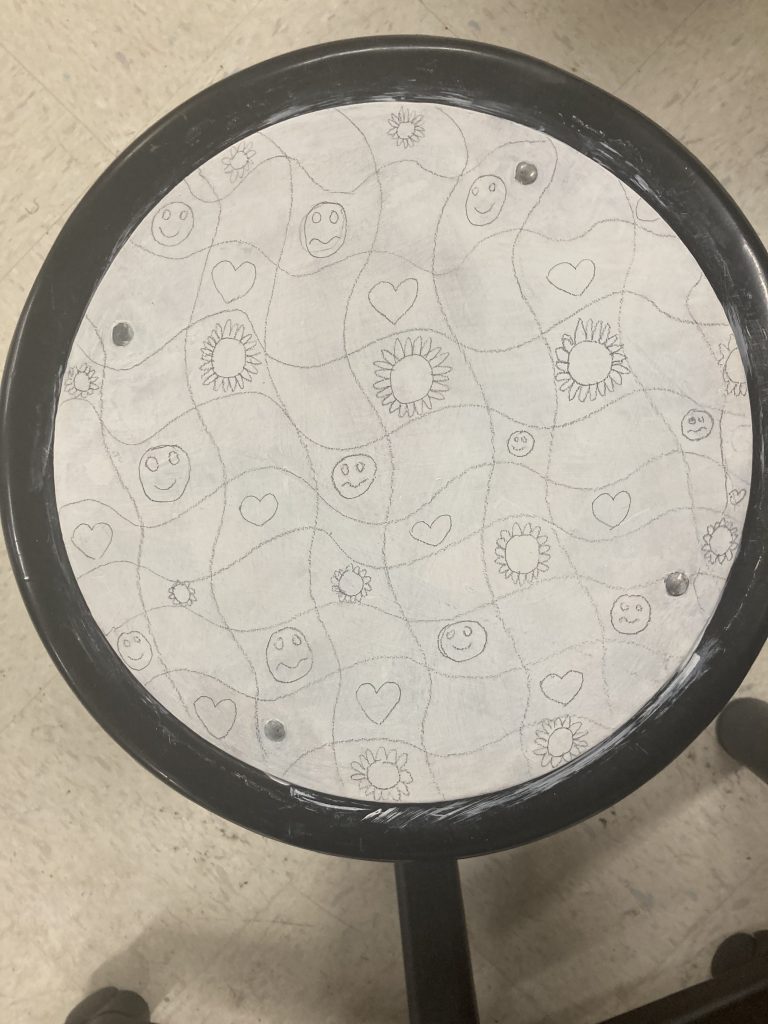
A Stool in Progress
During the 4th quarter, I did not come down to makerspace much because I had other school assignments going on. I did paint another stool white and I have a sketch laid out on it, but I’m not sure if I’m going to keep the sketch yet and paint it. The current sketch I have is like a squiggly checkerboard pattern with alternating flowers, faces, and hearts in the squares. I won’t be able to finish the stool and paint it this year, so, I’ll probably finish it next year! I think this is the last stool I’m painting for a while because I’m getting tired of painting stools.
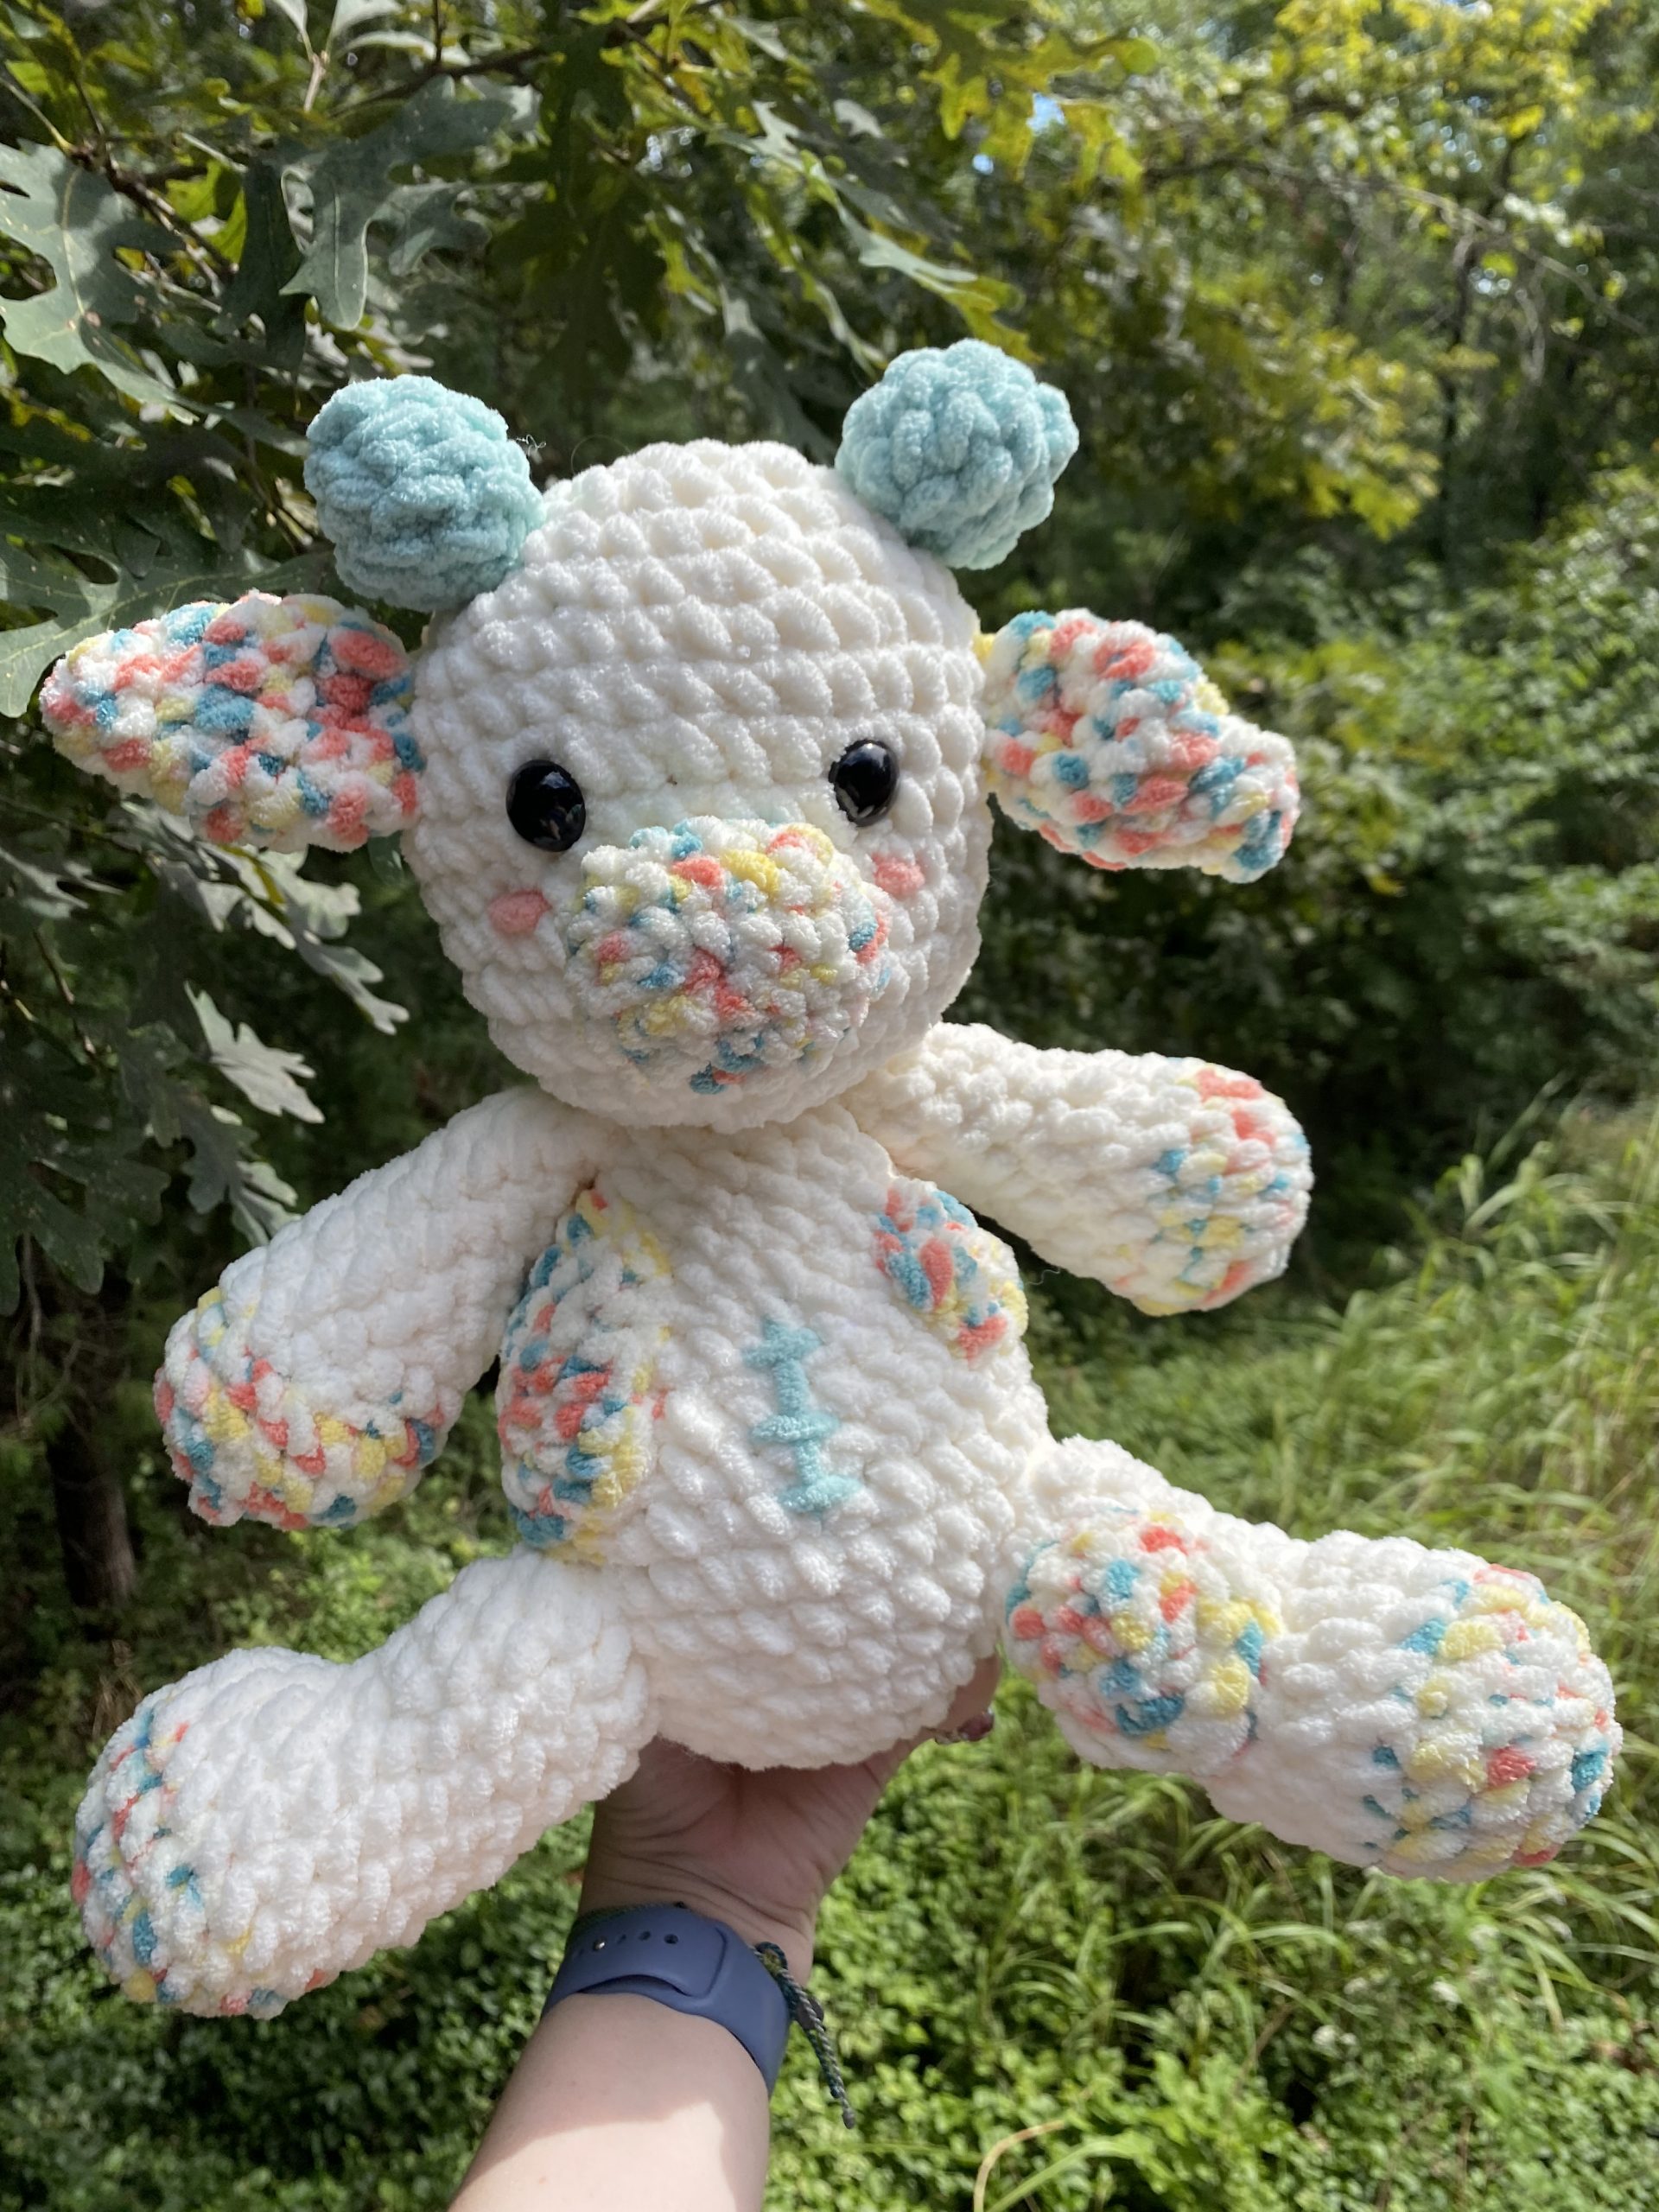
Crochet Business
This quarter in maker space I worked more on my crochet business. I did a LOT at home to improve my etsy site and make it more organized. I crocheted a lot, even if I wasn’t in the makerspace. Here is a picture of one of the animals I made. I really only crochet something called amigurumi. It’s a type of crochet that works on top of it’s self to create 3-D objects. I usually make animals, but you can create replicas of objects or even people.
. 

Recent Comments