Tri State Area
Makerspace at the Fulton School
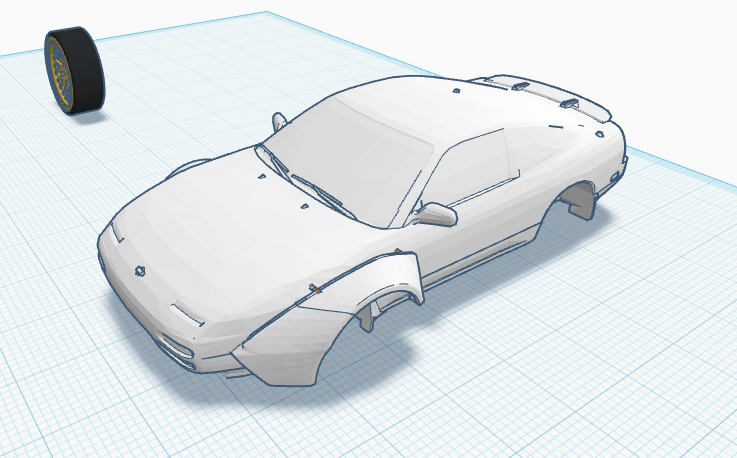
Spear and Custom widebody kit.
During Maker Space, I have been working on a series of projects,
One of those projects is a custom widebody kit for a car. Using tinker cad I found an unfinished Nissan 240sx, I decided to make a widebody kit for it. I will make the car without any modifications but add little clips to it to clip the widebody kit. It’ll be 3d printed, and when done, I will add LEDs to the bottom of the car for a nice underglow and possibly headlights. I am also designing custom wheels and suspension for it.
So far I have learned the precision needed to get a perfect fit for the widebody kit as well as how next time I will not be using Tinker cad due to the unprofessional tools.
Another thing I have been working on is a spear. I found a stick in the woods and got an idea to make a spear. First I skinned the bark off the stick to get a smoother surface. Currently, I am in the process of sharpening and shaping the spear. When done with sharpening and shaping the spear, I will burn native designs onto it, giving it an old yet astounding look. In progress, I have learned that it is necessary to take measurements before chiseling or cutting into the spear, as well as some native designs.
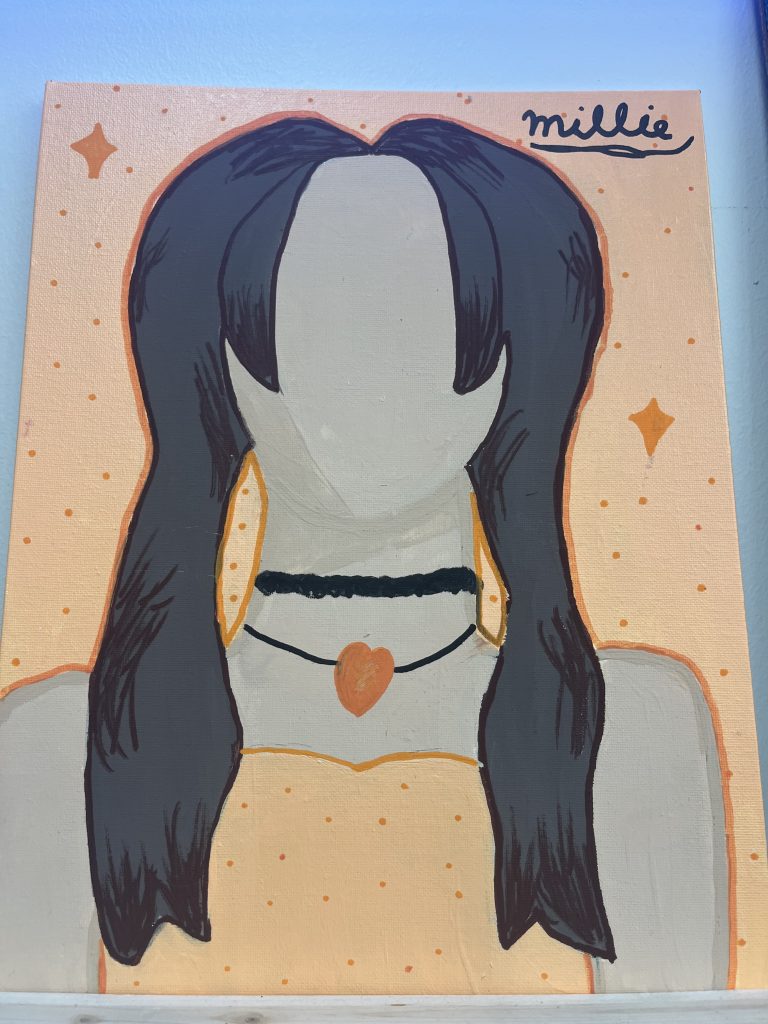
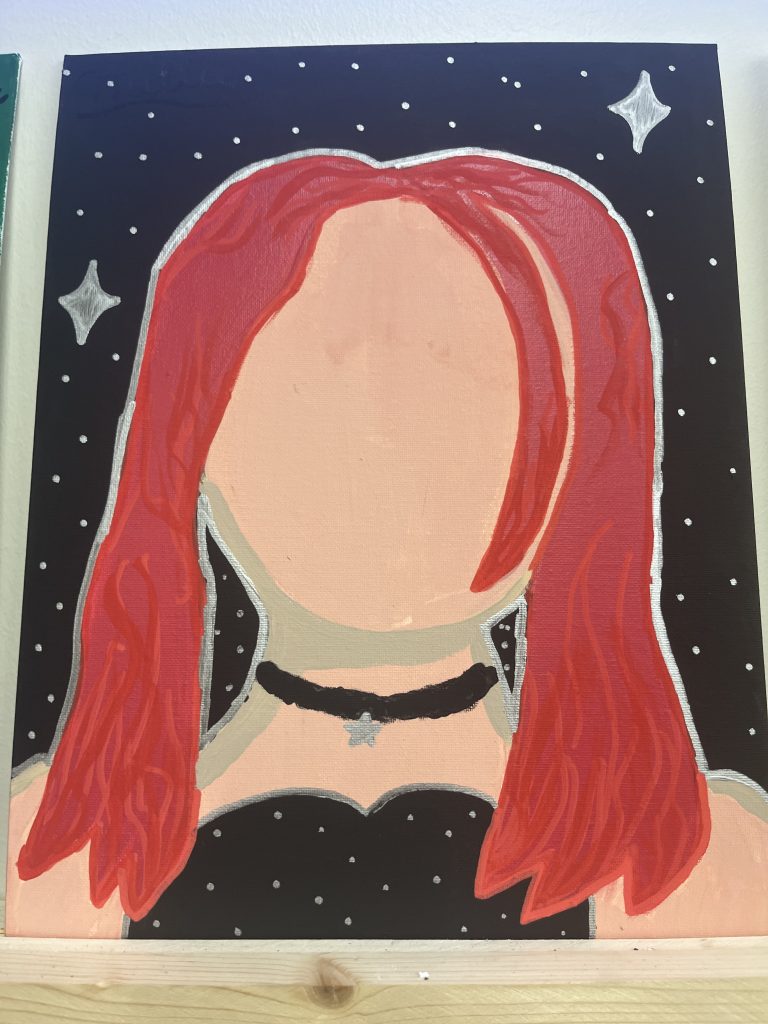
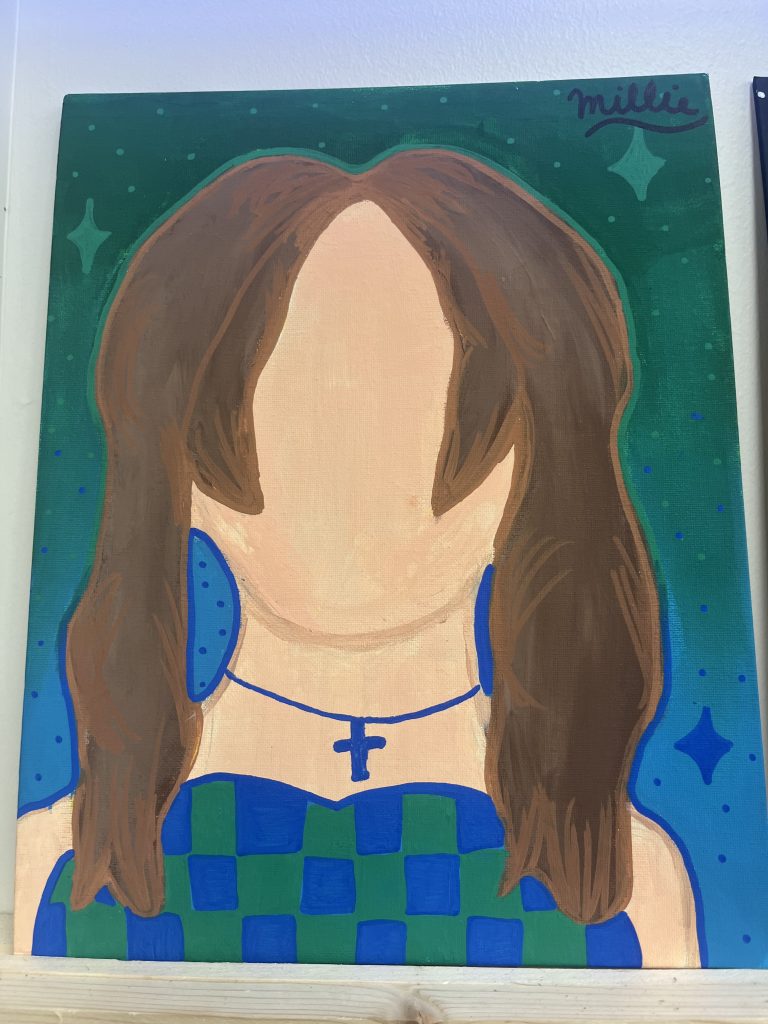
people paintings.
for my maker space project one of the many things I have done this quarter is paint people that go to my school. I have painted 3 people so far. Sophia, Lily, and Anisley. I did all of the paintings in different styles based on what the person I was painting wanted. It was challenging because I had to mach the skin colors and hair colors. I was pushed out of my comfort zone because I’m not used to making a real person, normally I draw people from my imagination. For my net painting I hope to paint features on a person to make it more realistic. This project was very fun to do and I’m excited to see who I paint next.
Little coquette bow from string
I had a flower hairpin and didn’t like its design so I remade it to something I like more.
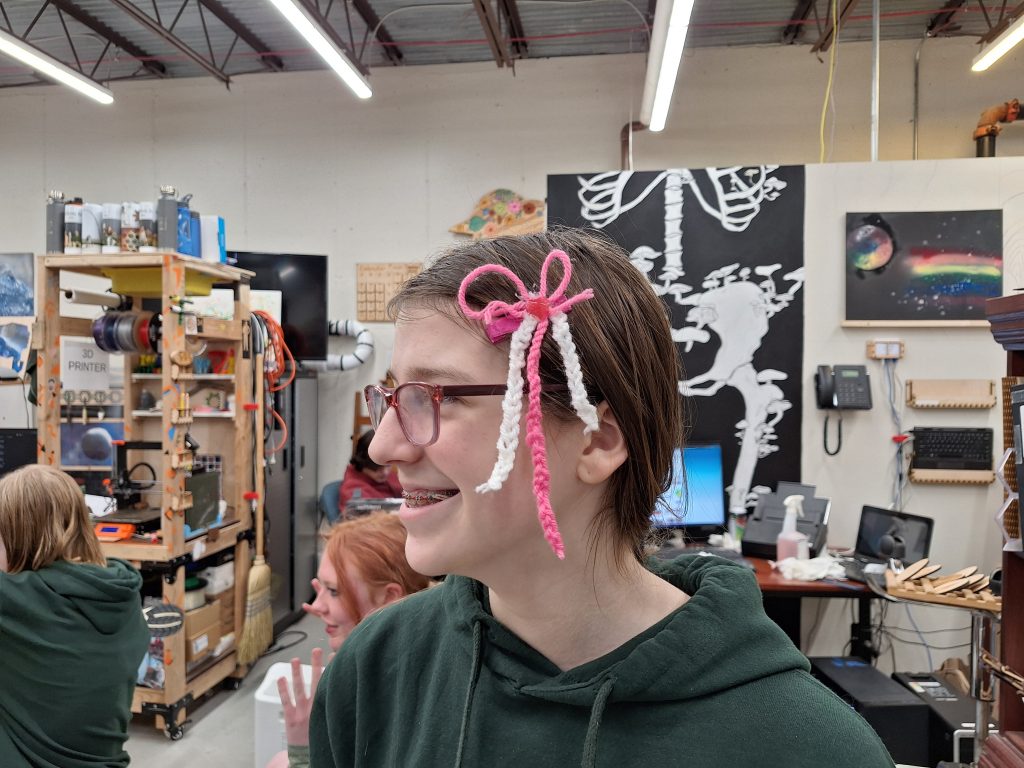
I had the idea to add crochet stings and yarn for the real bow part. There was the idea to add something else, so I “permanently borrowed” a little epoxy gem. I stuck it all together with hot glue I wasn’t super pleased with the product, so I’ll try to remake it with some other ideas. For the bow, I think I’ll hand make the loops and then add the strings on later. The next thing I’ll do is probably make the crochet strings shorter. I might add other things onto it as well.
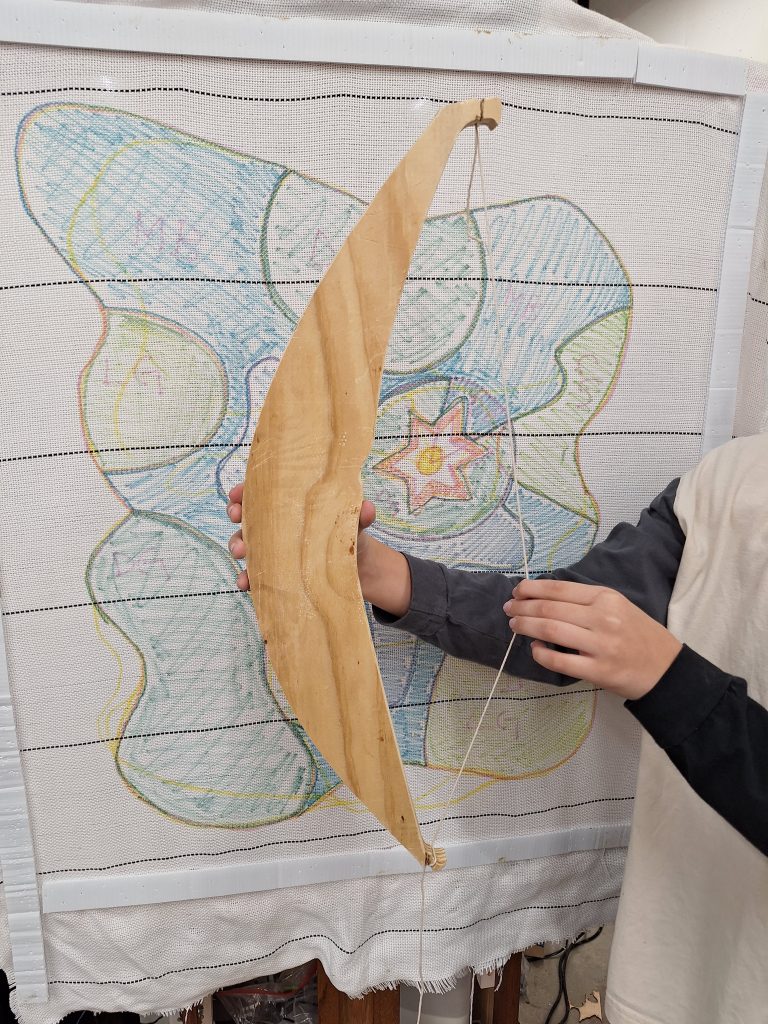
bow
I tried to build a bow out of wood. I chose a non-flexible wood so the projectile did not even fly. I also made the bow too thick so when you shot it it would just go to the side and not forward. the reason why it did not fly far is because the bow is posted to flex and because I chose a non-flex wood it did not fly. next time I would choose flexible wood and be less thick.
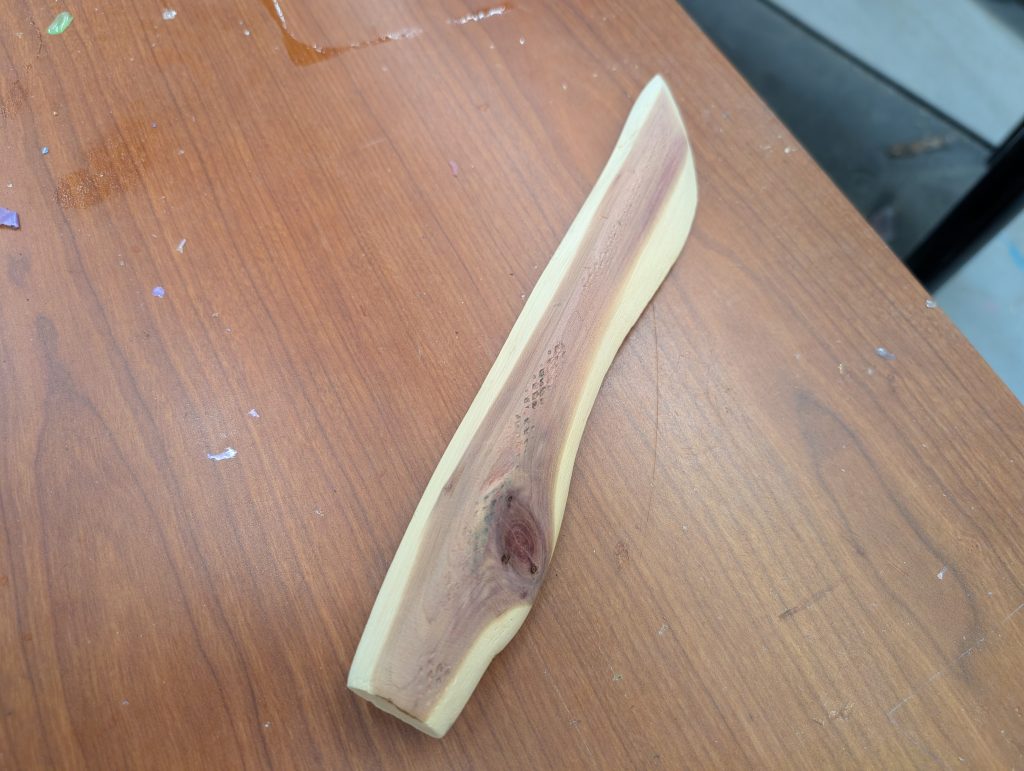
knife carving
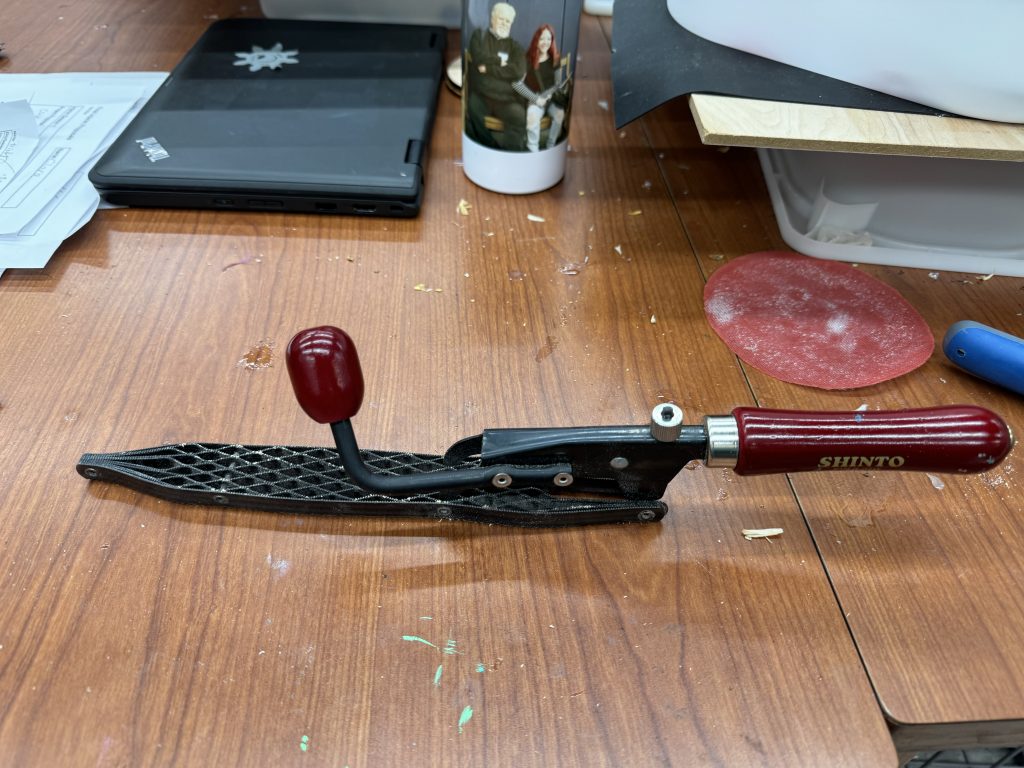
using the vise and tools like the rasp ,chisel and sand paper I was able to make a couple knifes and small swords this was more for practice than anything in hopes for make a really nice looking and feeling knife or another kind of carved item. I have also been working on carving mainly handles for knives so I can use a real metal blade so it can be truly useful.
Earing holder
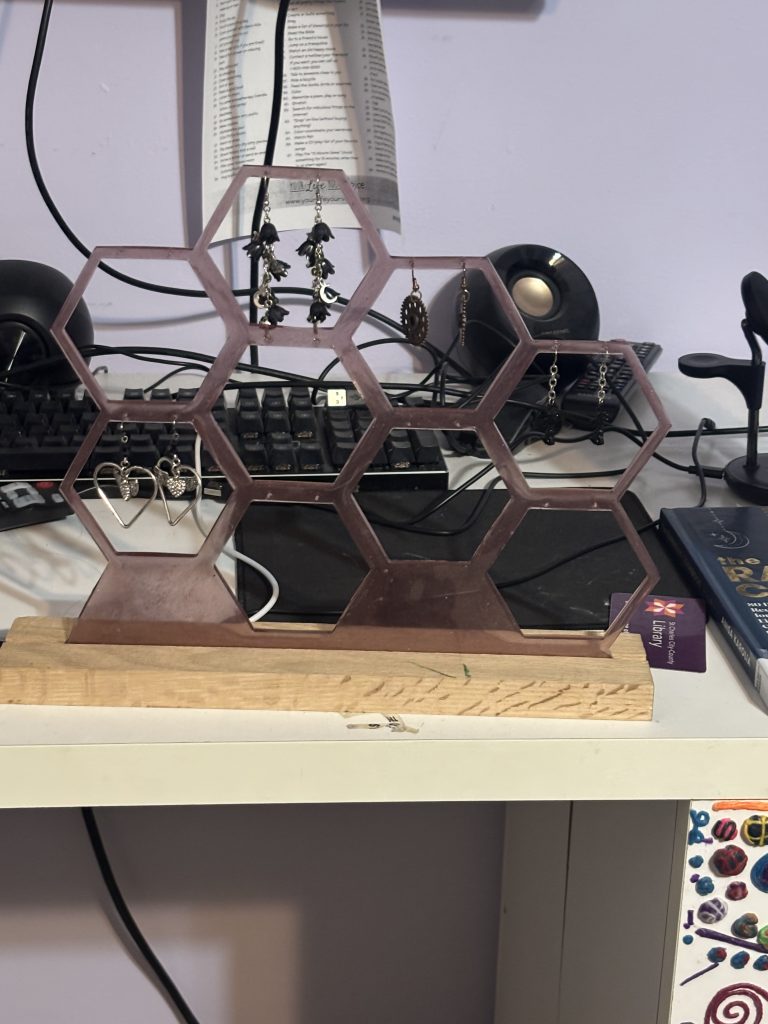
This is the earing holder I made in makerspace. To make this I mixed up some clear cast resin and made it my desired color. After that I poured it into the mold and let it cure. After the epoxy part was done I cut a slit into a piece of wood and put the epoxy earing holder in it to stand it up. I think it turned out pretty good it was quite simple to do, although something I would add would be LED lights on the sides.
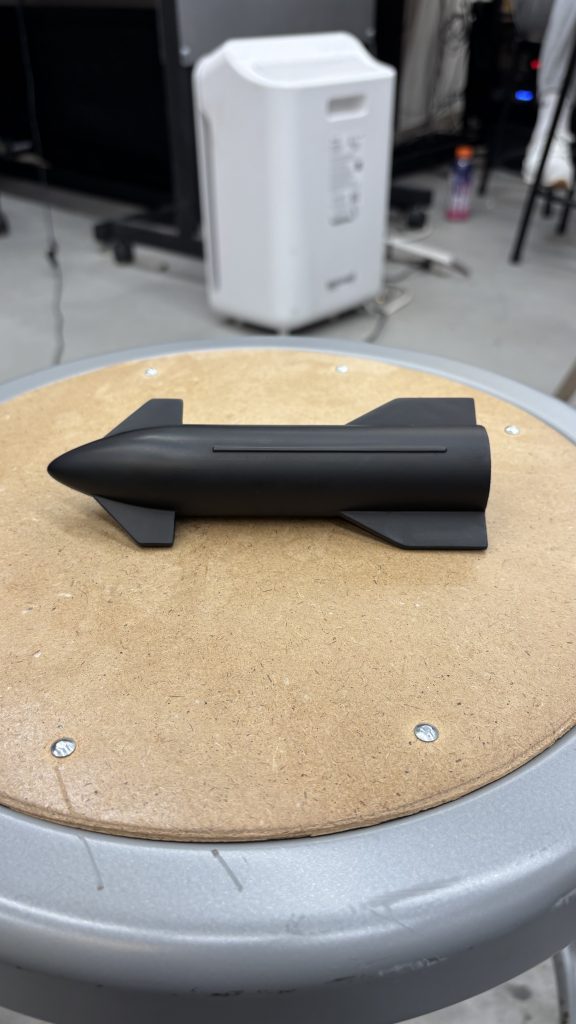
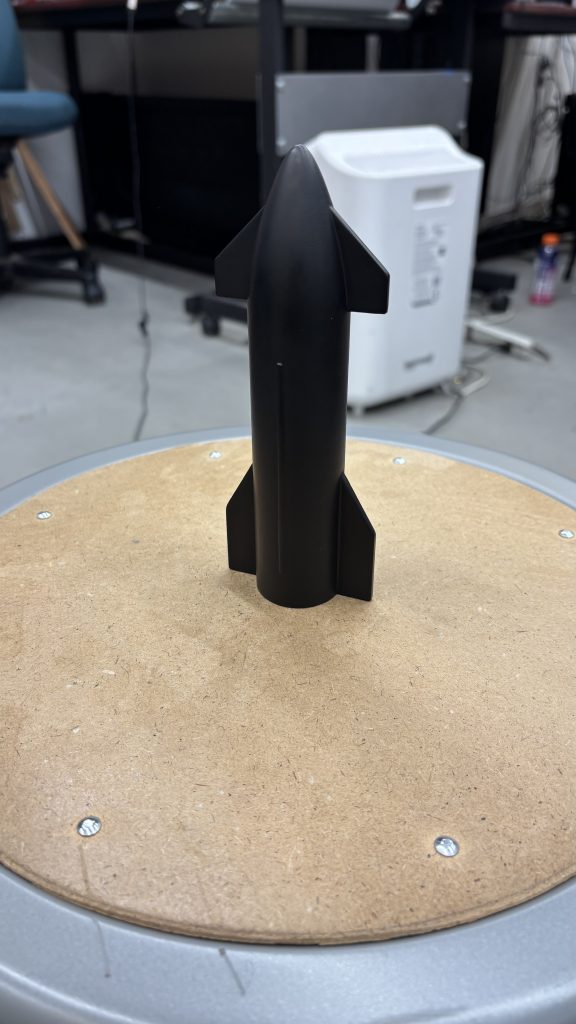
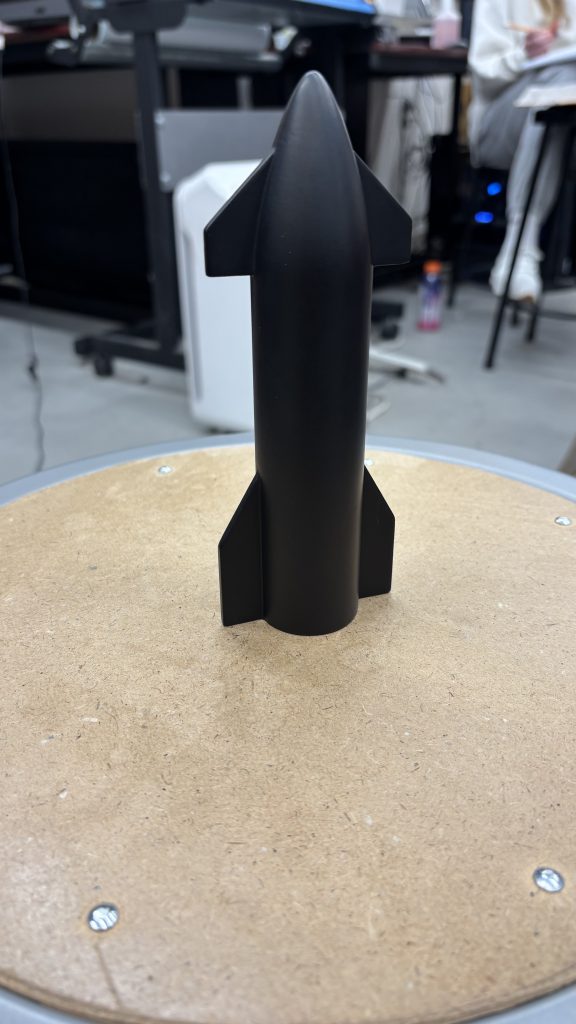
Starship
Me and damien are working together on our science fair project. Our project is to try and electroplate a 3d print in metal. We printed a model of Spacex’s Starship. We used sandpaper and filler paint to smooth the layer lines. After that, we coated it in 5 or 6 layers of a carbon conductive spray paint. We are planning to electroplate our model in zinc metal this week.
3D Prinitng at LHS Marketplace Craft Fair
(temp)
Marble hooks
Fidget Spirals
Benchies
Carpet
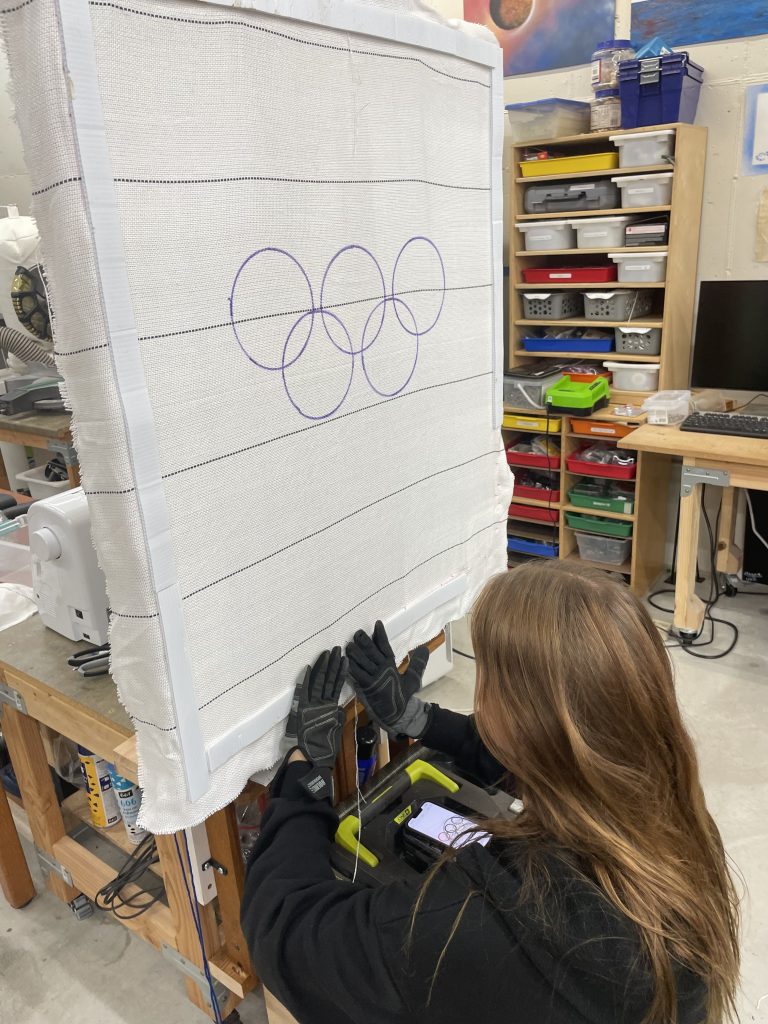
Basically over the summer I became very inspired by an athlete and all that was on my mind was her and her sport. As school started the olympics had just ended and because they were so recent- it was the only thing on my mind. I started out by drawing the the logo out on a piece on cloth. The cloth had to be pulled tightly on to a board of tacks. Then I got more detailed with the logo and started the back ground of the carpet. Then little by little I continued and literally just two days ago go done with it. I still need to put the back of the carpet on the carpet. I used glue on the back side of the carpet and then when it dried I shaved the carpet down.
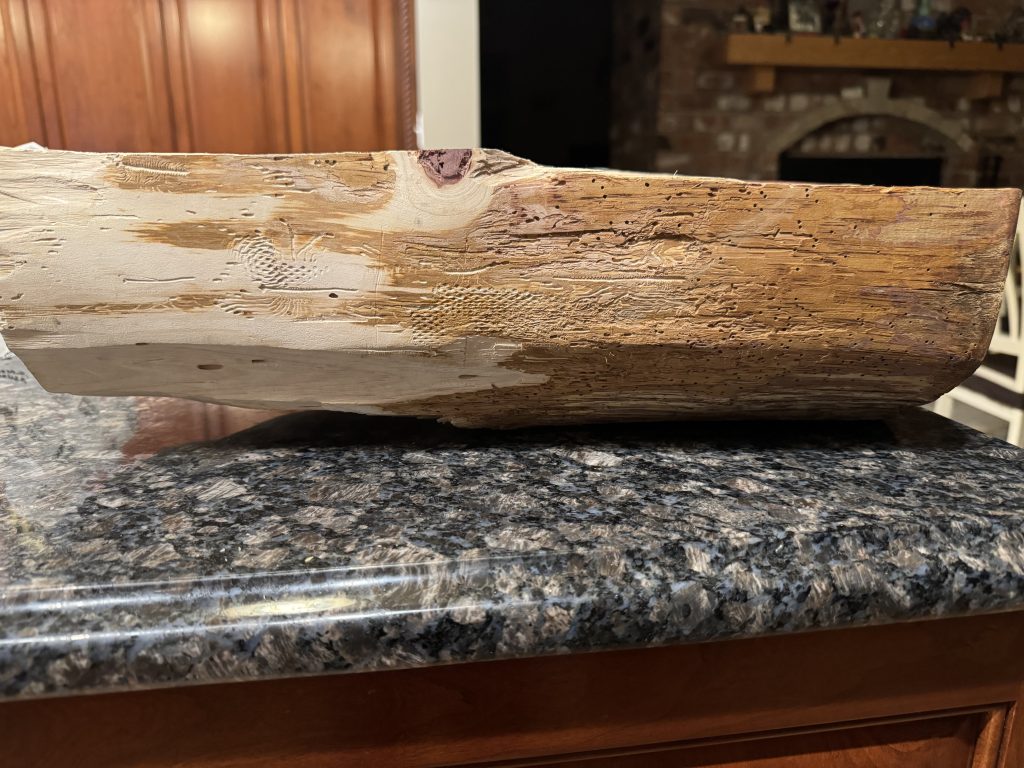
Makerspace Project
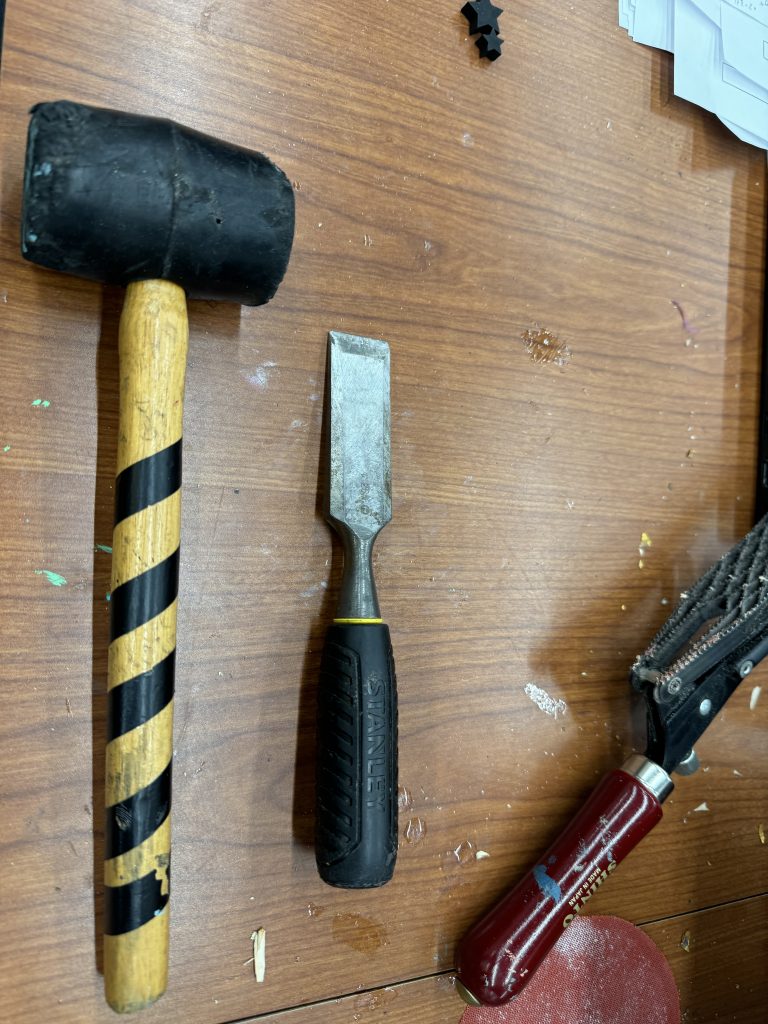
For my Makerspace project this quarter I decided to make a wooden planter for some type of plant don’t know which plant I will plant in it. First I started out log and cut it half with a hammer and a chisel then I began carving it out with a chisel which took awhile so after a awhile I decided to use a drill to get a jumpstart to my progress and make it easier because it’s was hallowed out. I continue with the chisel and am still working on hallowing it out. I used a rasp on the sides to get the even and smooth. Eventually I will seal it with either epoxy or some sort of mineral oil or maybe treat the wood so it won’t rot if it’s outside. I hope to finish this project in the middle of the 2nd quarter if not the end of the 2nd quarter

Recent Comments