Tri State Area
Makerspace at the Fulton School
Part One: The Idea and Vinyl Cutter
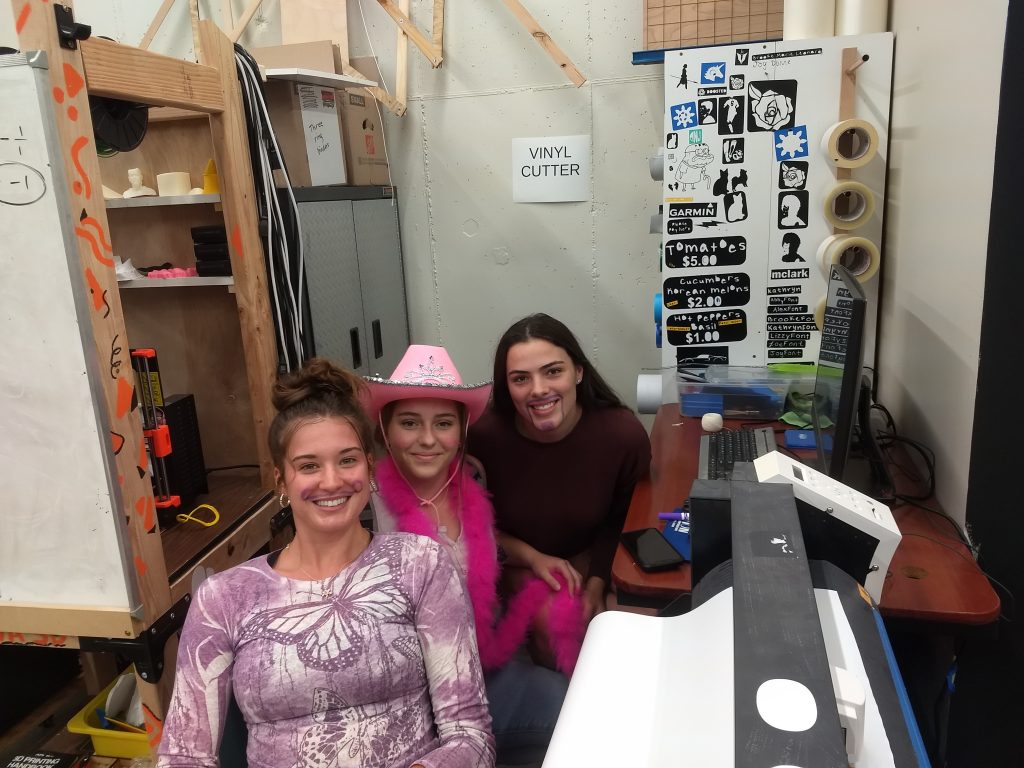
For this quarter Brooke, Ruthie and I decided to make decal stickers for our cars that signified out friendship, but also were personalized to each one of us. We got this idea from the name of our group chat and Brooke and I’s old shirts we made back in 8th grade. For the old shirts we put the nickname that signified our relationship and then had something individualized, for example I put hockey sticks on mine and Brooke put an old mustang on hers. We loved those shirts and those shirts helped us come up with this idea.
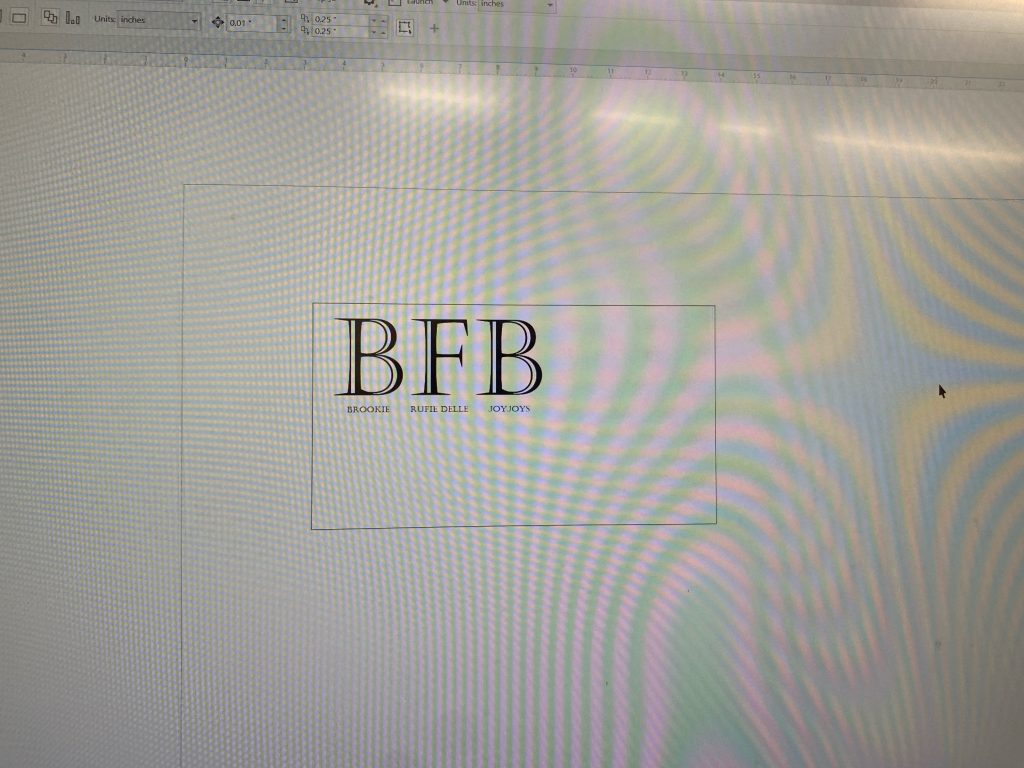
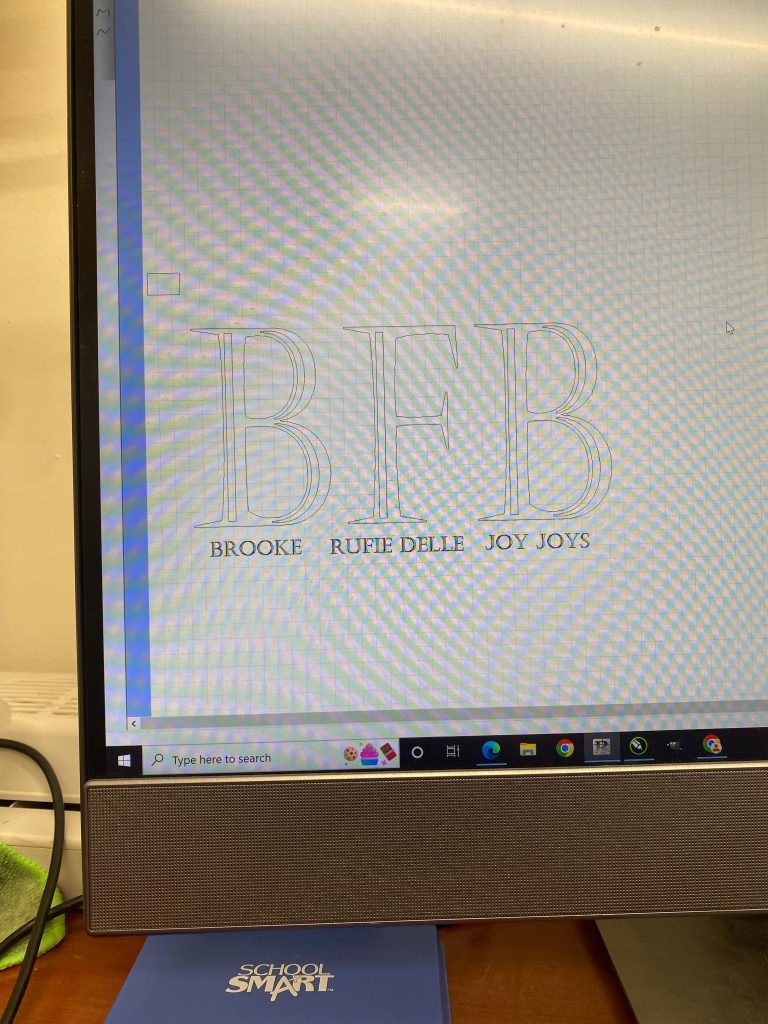
The idea for our project was to write BFB in a big Castellar font to represent our friendship and then as the individualized portion we put our nicknames under each of the letters in the same font, but smaller size. We started creating this idea on the vinyl computer because we got to try a lot of different fonts until we found the one we all liked. We also got to play around with how we wanted each text box to sit. As we started to do this we ran into out first struggle.
The first struggle we ran into was how to line all the text up and group all the text. When we first wrote it out, the BFB was separate from our nicknames. It seemed like it was going to work until we grouped everything to where everything shifted and none of the text was lined up. We spent a good amount of time trying to figure out how to get it all just write and we finally did. We came up with the idea (with Docs help) to write each BFB letter and nickname in their own text box, that way we could first group the nickname to its assigned letter in BFB. Once everything looks grouped correctly we saved out work and now it was time to print it out.
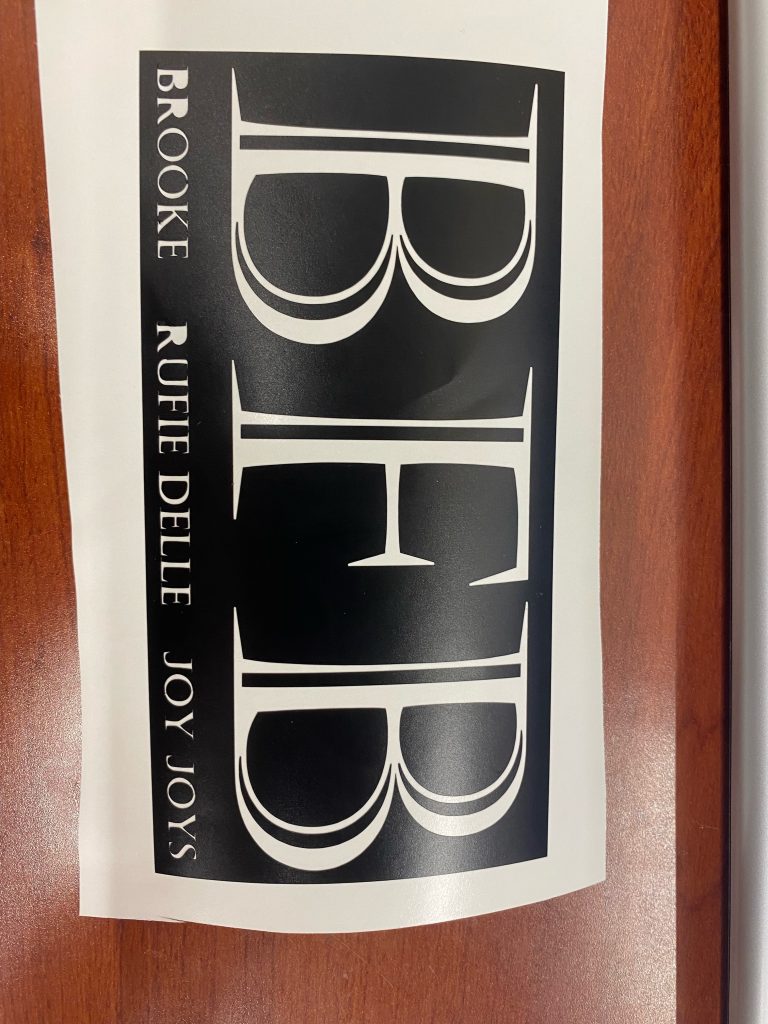
When we got to custstudio (vinyl printer) we ran into our second struggle. Our text from coreldraw wouldn’t not paste onto cutstudio. This meant we had to recreate everything on cutstudio now in order to get it to print it out. It became very tedious because we struggled again with grouping and lining everything up. Another reason it was even more of a struggle was because we had to figure what size we wanted the letters to be in millimeters and since this was our prototype we didn’t need it to be that big. It was 130mm by 70mm and the reason this was going to be a prototype was because we didn’t have enough time to order in the right material for a decal sticker.
The material we needed for the decal stickers is a vinyl sticker with a gummed backing so that it is durable enough to last on a car throughout different seasons. We did not have this material in makerspace and we need to order it when our second quarter starts. Besides the minor struggles we experienced and not having the right material the project went better than I expected. It was great to do a project with two of my closes friends because there was so much creativity between the three of us. I would say the biggest struggle between us is how distracted we get with one another. I am excited to see this project develop and post Part 2 of our project next quarter!
Decals
The initial post about stickers leads to this project. We (Joy, Ruthie, and I) want to make a decal that represents our friendship while having individual characteristics that represent us individually. We already know that we will use the vinyl cutter and computer to design the decal however, we have never used this material before and I am curious to see if there is any difference. The stickers post can show our current ideas of what we would like our design to look like.
If our decals turn out to be durable, then we will suggest the idea to the Maker Space business as a new product of inventory. As we continue to try different ideas, colors, designs, etc. the possibility for customizable decals will become more specific and precise.
Stickers
Our first project is a design of what we hope to do in our second project. The goal is to make decals for our cars, but since we are currently lacking the appropriate material, we decided to try different designs with normal sticker material. Since making different stickers and designs can all be done in-house on the computer, it makes it convenient to try different looks. We are anticipating our final design and decal will be made next quarter. Below you can see our current ideas on what we want our decals to look like.
CorelDRAW is the program we used to design our first sticker and we will continue to use it to change and update our current design as well as make others. We used CutStudio to cut the actual design out on the vinyl.
After looking at our pictures below, it can be seen that our original choice of font is not a good choice because when it is printed out so tiny, the letters lose their pattern and happen to lose some essential parts of the letters (part of the Rs). To fix this, we could either change our font or make our text bigger. Regardless, we need to change the design to make it print out more efficiently.
We also didn’t originally plan for the sticker to be inverted, this would also be a change in the design on CorelDRAW.
Images will appear at a later date.
Future Painting
Another project that I will be working on (with Alex of course!) is making a painting to hang on the wall in makerspace. Originally we thought of painting on a wall, but we decided against it because of Doc’s vertical decorating choices and in case the makerspace moves to a different room/building in the future. The idea for the painting is that it will be a sort of logo for the makerspace program. Because it’s called makerspace the people in it should obviously be called makerspace-tronauts (haha get it?) so in the center of our painting will be Lily’s design of the makerspace-tronaut which is an astronaut helmet. Then in the background we will paint the solar system and other space related things like a comet and alien. The background color will be black and we will use white for stars and constellations. I would upload the sketch we have, but unfortunately I don’t have it with me. Alex and I are also debating whether or not to write “Littyspace” on the painting. Alex thinks it’s really funny and I do too, but it also seems like it’s a micro-trend.
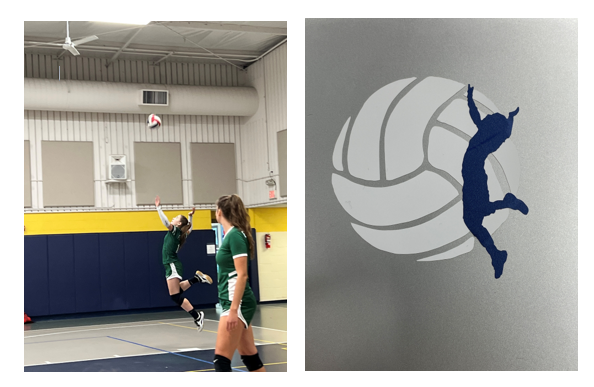
Volleyball stickers

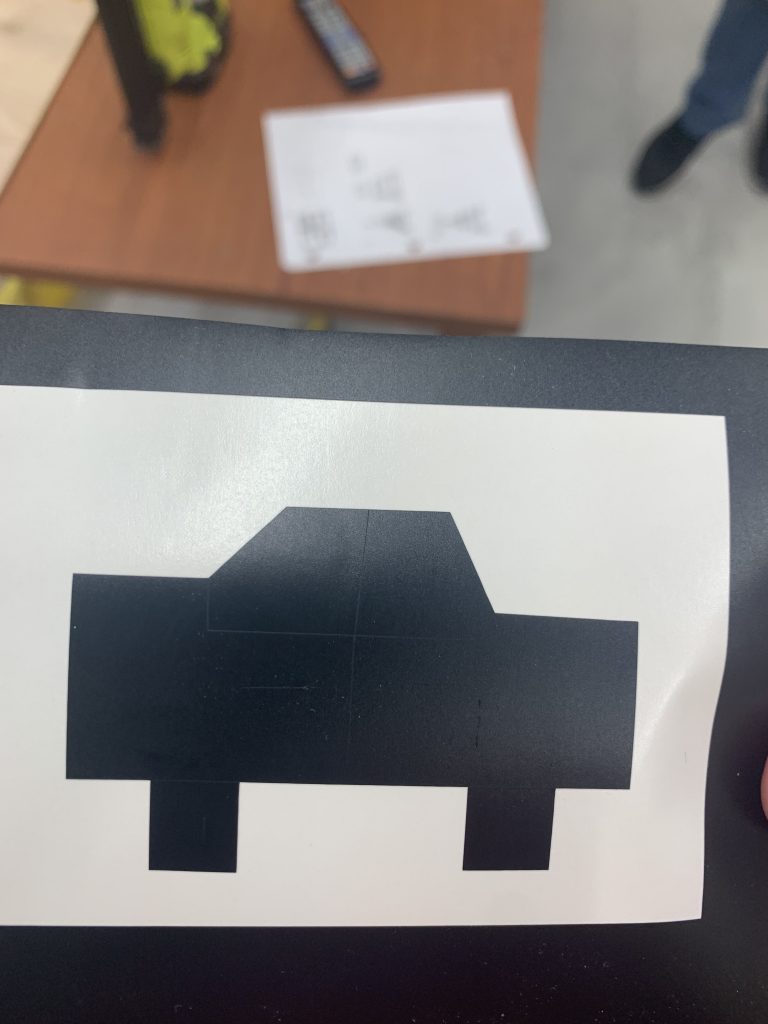
Car sticker
First I made a bunch of different shapes and made them in the shape of a car. Then I put the shapes in cutting program and then clicked print the sticker came out nice. It was easy to cut because it was a simple design.
Custom yugioh card
For my first blog post I decided to make a custom yugioh card. First I found a yugioh card template and then a picture of squid-ward and put the picture inside the yugioh card template. Then I put the wood in the laser machine and let it cut out. The first one didn’t turn out well so I changed the contrast of the image. And printed it again it came out a lot better.

Next Quarter and Interim
I have already planned what I want to do for next quarter and the interim. I’m going to make a coffee table for my room made out of resin but with vinyl records inside of it. I want to do this because I love music and it’s a big part of my life. I need a coffee table and I had a hard time finding exactly what I wanted so I thought why not just make my dream coffee table? It’s going to be three feet by two feet and half an inch thick. My only worry is that it’s not going to be thick enough to support itself. I could make it thicker but resin is expensive so I don’t want to buy too much. But I gotta do what I gotta do to make the DREAM!
Minecraft Painting
This quarter during makerspace I worked on creating a painting from the game Minecraft in real life. First I chose the painting I wanted to make which was just this guy running. It’s basically just pixel art so it’s not too hard. The hardest part I found to be was getting the plywood the right size. I had never used the saw before so Doc had to help me with that. I haven’t actually finished the painting yet but I’m really excited to get it done and hang it in the makerspace!
Future Makerspace Project Idea
This semester I have been really bad at actually going to makerspace because of my other workload for school. For next quarter I would really like to try my hand at the embroidery machine because I haven’t yet. I think I may try embroidering a crewneck or a bag. I’ve also thought that sewing and embroidery especially with clothes is so cool and I would love to learn how to do it. I think having this project idea will give me something to look forward to and get me down in the makerspace more and out of my makerspace rut!
Recent Comments