Tri State Area
Makerspace at the Fulton School
Des Frog
Ryan and I engraved the Yu-Gi-Oh card Des Frog onto a flat wooden sheet. We did this because the sheet essentially functions as a big card. The reason we chose this card to do was because it’s a frog and those are pretty cool. The process was simple and easy since we have experience doing this before.
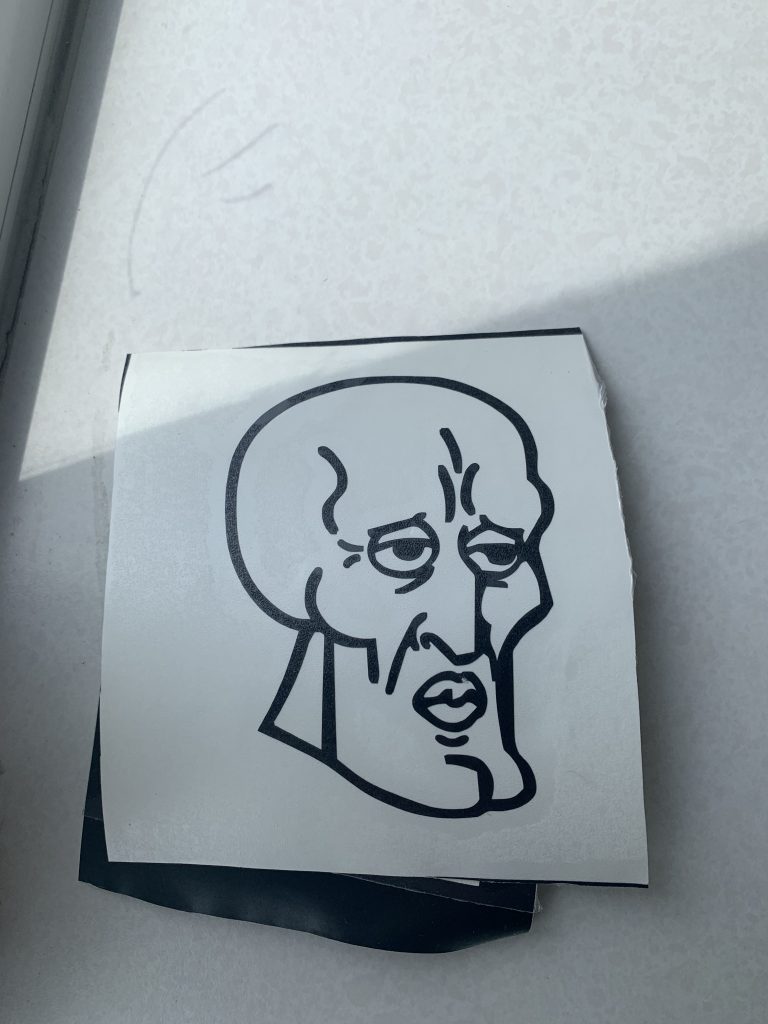
Handsome Squidward Vinyl
I chose to do a vinyl of Handsome Squidward because he is a gigachad. I worked on printing out the vinyl with Ryan because we do most of our work together. I’m not incredibly comfortable doing the vinyl so Ryan helped me a lot with the technical aspect of it so we got it done and I’m happy with it.
Golf sticker
I made a sticker of a the golf brand callaway. This is brand of clubs I use when I play golf. So the process of making one is you find a picture you like. Then save the picture you want open the sticker machine program. Turn on the vinyl cutter and then put the vinyl in the machine and press cut. And wait for it cut out.

Squid ward pictures
I made a squid ward sticker with Adam first we found a picture and then we save it to a file. Then we put in the sticker machine program. Then we turned on the sticker machine. And put the vinyl in the machine and then we printed it out. SpongeBob is one of my favorite tv shows.
Makerspace CHAIR
The process of this chair was I found it in rundown and paint coming off. So I decided to paint it black. I took the back of it off and filled the holes with wood glue and chair shaving. And that’s the process so far. Come along for the journey.


Earrings
I made earrings using the computer and the laser. First I chose the design, second I made sure the shape was right, lastly I printed it. The loop was very small, so I attached hooks to them with tweezers. I’ll paint the earrings later.

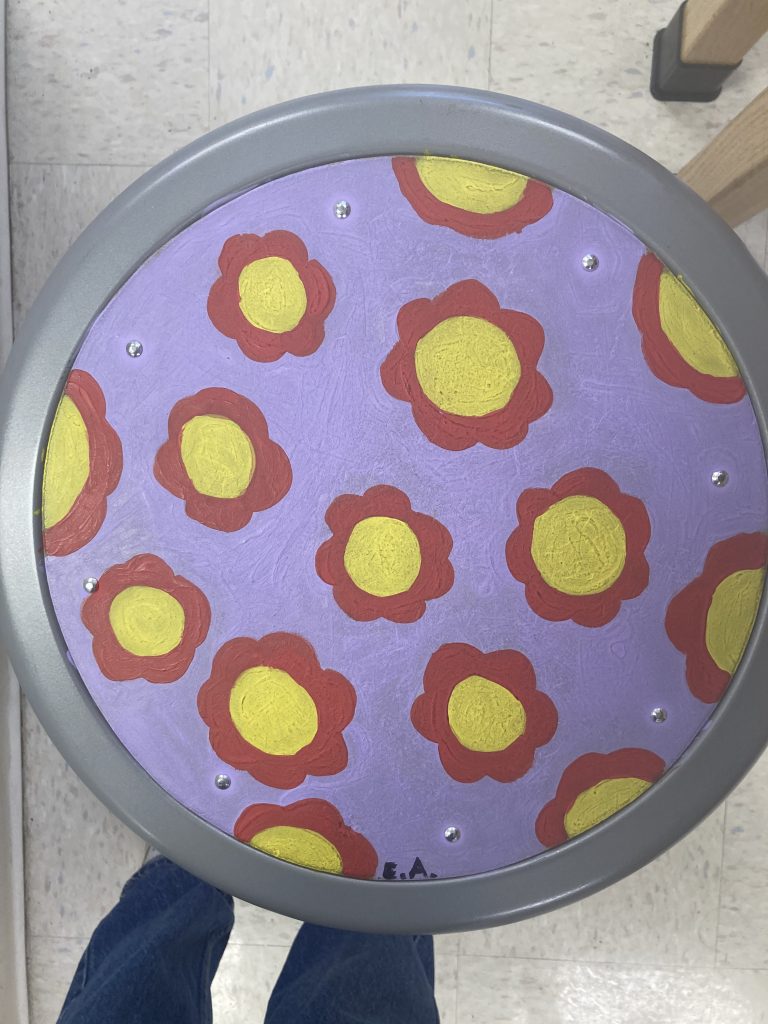
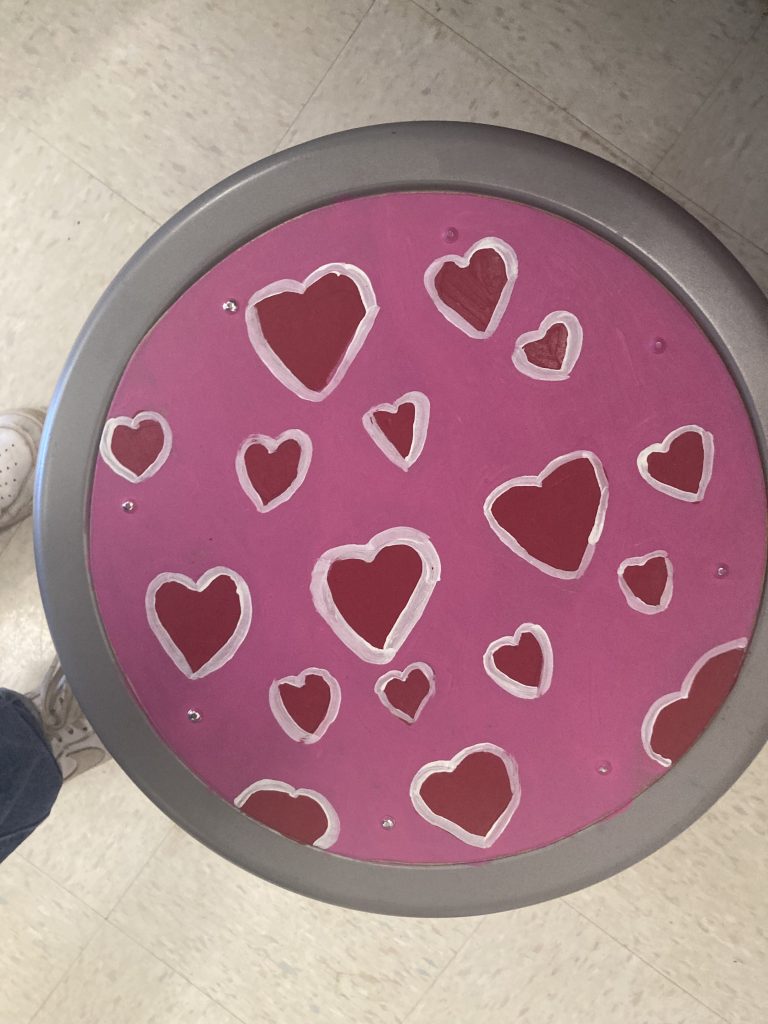
1 stool that slays another that needs some work
This quarter I have not done as much in makerspace. I did paint two stools and helped Alex a bit on a stool she is working on. I got the idea to paint stools because I have always wanted to paint one of the stools that are in the art and science room. Painting one of those stools has been something I’ve wanted to do since I was in like first grade, so, when I found two in Mr. Mitchell’s room that were completely blank I decided that’s what I would do! The first stool I painted has a lavender background with orange flowers, that have yellow centers. I knew I wanted to do floral print and I mixed up an orange color for the flowers, then Kate gave me the idea to do a lavender background. I really like it because it has a nice contrast. The other stool has hearts on it. I’m not that happy with the heart stool, I might re-paint it but I’m not sure yet. I am really happy with how the flower one turned out though!
World Wide Technology Project
I helped with two parts of this project. First, I made sure that our project was within community guidelines and that our Head of School, Mrs. Douglass, approved of our ideas. After everything was okayed, we needed to send out an email from Mrs. Douglass to all upper school students, including a google form to fill out. That form included the students age, name, birthday, hobbies/interests, and anything else they wanted to include. Once that form was sent out and we received feedback, I worked on organizing each of the profiles, and adding all of the information the students gave us into our website.
After working on the personal bios/profiles, I helped create the presentation video for the WWT competition. That included organizing the pictures we took throughout the project in the presentation, and talking about the things I contributed to in the overall project.
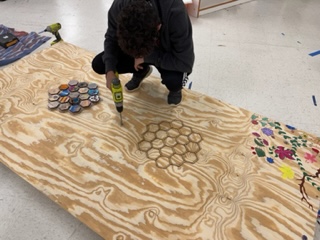
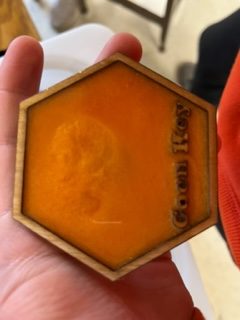
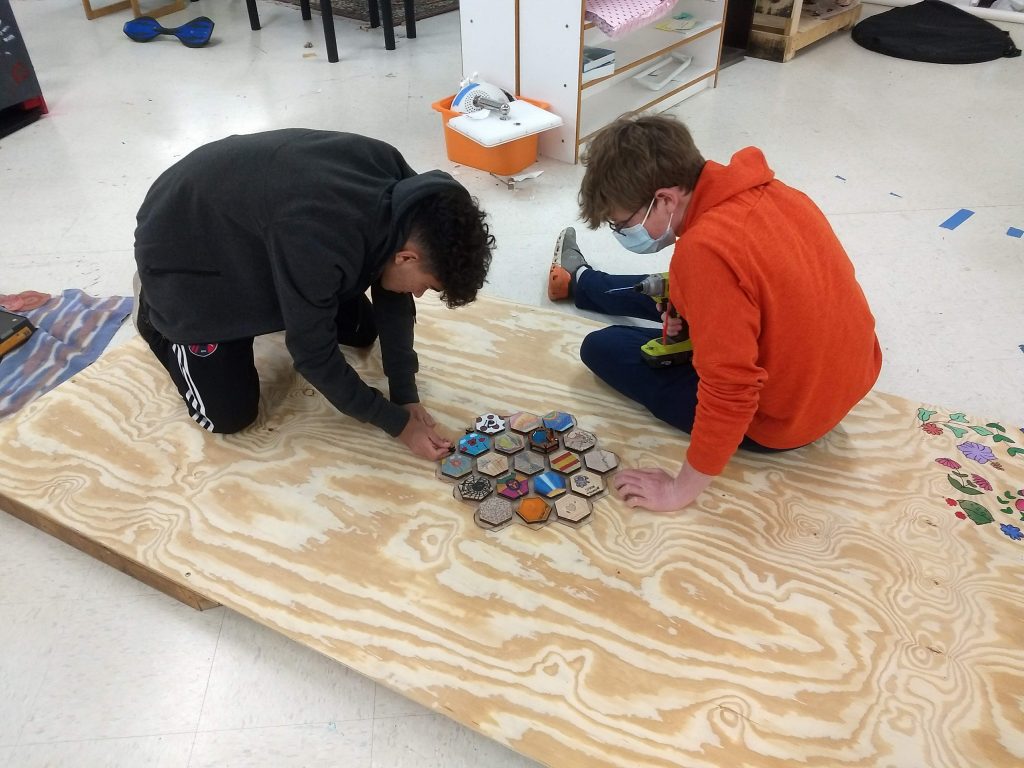
Hexagonal Tiles
For my part of the World Wide Technology project (WWT), we made a physical aspect. I did this part of the project with Blas and Ava. We first used a hexagonal outline from a prior project to get the main outline for our project. We made many different sizes before we got the right one. We then needed a way to connect the tiles to a board. The way that we did this was that we made another tile the same size as all the other ones except the backs have a hole in them that we put a magnet inside of it. We handed the fronts of the tiles with everyone’s names on them to everyone. There were many ways that one could decorate their tiles, I used epoxy. Some people used the laser cutter and most people used colored pencils. Once we got the tiles back I connect the back parts of the tiles with magnets to the front tiles that were colored on.
We cut out acrylic from the Covid dividers for the back of the base. I put magnets inside wholes in the acrylic so that the tiles could connect to it. Then we put the bases on the main board.
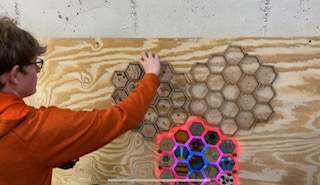


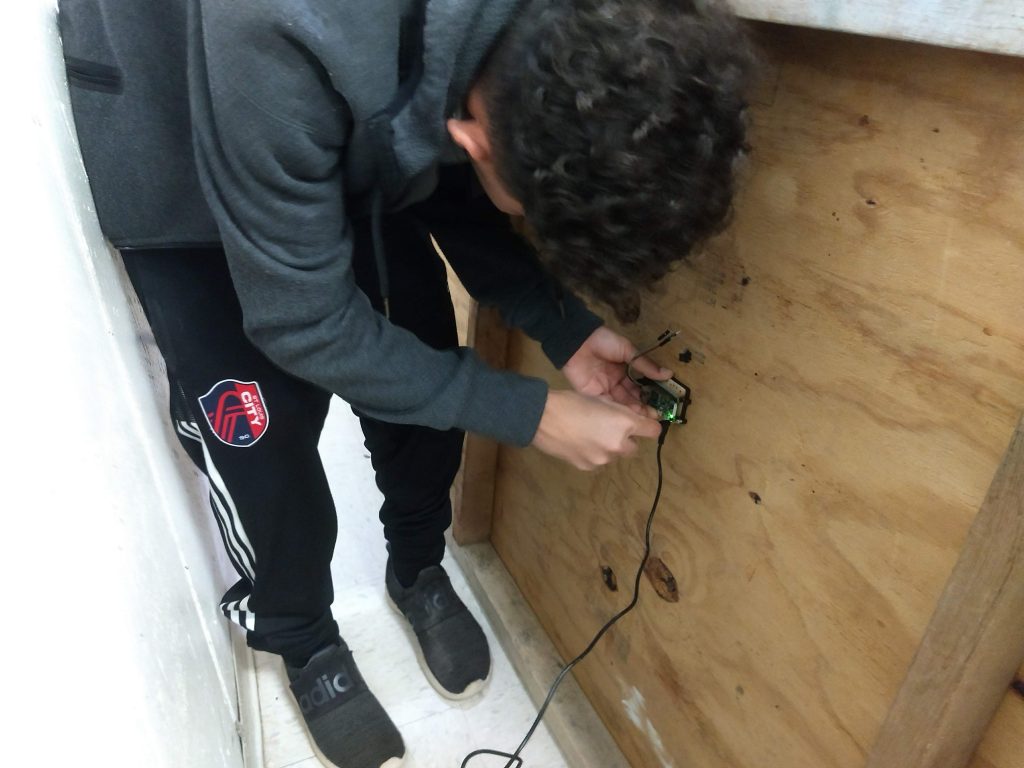
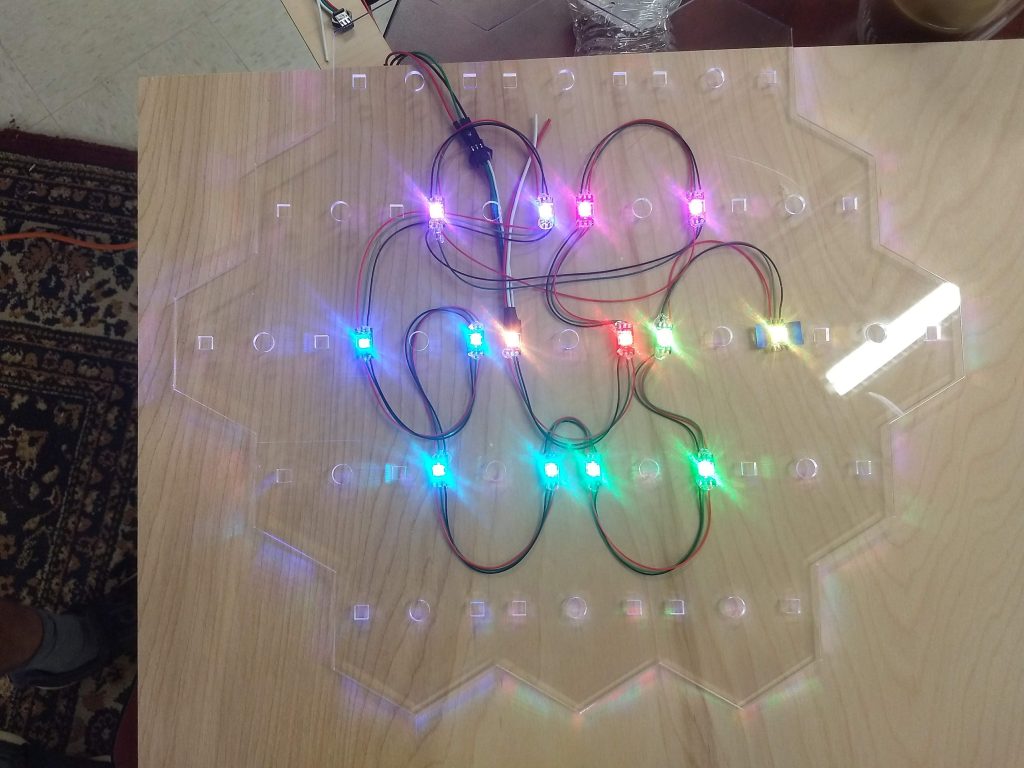
Hexagonal LED tiles
For our WWT project I worked on the physical part. I designed the the tiles and printed them out. The hardest part with printing was saving space due to the amount of wood we needed to use. The acrylic we didn’t have to worry as much about because we reused all of it. The hardest part about designing the hexes was the scaling and deciding the sizes of the tiles.
Printing the tiles was very time consuming with the wood. The laser had to go over the wood more than once which I had to change the settings with and re-cut multiple times. I printed five originally which would make enough backs and tiles for each person.
Next came the LEDs. Each LED had to be individually soldered with the correct wires. The strip of LEDs weren’t close enough to each other which added more work with having to cut and rewire each LED in order to fit in the designated spots. This would leave enough more space to make the LEDs shine more through the acrylic which had to be frosted with a hand sander. Before soldering we had to find the distance between each spot and find an organized way to align each LED to make them easily programmable. Since we used hex shapes there wasn’t an obvious order in which each tile should light up. One tile has two LEDs so we went to the bottom one first then the second one on the top, the next wire from there had to go down or up to the next tile in order to start from the bottom or the top. To do this each wire had to cut at separate lengths then stripped of the casing and at the tips leaving enough of the wire to solder but not to much to interact with other ones. Once all the LEDs were soldered with the right length and order we hot glued each one to the corresponding cut hole. After all the LEDs were in placed on the back of everything.
Recent Comments