Tri State Area
Makerspace at the Fulton School
PLA VS PETG VS ABS
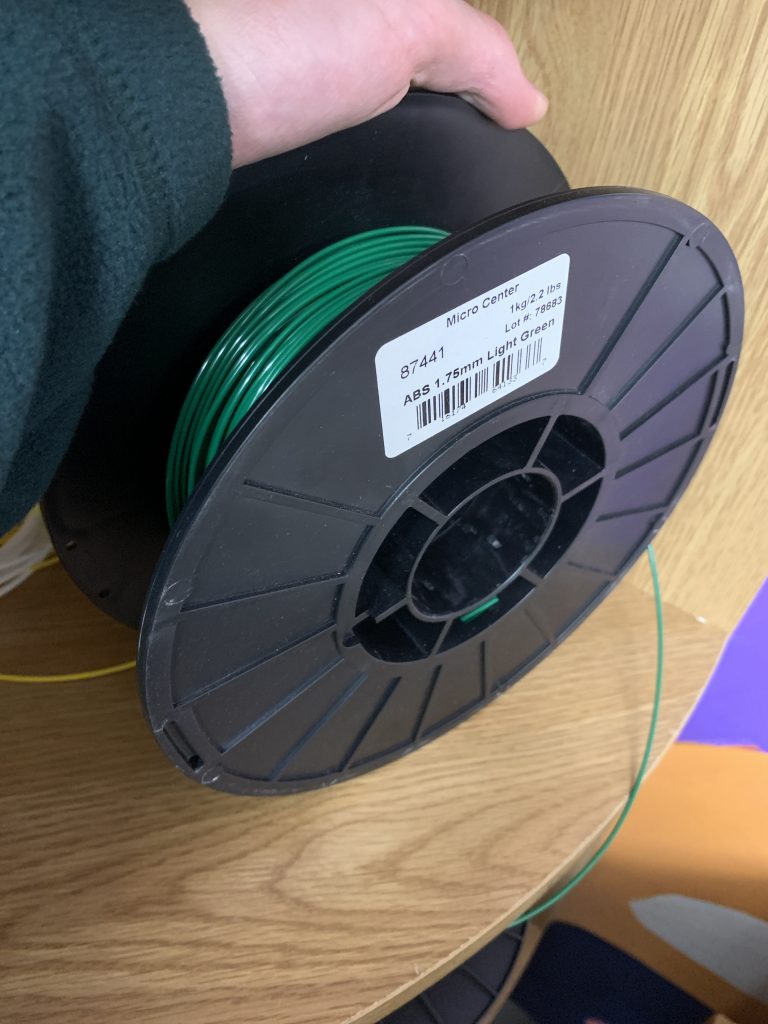
ABS

PLA

PLA is less sensitive to tempurature changes, and is one of the easier to use. It wont work with wear and teare designs in comparison to ABS, even though PLA will take more stress before breaking. As it turns out PLA means polylactic acid. This plastic dosn’t work under continuous pressure, and may deform or crack if not taken care of/used properly.
PETG

PTEG stands for Polyethylene terephthalate, where the G stands for glycol. It is a more recent material compared to the other two, and has some of the aspects of both ABS and PLA. Examples are be more ease of use, the durability, and the tempurature resistance. It needs a slower fan speed and cant be used on a glass like material, but can stand up to wear well enough.
Resin Wall Art
MY FAILED ATTEMPTS
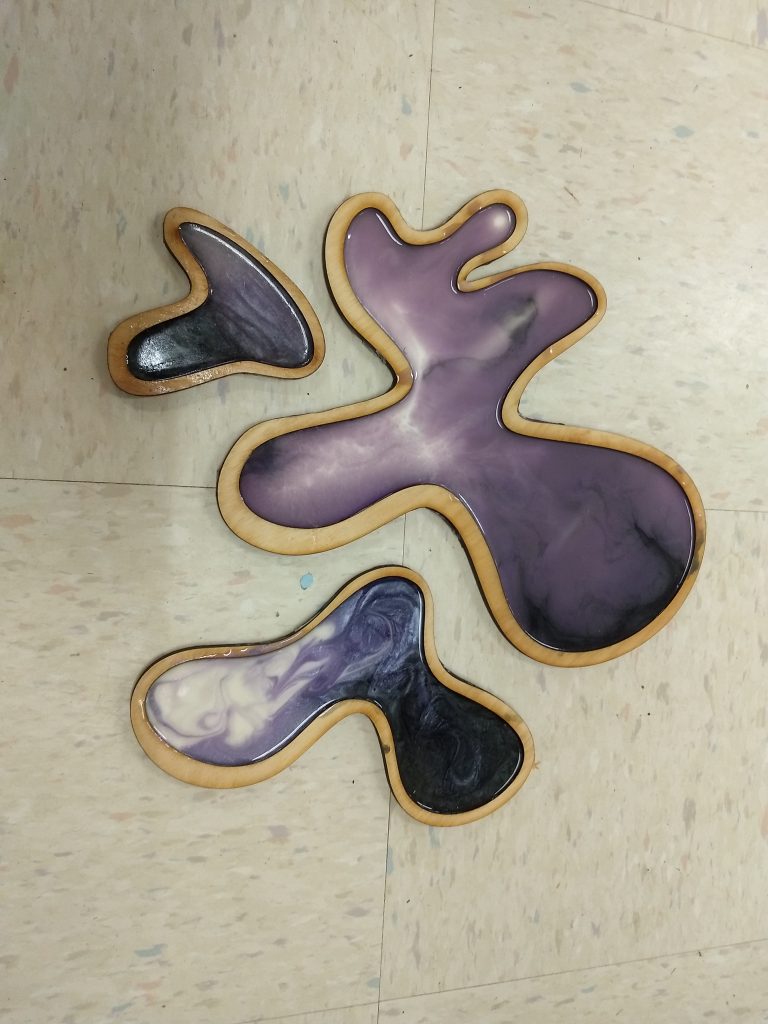
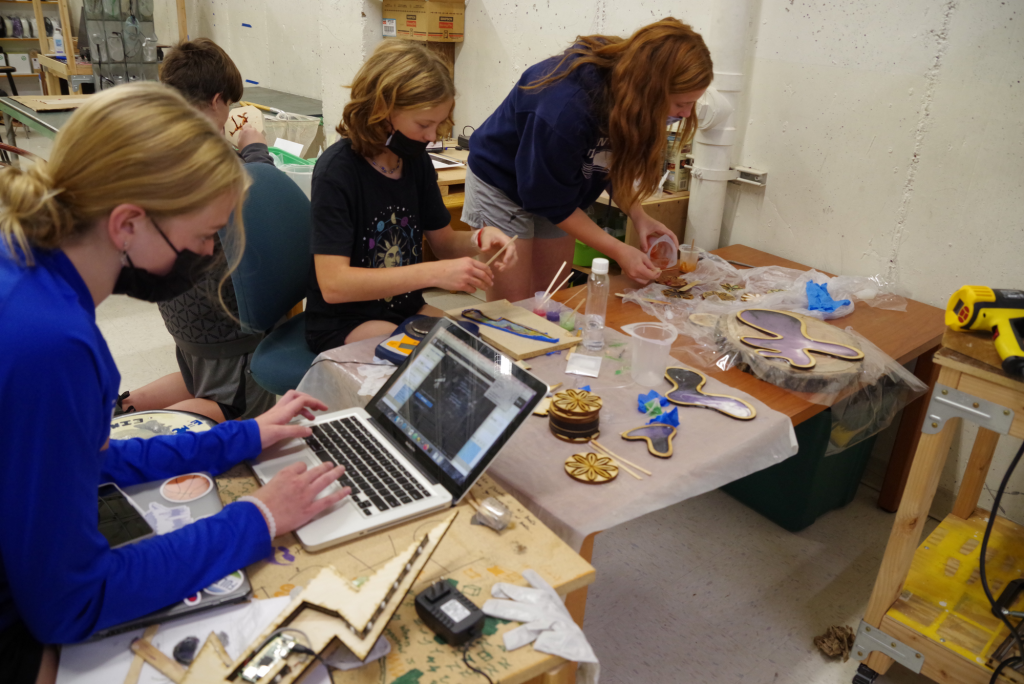
For my interim project, I made a piece of art to hand up on my bedroom wall. While making my wall art I learned what different ways work and do not work for sealing open space to then fill with resin. The first time I tried, I used a piece of plastic wrap material and sprayed spray glue to stick the plastic to the wood cutout. I used a heat gun to try and make the plastic more fitting to the cutout. That did not work. The resin leaked everywhere so I tried to save as much of it as possible for my next try. for my next attempt just used the heat gun and the plastic wrap material. I heated it so the plastic shrunk to the piece of wood. This works fine but, it still leaked a little bit. In my last attempt, I just tapped the whole bottom opening and then filled it with resin. This worked great. It didn’t leak at all and the tape was pretty easy to get off. For the research portion of this project, I looked up the history of resin, what it is and how it is made.
WHAT IS RESIN?
Resin is a naturally occurring organic compound that is found in plants. Resin usually consists of a noncrystalline, liquid substance that is fusible, making it an effective alternative to plastic.
NATURAL RESIN/HISTORY OF RESIN
Generally, natural resins are made from trees, mostly pines. Resin formation happens when the bark gets injured from wind, fire, lightning, or other cause. The fluid movement usually loses some of its more volatile components by evaporation, creating a soft residue at first but becoming more solid and hard the longer it sits. The ancient Chinese, Japanese, Egyptians, and others used resins as lacquers (outer coat/finisher) and varnishes.

Lightning Bolt
For my makerspace project, I made a wooden lightning bolt surrounded by LED lights.
Steps:
First, I drew out my lightning bolt and transferred the image to the computer, then cut it out with the laser cutter on wood. The next step was to glue together the wooden bolts and make adjustments with measuring so I could fit the Raspberry Pi in between the wooden bolts. Next, I soldered the LEDs to the Raspberry Pi and put it all into my wooden bolt. The last thing I did was oil the wood, and I was finished.
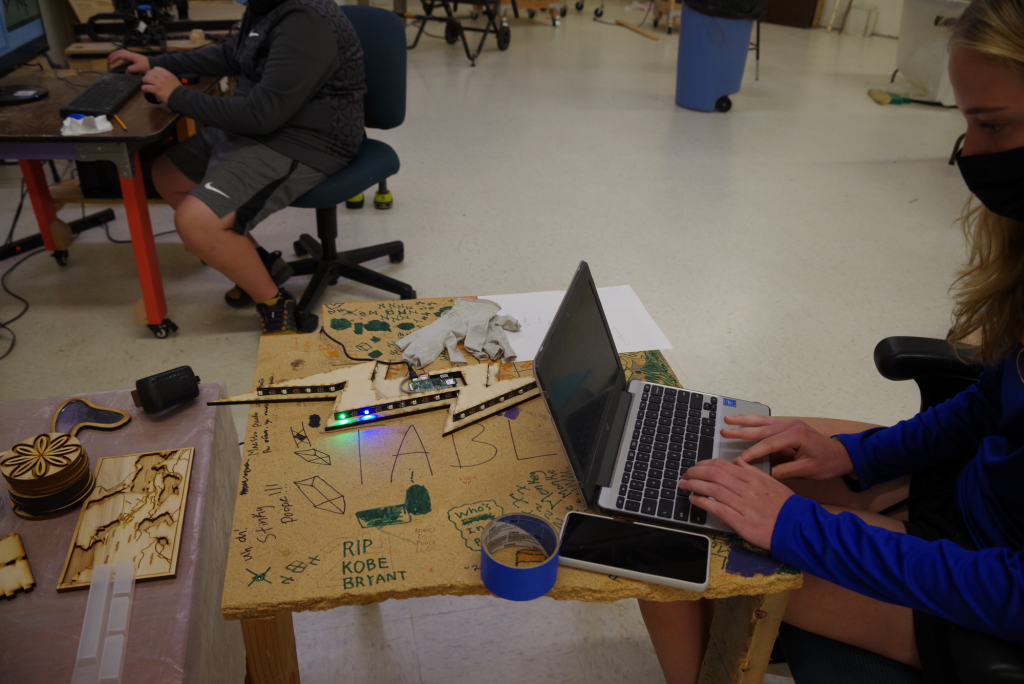

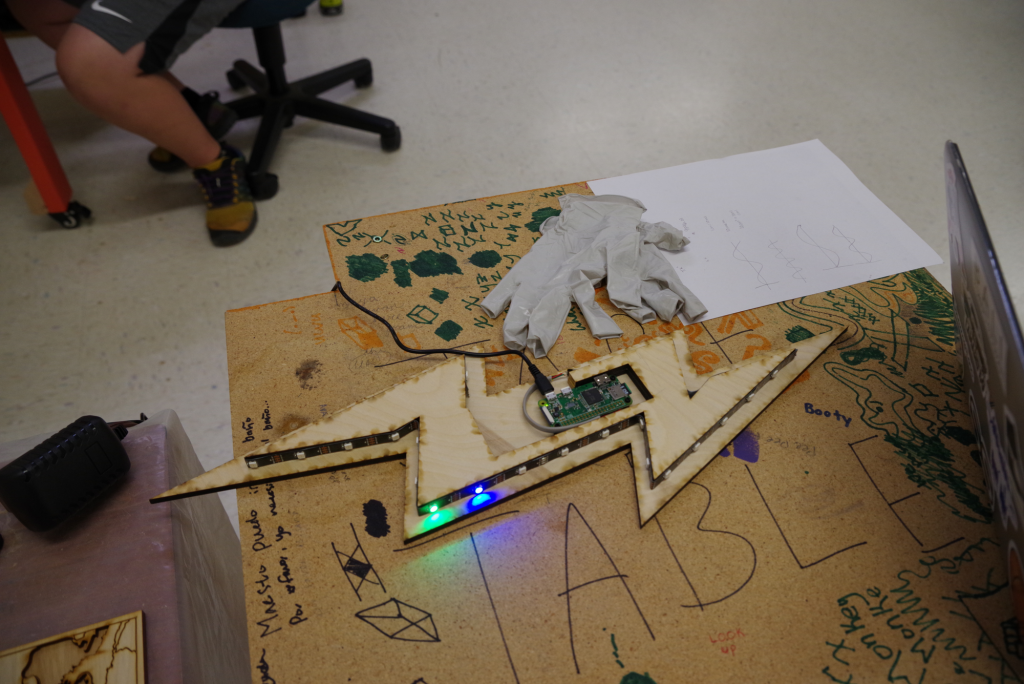

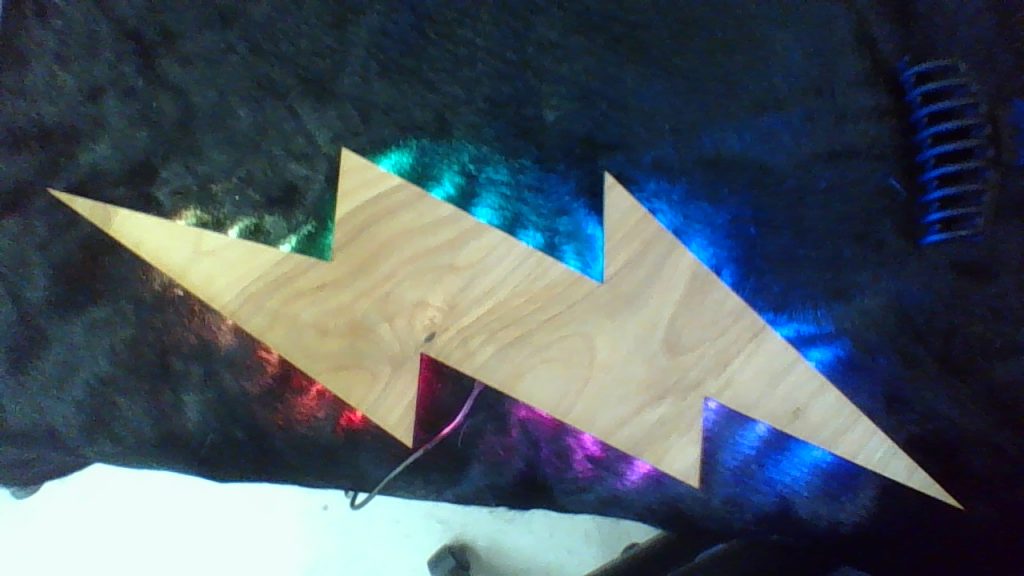
While I was doing my project, it made me wonder exactly how lightning is made. So I did some research and found out the lightning is made from the friction of the clouds moving together usually during a storm. Whereas thunder is the sound of lightning because it moves so fast, it breaks the sound barrier creating a sonic boom. Benjamin Franklin was the first to show that thunderstorms let out electricity in 1772. Lightning usually comes from a parent cumulonimbus cloud. The three different types of lightning are cloud to cloud, cloud to ground, and cloud to air. Lightning is very fascinating to me and that is one of the reasons I chose to make a bolt.
How to Sand Epoxy
When epoxy does need sanding its best to use wet sanding. (Wet Sanding- is when, typically water or any other liquid, is applied to the sandpaper leaving less residue on the surface leading to longer use of the paper. Epoxy is a very hard material leading to the dullness of the paper. Wet sanding prevents clogging on the paper increasing its life span. Sometimes dry sanding is needed when sanding with wood to avoid staining the wood with liquid. For wet sanding waterproof sandpaper is needed. The paper becomes waterproof with a closed layer of silicon carbide. The paper can come in 60 to 1000 grit sizes. To little of a grit size damages the wood making it difficult to recover. To create a nice surface for polishing its best to start at an average grit size and work your way higher ending in a smooth surface with the highest size grit.
Procedure for Wet Sanding
- When wet sanding do it by hand to avoid electrocution.
- Prepare water near work space.
- If needed wet the surface.
- During sanding remove any particle with cloth consistently.
- Dry the surface off for any more treatment. As well as using an electrostatic cloth to remove extra tiny particles from surface.
Acrylgiessen, & Oezses, S. (2020, November 28). Sanding epoxy resin – helpful tutorial on how to sand resin. acrylgiessen.com – Creative Magazine. Retrieved October 22, 2021, from https://acrylgiessen.com/en/sanding-epoxy-resin/.
How to make an epoxy table mold
For my maker space interim research project, I choose to research epoxy table molds and how to make them. I did this because while Blas and I were making our table we used tape on the edges thinking that all the epoxy would not leak, we were wrong. Lots of the epoxy leaked which made us have to do a lot of sanding and chiseling to the bottom and the sides of the table and a little of the top. We did not enjoy doing all of the sanding and it took a lot of time.
When first researching about epoxy table molds I was going to research about live-edged epoxy table molds but while researching I could only find ones that were for rectangular tables, so I decided to research the rectangular table molds.
| Sticks to epoxy | Does not stick to epoxy |
| Wood Glass Aluminum | Sheathing tape/Tuck tape High-Density Polyethylene (HDPE) Teflon Polyethylene Polypropylene Nylon Mylar Silicone |
How to make the epoxy table molds
- Design the mold with the edging being ½ in. higher than the table so that epoxy does not leak off
- Cut plywood to size
- Cover all parts of the plywood that will be touching the epoxy with sheathing tape like tuck tape, so that the epoxy will not stick to the mold and to have a easy removal once the epoxy has cured
- Put the plywood together with screws to make it easier to disassemble and have a chance to use the same mold in the future
- Apply a line of silicon to the bottom of the walls, to have a tighter seal and less leaks
- Use a lint free cloth with denatured alcohol to remove all dust and debris from the mold
- On all inner edges of the mold apply a line of silicon to prevent leaks

“How To Build An Epoxy Casting Mold.” Ecopoxy, support.ecopoxy.com/en/how-to-build-an-epoxy-casting-mold. Accessed 21 Oct. 2021.
Halberd research
The halberd weapon’s origins can be traced to the Swiss armies of the 14th and 15th centuries. The weapon consists of an ax blade balanced by a pick with an elongated pike head at the end of the staff. It was usually about 1.5 to 1.8 metres (5 to 6 feet) long. It enabled a foot soldier to contend with an armoured man on horseback; the pike head was used to keep the horseman at a distance, and the ax blade could strike a heavy cleaving blow to finish the opponent. The blades of halberds took on a variety of shapes, often being engraved or inlaid and exquisitely finished as works of art. Concurrently with the disuse of armour and the development of firearms, the pike, or thrusting element, gradually displaced the cleaving element in such weapons.
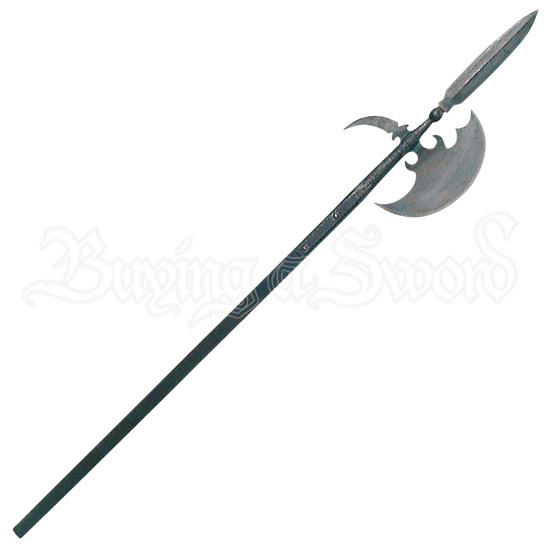
The ji (halberd)was a Chinese polearm, often translated into English as spear or halberd, though they are fundamentally different weapons. They were used in one form or another for over 3000 years, from at least as early as the Zhou dynasty, until the end of the Qing dynasty.
A weapon called Fang Tianji appeared in the Song Dynasty. Although there is a halberd in the name, there is a decisive difference between the shape and the halberd that appeared in the Shang Dynasty. Fang Tianji can be regarded as a weapon developed from a gun, with meniscus-shaped blades on both sides of the gun tip. So although it is called a halberd, it is actually a long-handled knife used by both hands according to the ancient spectrum.

Halberd
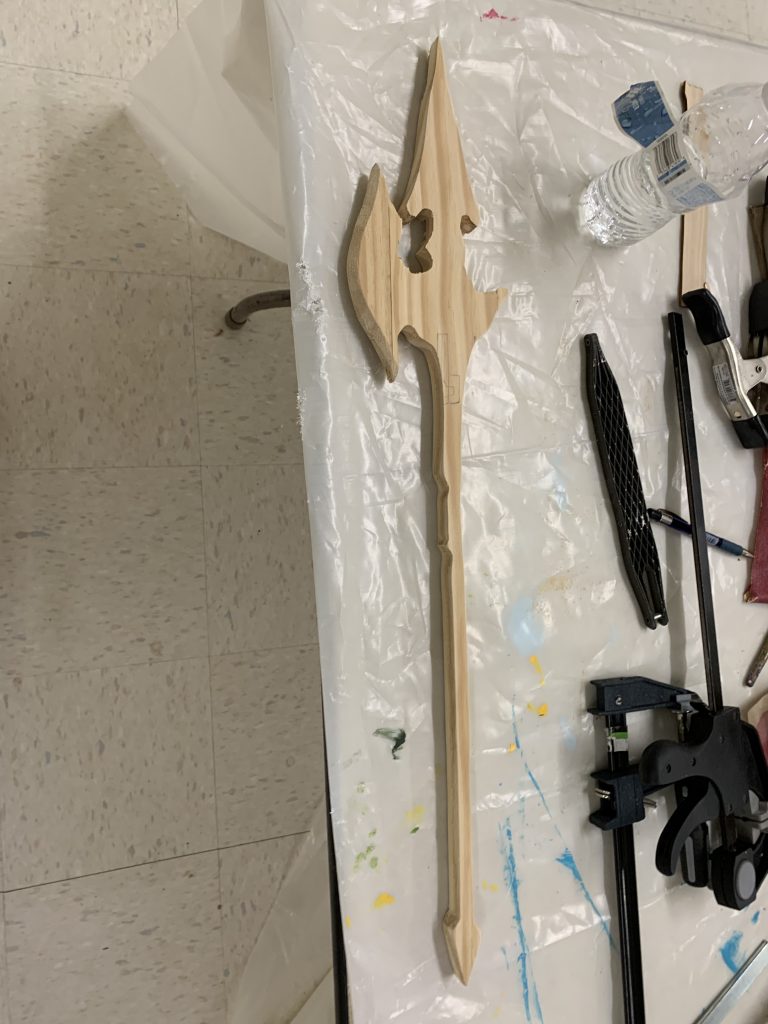
Based on a picture I found on google, I slightly modified its length, shape and outlined it.

Then I set the length, width and thickness of the halberd, and then divided a long piece of wood into 3 pieces and combined them with wood glue that fits the halberd. CNC machine to cut it out
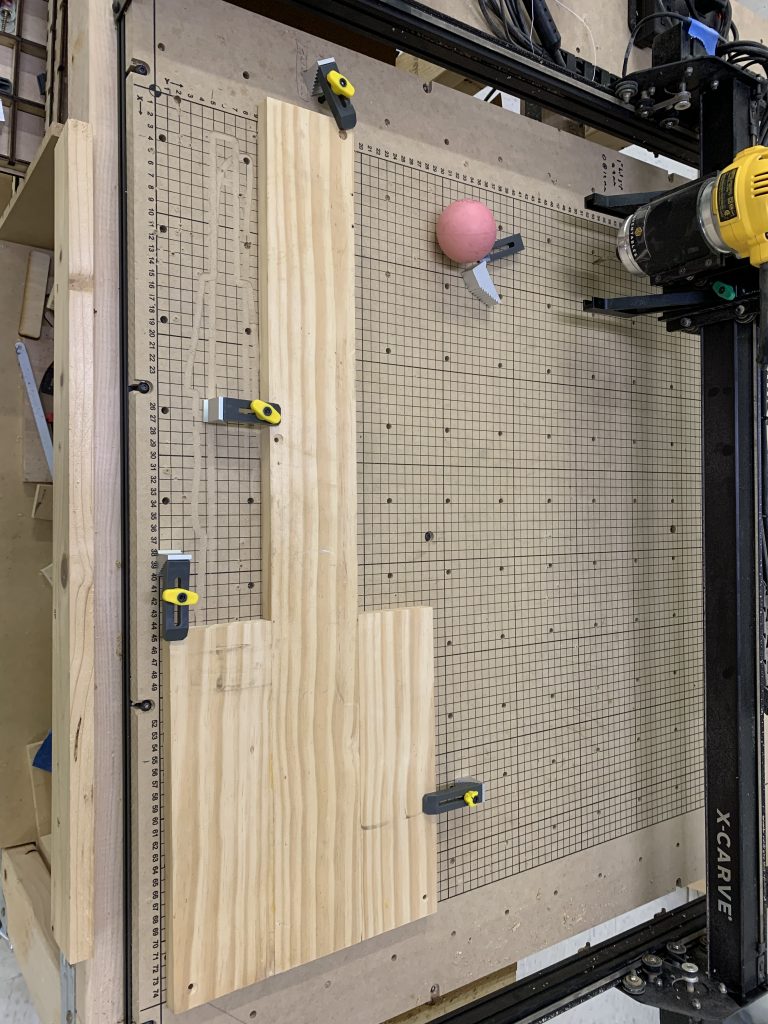
The last type is sharpe the edges of the halberd by using the sandpaper and a knife
Telescope Phone Holder
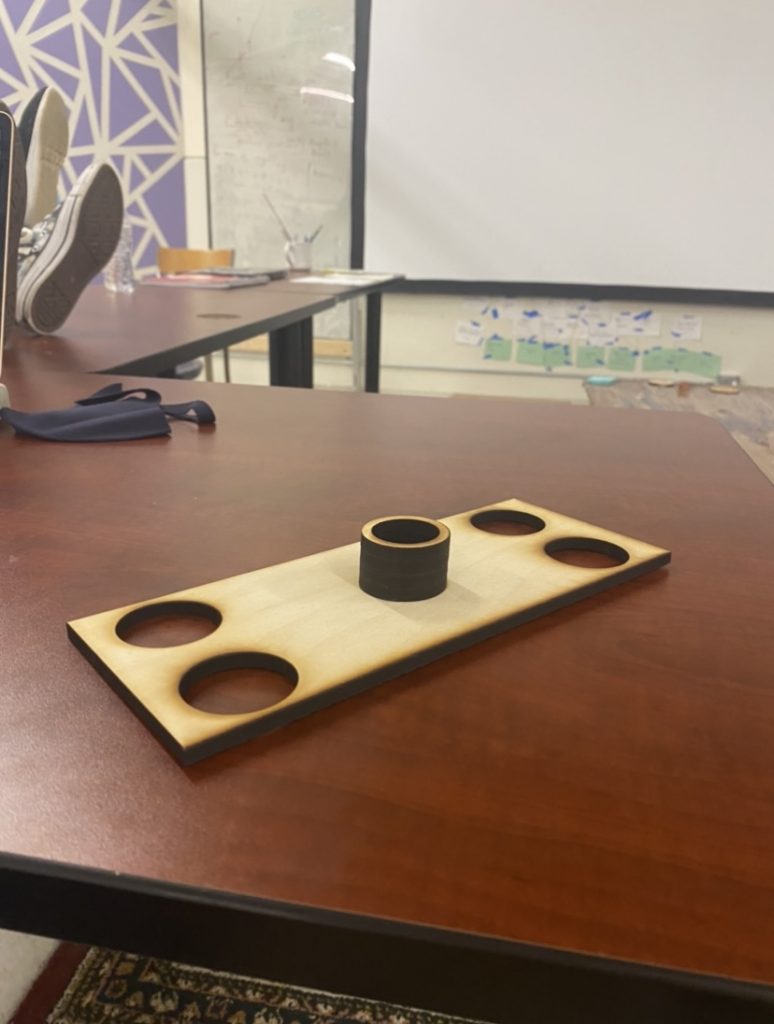
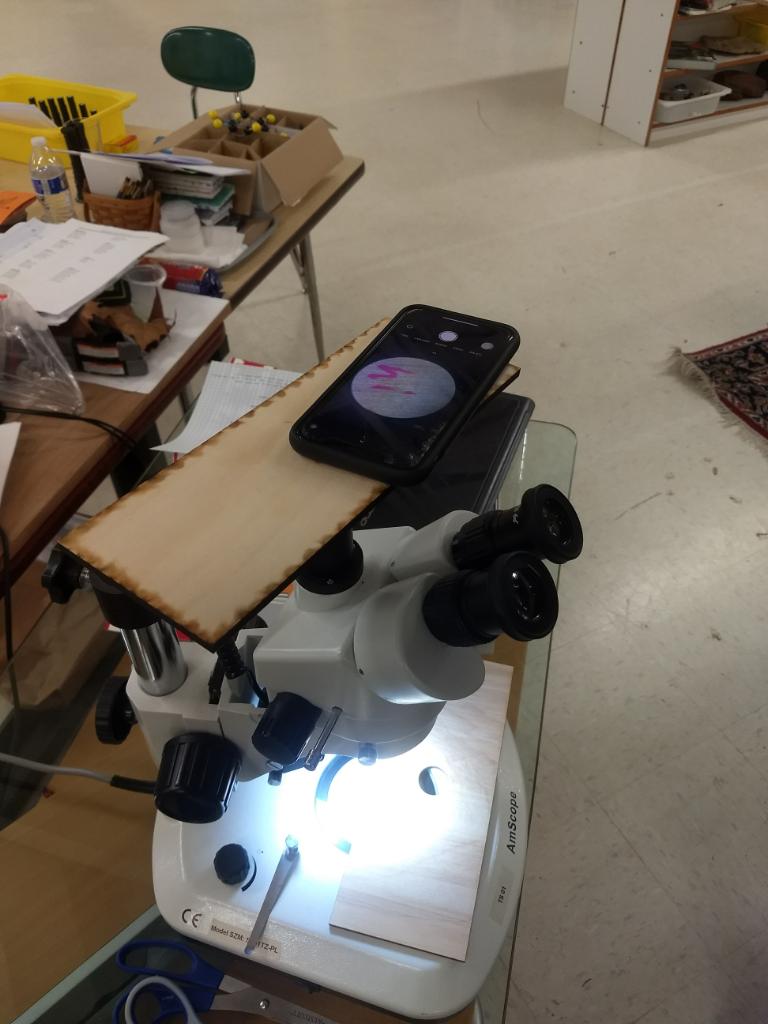
This stand is designed to securely hold a phone on top of a microscope in order to get a picture of the image that the microscope is portraying. The three rings are created to perfectly fit according to the measurements of the microscope head. The size might vary depending on the brand.
In order to create the stand, the first thing that needed to be done was to measure the circumference of the head of the microscope. From these measurements, the three rings can be made (identically). The rings can be glued to any piece of wood that would fit the entire phone with even distribution of weight.
At the center of the three rings, drill a hole big enough to see the entire glass image from the microscope.
All of the wood can be put together with wood glue. Tip: when gluing the rings on top of each other, place them on the microscope head and let them dry together around the head. This will make them flush and the correct size.
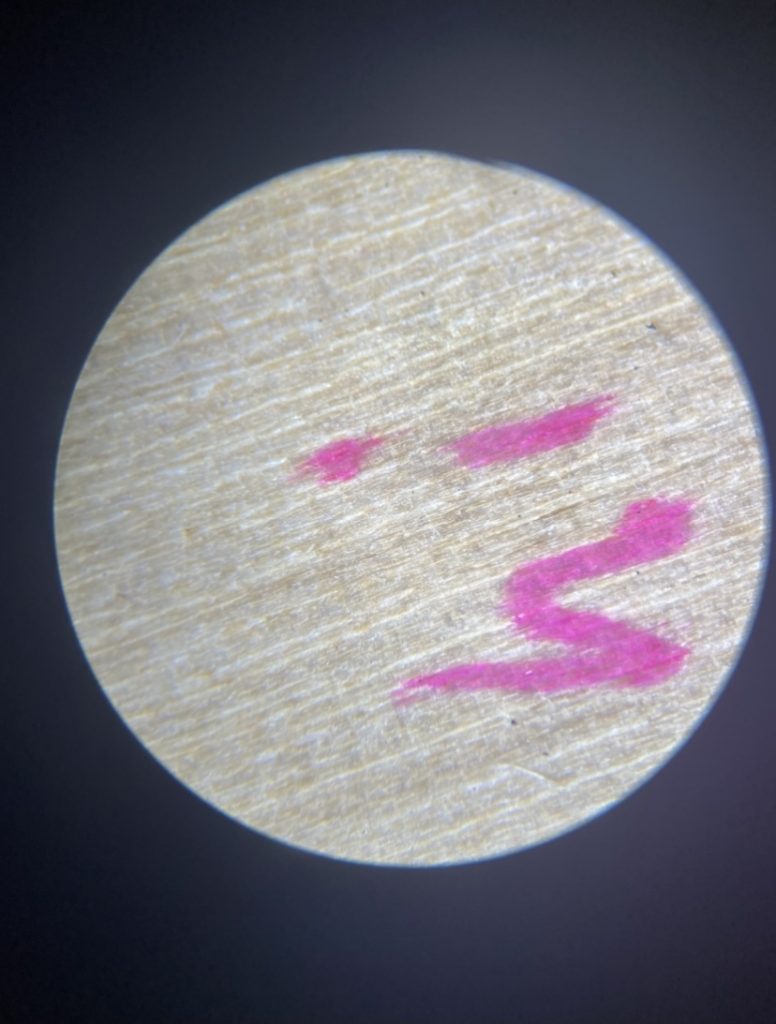
Below is an example of the clarity:
Coen and Blas Resin Table
We created a table using two separate pieces of wood joined by resin.

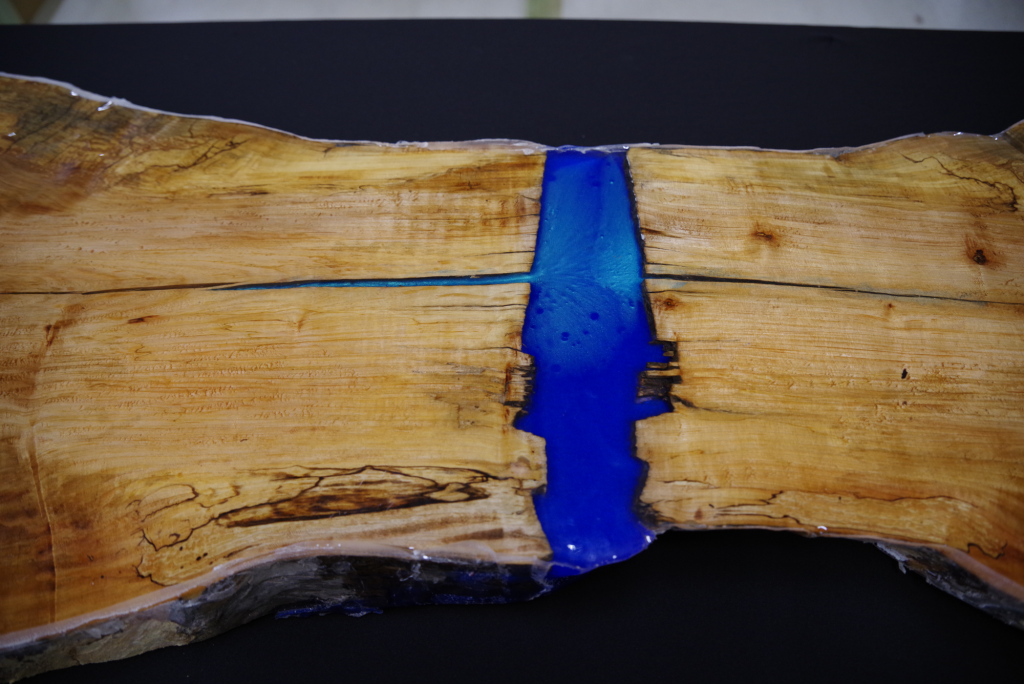

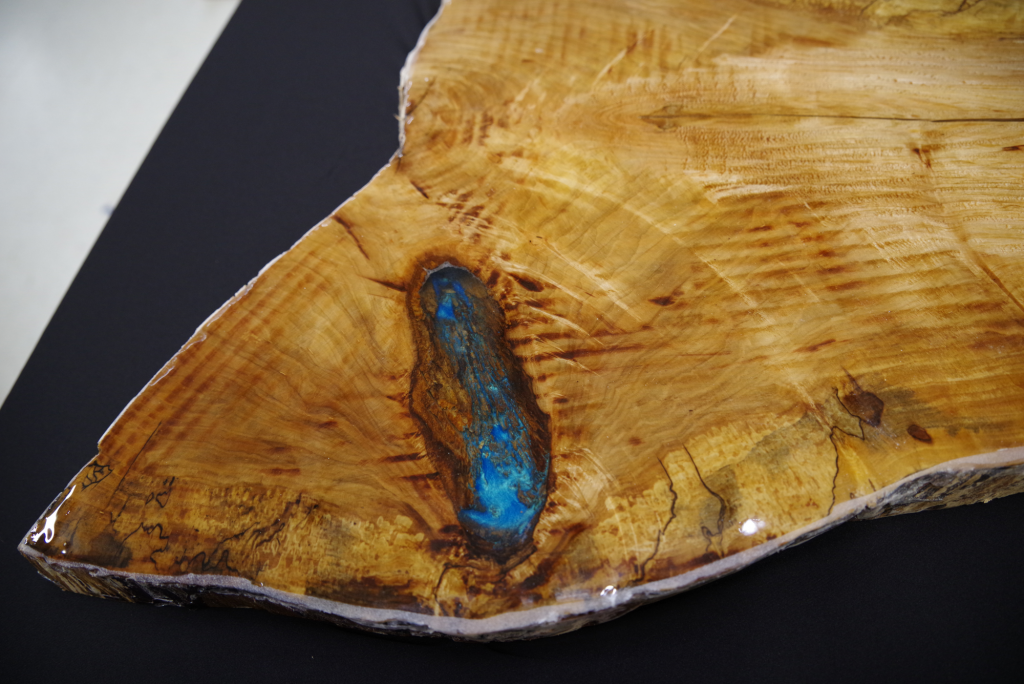


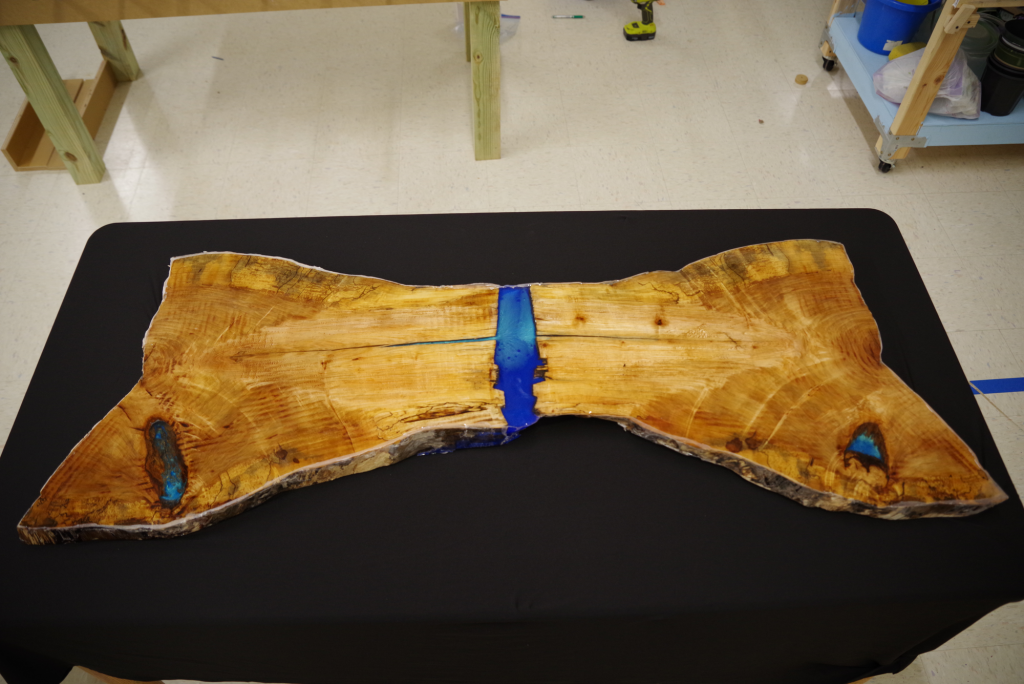
The table took a few months of makerspace elective time to create due to the time resin takes to dry and the amount of extra details that were needed to be done. We used live-edged wood to do this, leaving more possibilities of having abstract features available.
There were holes on both pieces of wood, which we decide to get creative with instead of just pouring clear epoxy. To get color in the epoxy we added different color mica powder to get different looks on the table.
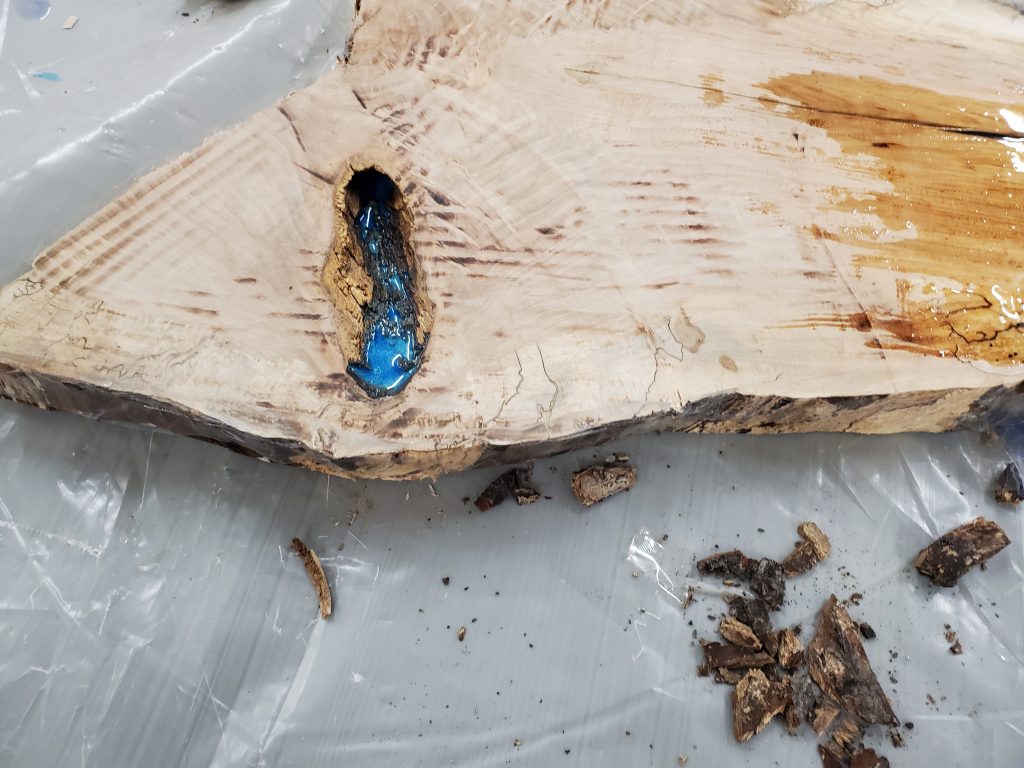

A few challenges we ran into while making the table included: keeping the resin from leaking while connecting the two pieces of wood, as well as pouring the finishing layer on top of the table. In order to overcome this, we taped around all the edges and some of the bottom to prevent any resin from leaking. This wasn’t the best way to control the resin due to the inconsistency of the tape holding, which in the end lead to more sanding.
The table is a personal project between Coen and I, meaning that, besides the material, all profit will go back to us leading to more opportunities for creating more art. There are still many more things that can be added to the table, such as the legs, sanding down the sides, and polishing sanded resin.
Parthenon History Project
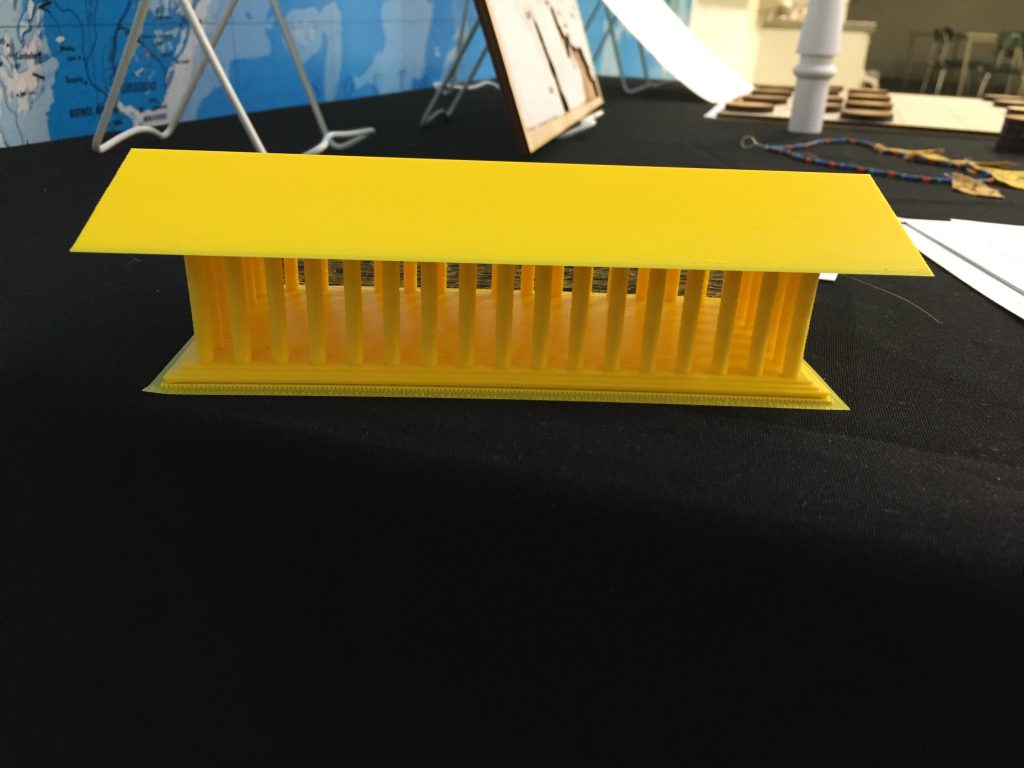
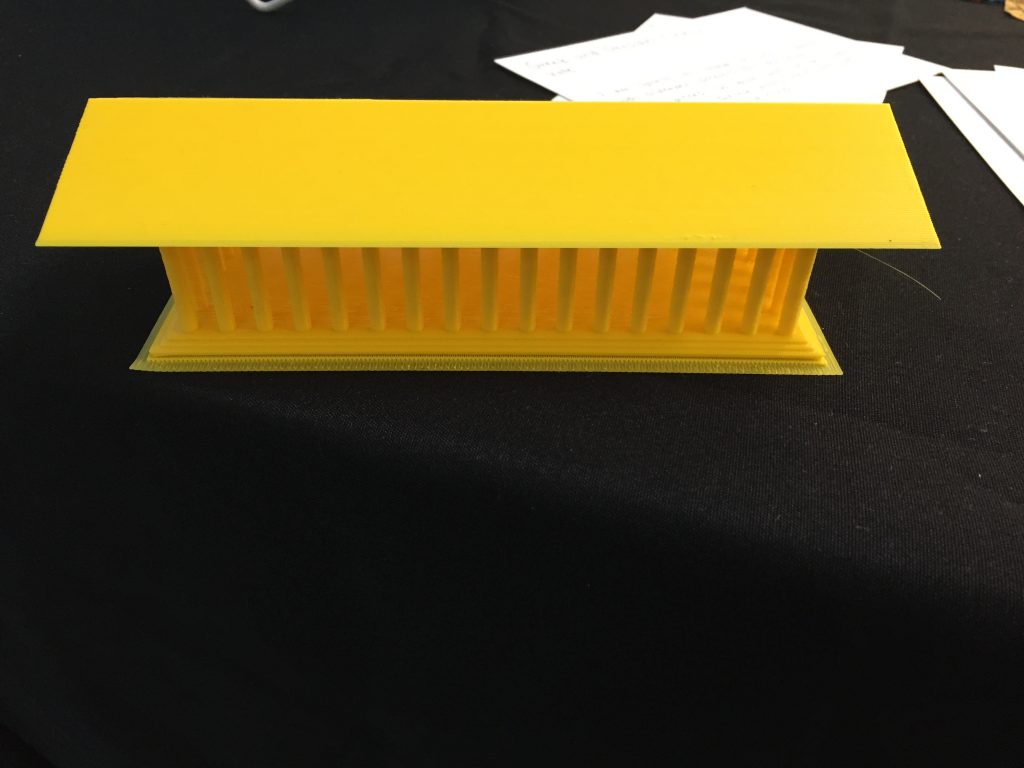
For this project, I made a replica of the Parthenon with openSCAD. This was the first time that I have made anything with the 3D printer. The things that were difficult while making this project was coding the shapes and coding them to make them where they are supposed to be located. This was hard because I have done very minimal coding in the past. The first thing that went wrong was that the 3D printer did not work when I was trying to print the project. When Dr. Urbano came back from the middle school trip he fixed the 3D printer. Then we printed out the top of the Parthenon and the base of the Parthenon separately. We did this because if we didn’t do this then while printing the top of the Parthenon it would make more base in the middle of the Parthenon and we did not want that. After printing the roof I found out that the schematics for the roof were off and too big.
for (i = [ 0 : 16 ] )
    translate([22* i, 150, 0])
    cylinder(r=5, h=76);

for (i = [ 0 : 16 ] )
    translate([22* i, 0, 0])
    cylinder(r=5, h=76);

for (i = [ 0 : 6 ] )
    rotate([0,0,90])
    translate([22* i, 0, 0])
    cylinder(r=5, h=76);

for (i = [ 0 : 6 ] )
    rotate([0,0,90])
    translate([22* i, -353, 0])
    cylinder(r=5, h=76);

translate([176,75,0])
    cube([375,170,9],true);

translate([176,75,0])
    cube([390,190,3],true);

translate([176,75,0])
    cube([380,180,6],true);


module prism(l, w, h) {
       polyhedron(points=[
               [0,0,h],           // 0    front top corner
               [0,0,0],[w,0,0],   // 1, 2 front left & right bottom corners
               [0,l,h],           // 3    back top corner
               [0,l,0],[w,l,0]    // 4, 5 back left & right bottom corners
       ], faces=[ // points for all faces must be ordered clockwise when looking in
               [0,2,1],    // top face
               [3,4,5],    // base face
               [0,1,4,3],  // h face
               [1,2,5,4],  // w face
               [0,3,5,2],  // hypotenuse face
       ]);
}
translate([-8,76,76])
rotate([0,0,630])
prism(370, 86, 30);

translate([362,76,76])
rotate([0,0,90])
prism(370, 85, 30);

module prism(l, w, h) {
       polyhedron(points=[
               [0,0,h],           // 0    front top corner
               [0,0,0],[w,0,0],   // 1, 2 front left & right bottom corners
               [0,l,h],           // 3    back top corner
               [0,l,0],[w,l,0]    // 4, 5 back left & right bottom corners
       ], faces=[ // points for all faces must be ordered clockwise when looking in
               [0,2,1],    // top face
               [3,4,5],    // base face
               [0,1,4,3],  // h face
               [1,2,5,4],  // w face
               [0,3,5,2],  // hypotenuse face
       ]);
}

/*module prism(l, w, h) {
        polyhedron(points=[
                [0,0,h],
                [0,0,0],[w,0,0],
                [0,1,h],
                [0,1,0],[w,1,0]
   ], faces=[
        [0,2,1],
        [3,4,5],
        [0,1,4,3],
        [1,2,5,4],
        [0,3,5,2],
    ]);
}
prism(3, 25, 180)*/
/*module triangular_prism(b,d,h,ht,sc)
{
    linear_extrude(height=ht,scale = sc)
    polygon(points = [[0,0], [b,0],[d,h]]);
}
triangular_prism(3,3,3,1,100);

*/
Recent Comments